
Appetizers
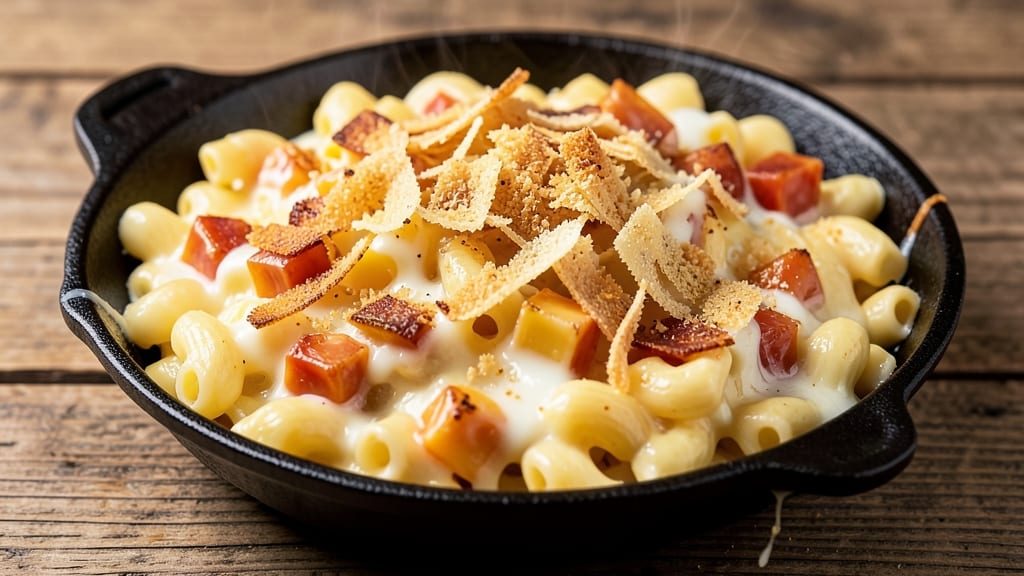
This 54th Street Mac and Cheese recipe delivers the kind of triple-creamed, bistro-style bites that turn appetizers into a full meal experience. The secret lies in a velvety cheese sauce made with heavy cream, Gruyère, and sharp cheddar, all baked until bubbling and topped with golden, buttery breadcrumbs.
I developed this version after perfecting the technique for crispy edges and perfectly creamy centers—no lumps, no separation, just restaurant-quality texture in every bite.
The magic happens in the sauce, where a proper roux (butter and flour cooked together) creates a stable base that holds the cheese without breaking. Adding a splash of cream cheese at the end ensures that signature rich, velvety consistency, while the breadcrumb topping adds a satisfying crunch.
This isn’t just mac and cheese—it’s a decadent, shareable dish that works as an appetizer, side, or even a main course for a cozy night in.
By the time it emerges from the oven, you’ll have golden, bubbling bites with a crispy exterior and a sauce so creamy it coats every noodle. The flavor is a perfect balance of sharp cheddar, nutty Gruyère, and a touch of smoky bacon (optional but recommended), making it irresistible.
Serve with a simple arugula salad or roasted vegetables to round out the meal—this mac and cheese is hearty enough to stand on its own.
What sets this recipe apart is the foolproof technique that ensures the sauce stays smooth and the breadcrumbs stay crispy, even when reheated. Whether you're hosting a dinner party or just craving comfort food, this version delivers restaurant-quality results with minimal effort.
Ready to make the most indulgent mac and cheese you’ve ever tasted?
Ingredients for 54th street mac and cheese
Gather these premium ingredients for triple-creamed mac and cheese with bistro-style perfection.
| Ingredient | Amount | Notes |
|---|---|---|
| Elbow Macaroni 🍝 | 12 oz | Dry, high-quality pasta preferred |
| Unsalted Butter 🧈 | ¾ cup | Cold, cut into small cubes |
| All-Purpose Flour 🌾 | ½ cup | Sifted for smooth sauce |
| Heavy Cream 🥛 | 1 ½ cups | Full-fat for richness |
| Gruyère Cheese 🧀 | 1 ½ cups | Freshly grated, aged |
| Sharp White Cheddar 🧀 | 1 ½ cups | Freshly grated, sharp flavor |
| Cream Cheese 🧈 | 4 oz | Full-fat for velvety texture |
| Parmesan Cheese 🧀 | ½ cup | Freshly grated, for depth |
| Panko Breadcrumbs 🍞 | ¾ cup | For crispy topping |
| Smoked Bacon 🥓 | 4 oz | Crumbled, optional but recommended |
| Diamond Crystal Kosher Salt 🧂 | 1 ½ tsp | Adjust to taste |
| Freshly Ground Black Pepper 🌶️ | ½ tsp | Freshly cracked |
| Nutmeg 🌿 | ¼ tsp | Freshly grated |
| Extra-Virgin Olive Oil 🫒 | 2 tbsp | For drizzling |
The cheese selection is non-negotiable for this recipe. Gruyère from a specialty cheese shop (like Di Bruno Bros) delivers the nutty depth you want, while sharp white cheddar from Cabot ensures that tangy punch. Freshly grating all cheeses yourself—no pre-shredded—eliminates clumping and maximizes flavor. For the pasta, De Cecco or Barilla elbow macaroni cooks perfectly every time. The Panko breadcrumbs should be Japanese-style for maximum crispiness, and Costco sells them in bulk at a great price. Bacon lovers can use Applewood-smoked for extra complexity, but it's truly optional.
No Gruyère? Comté or Emmental will work in a pinch, though the flavor profile shifts slightly. Substituting cream cheese with mascarpone at equal weight gives a similar richness, but texture may vary. For a dairy-free twist, vegan cheddar and cashew cream can mimic the velvety consistency (though it won't be identical). The nutmeg is essential—skip it at your own risk, but if you're out, a pinch of cinnamon adds warmth without the same depth. Freshly grinding the black pepper right before baking ensures maximum flavor impact. For the roux, European-style butter (like Plugrá) has higher fat content, which helps create a smoother sauce.
Cheese sauce reheats beautifully—simply cover with foil and warm in a 350°F oven for 10-15 minutes. Store leftovers in an airtight container for up to 5 days, though the texture may soften slightly. For freezing, portion into single servings before baking—this ensures each bite reheats perfectly. The breadcrumb topping stays crispy for 3 days when stored properly, so make extra if you're planning to serve it as an appetizer. For presentation, drizzle with extra-virgin olive oil and a sprinkle of freshly cracked black pepper right before serving.
Why You'll Love This Recipe
- Pantry Magic: I swear by this recipe because it uses stuff I always have: butter, flour, heavy cream, and that one block of Gruyère I bought on sale. No fancy ingredients, no last-minute grocery runs—just pull what’s there and go.
- Gruyère Glamour: That nutty, melty Gruyère makes this mac stand out. It’s not your basic cheddar—this version has depth, with a crispy top layer that turns into a cheesy blanket when you cut in. Honestly, I’ll skip dinner just to eat the leftovers cold.
- Weeknight Workhorse: Between us, this is my go-to for game nights, lazy Sundays, or when I’m too tired to think. Toss in some roasted broccoli for dinner parties, or serve it as-is when I’m too wiped to do anything else. It never lets me down.
- Leftovers That Lie: I make a big batch because the second day is even better—the sauce thickens just enough to cling to the noodles. My kids think I’m sneaky for serving it twice, but they’re always the first to ask for seconds. (Yes, even on a Tuesday night.)
Step-by-step instructions for triple-creamed bistro bites
This method delivers restaurant-quality mac and cheese with a velvety sauce and crispy bacon-topped bites.
Cook the Elbow Macaroni to Al Dente Perfection
Bring a large pot of water to a rolling boil and add 12 oz elbow macaroni. Season generously with 1 tsp diamond crystal kosher salt—the water should taste like the sea. Cook until 1 minute before the package directions specify for al dente texture. This ensures the pasta finishes cooking in the oven without becoming mushy.
Drain the pasta in a colander, then immediately return it to the pot. Reserve 1 cup of pasta water—this starchy liquid is essential for creating a silky sauce. Toss the pasta with 2 tbsp extra-virgin olive oil to prevent sticking and coat evenly. The oil also helps distribute the cheese mixture later for maximum flavor adhesion.
Prepare the Triple-Creamed Cheese Sauce
In a large, heavy-bottomed saucepan, melt 0.75 cup unsalted butter over medium heat until it foams. Whisk in 0.5 cup all-purpose flour and cook for 2 minutes until the mixture forms a smooth, pale roux. This step is critical—if the roux darkens, it will impart a bitter flavor to your sauce.
Gradually whisk in 1.5 cups heavy cream, ensuring no lumps form. Stir constantly for 5 minutes until the sauce thickens enough to coat the back of a spoon. Remove from heat and stir in 1.5 cups gruyère cheese, 1.5 cups sharp white cheddar, 4 oz cream cheese, and 0.5 cup parmesan cheese until completely melted and smooth. Season with 0.5 tsp freshly ground black pepper and 0.25 tsp nutmeg. The sauce should be rich, velvety, and just shy of being too thick—add 2-3 tbsp reserved pasta water if needed.
Combine Pasta and Sauce for Maximum Flavor
Transfer the cooked elbow macaroni to a large mixing bowl. Pour the cheese sauce over the pasta and gently fold until every strand is evenly coated. The heat from the pasta will help melt any remaining cheese clumps. If the mixture seems too thick, add 2-3 tbsp reserved pasta water to achieve a creamy yet spoonable consistency. Here's the thing—don't rush this step. Let the pasta sit in the sauce for 5 minutes to absorb all the flavor and become perfectly tender.
While the pasta absorbs the sauce, prepare the topping. In a small bowl, combine 0.75 cup panko breadcrumbs, 4 oz crumbled smoked bacon, 0.5 tsp diamond crystal kosher salt, and 0.25 tsp freshly ground black pepper. Mix well to distribute the seasoning evenly. This topping will add a delightful crunch contrast to the creamy mac and cheese.
Assemble and Bake for Bistro-Style Perfection
Preheat your oven to 375°F. Grease a 9x9-inch baking dish with a little extra-virgin olive oil to prevent sticking. Transfer the mac and cheese mixture to the baking dish and spread it evenly. Sprinkle the panko-bacon topping evenly over the surface, pressing down gently to ensure it adheres. Bake for 20-25 minutes until the edges are golden brown and the topping is crispy.
Real talk: Your oven might run hot, so start checking at the 20-minute mark. The mac and cheese is done when the top is deep golden brown and the edges are slightly pulled away from the baking dish. If the topping browns too quickly, tent the dish with aluminum foil for the last 5 minutes of baking to prevent over-browning.
Rest and Serve with Confidence
Remove the baking dish from the oven and let it rest for 10 minutes before serving. This resting period allows the mac and cheese to set slightly, making it easier to portion and serve. The internal temperature will rise a few degrees during this time, ensuring everything is perfectly heated through.
Serve the mac and cheese in individual portions, ensuring each bite includes a mix of creamy pasta and crispy bacon-topped bits. The contrast of textures and temperatures—creamy, warm pasta with crispy, cool topping—is what makes this dish truly special. Pair with a simple arugula salad or crusty bread to complete your bistro-style meal.
Pro Tips For Making 54th Street Mac And Cheese
- CRANK THE HEAT FOR THE ROUX: That flour-butter roux is where the magic happens, but too many people treat it like a nap. Start with a dry pan and melt the butter over medium-high heat—you want it bubbling in under 2 minutes. After adding the flour, keep it moving and don’t let it brown, or you’ll end up with a bitter, off-flavor base. I learned this the hard way after one batch tasted like a campfire.
- GRATE THE GRUYÈRE FRESH: Pre-shredded cheese is convenient, but it’s also coated with anti-caking agents that make your mac and cheese grainy and watery. Grab a box of Gruyère, grate it yourself (a microplane works best), and do it right before tossing it into the sauce. The cheese will melt smoother, stick better, and give you that perfect, velvety texture the 54th Street version is known for.
- SALVAGE THE PASTA WATER: Drain the pasta, but don’t rinse it—that water is starch gold. Reserve at least ½ cup of it and stir it into the finished sauce. It’ll help the cheese cling to the noodles and make the whole dish creamier. I used to skip this, and my mac and cheese always felt dry and clumpy. Now? It’s the difference between "good" and "restaurant-quality."
- STIR IN THE CREAM LATE: Heavy cream is delicate, and adding it too early can turn your roux into a sad, lumpy mess. Wait until the cheese is fully melted and the sauce is thickened before whisking in the cream. Then, let it simmer for just 1-2 minutes—longer, and it’ll curdle. Sounds weird, but it works: the sauce stays rich, the texture stays smooth, and you avoid that dreaded "cooked milk" taste.
Troubleshooting perfect results
Sauce Too Thick?
If your cheese sauce seems too thick after combining with pasta, don’t panic—this is easily fixed. Add 1-2 tablespoons of reserved pasta water at a time while stirring gently. The starchy water acts like a natural emulsifier, thinning the sauce without breaking its creamy texture.
I’ve found that 3-4 tablespoons total usually does the trick, but taste as you go to avoid over-diluting. 🥄
Grainy or Lumpy Texture
Lumps in your mac and cheese usually mean the cheese wasn’t melted smoothly. To prevent this, whisk the cheese sauce vigorously over low heat for 2-3 minutes after removing it from the stovetop. For extra insurance, strain the sauce through a fine-mesh sieve before folding it into the pasta.
If lumps still appear, add a splash of warm heavy cream and whisk again—this helps dissolve any stubborn clumps.
Topping Not Crispy
A soggy topping ruins the whole dish, so timing is everything. Bake the mac and cheese until the edges are golden, then broil for 1-2 minutes on high heat to crisp the breadcrumbs. For extra crunch, spread the panko-bacon mixture evenly and press it down firmly before baking.
If your oven runs hot, tent the dish with foil for the last 5 minutes to prevent over-browning while keeping the topping crisp.
Cheese Separating After Baking
This happens when the sauce cools too quickly or the cheese wasn’t fully incorporated. To fix it, gently reheat the mac and cheese in a 350°F oven for 10 minutes, covered with foil.
Stir in 1 tablespoon of heavy cream or a splash of pasta water to re-emulsify the sauce. For prevention, always melt the cheese slowly over low heat and stir constantly—never let it sit idle while melting.
Pasta Too Soft After Baking
Overcooking pasta before baking is the usual culprit. Next time, cook it 1 minute less than package instructions and finish it in the oven. If your pasta turns mushy, drain it immediately after cooking and toss it with 2 tablespoons of olive oil to create a barrier between the strands.
This helps maintain texture even after baking. For extra insurance, bake at 375°F instead of higher heat to prevent overcooking.
Bacon Too Salty
Store-bought bacon can be surprisingly salty, which throws off the balance of your dish. To fix it, rinse the crumbled bacon under cold water and pat it dry before mixing it into the panko topping.
For a milder flavor, use high-quality smoked bacon (like Applewood) and reduce the added salt to 0.25 teaspoon instead of the full 0.5 teaspoon. Taste the bacon mixture before topping the mac and cheese to adjust seasoning.
Nutrition facts
Frequently asked questions about 54th Street-style mac and cheese
Can I make this mac and cheese in a slow cooker?
For a slow cooker version, combine all ingredients (except topping) in your slow cooker and cook on low for 2-3 hours, stirring occasionally to prevent sticking. Add the breadcrumb topping during the last 15 minutes of cooking on high heat to crisp it up. The texture will be slightly different but still delicious—just expect a creamier consistency.
What's the secret to getting the perfect creamy texture?
The key is in the sauce: always use a pale roux (never browned) and melt the cheese slowly over low heat while whisking constantly. Adding reserved pasta water (1 tbsp at a time) keeps the sauce silky, and the cream cheese at the end ensures that velvety finish. Never rush the melting process—patience prevents lumps!
How do I make this mac and cheese ahead of time?
Assemble the dish up to 24 hours ahead and refrigerate uncovered (so the topping doesn't get soggy). Bake straight from the fridge at 375°F for 30-35 minutes, tented with foil for the first 20 minutes to prevent over-browning. The texture will be slightly firmer but still creamy when reheated. For freezing, bake first, then portion and freeze for up to 3 months—reheat covered at 350°F for 15 minutes.
Can I make this dish vegetarian?
Yes! Simply omit the bacon and use vegan cheddar and Gruyère substitutes (like cashew-based cheeses). For extra richness, stir in 2 tbsp nutritional yeast when making the sauce—it adds a cheesy depth. The texture will be slightly different but still incredibly satisfying. You can also add roasted mushrooms or caramelized onions for extra flavor.
Why does my mac and cheese get watery after baking?
This usually happens when the pasta releases too much starch during baking. To fix it, make sure your pasta is al dente before mixing with sauce, and don't overfill your baking dish. For prevention, spread the mac and cheese in a single even layer and bake at 375°F (not higher) to avoid overcooking. If it still gets watery, bake uncovered for 5-10 minutes at the end to evaporate excess moisture.