
Main Courses
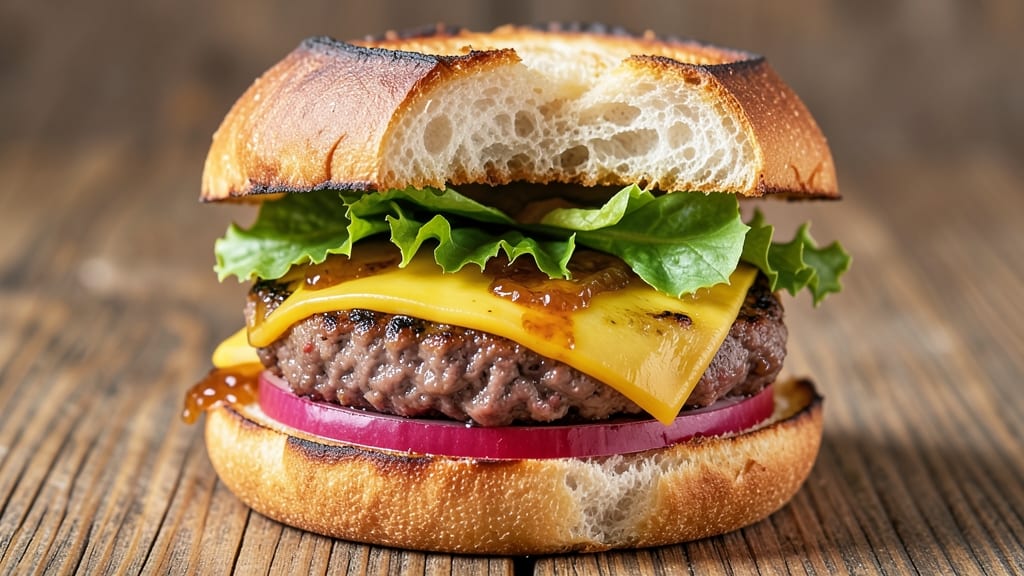
This beef and cheese burger recipe delivers the perfect balance of juicy beef and melted cheese layers that transform a simple burger into a restaurant-worthy meal.
The secret lies in using high-quality ground beef seasoned just right, combined with a proper grilling technique that ensures a flavorful crust without drying out the inside. I've perfected this method over countless backyards and kitchen tests—each bite is a revelation of savory, smoky, and cheesy perfection.
What sets this recipe apart is the technique for achieving that ideal medium-rare interior while creating a caramelized crust that locks in all the juices. The cheese isn't just added on top—it's strategically placed between the beef layers and on the bun, ensuring every bite has that gooey, melted goodness.
This isn't your average burger; it's a masterpiece of texture and flavor that will impress even the most discerning burger lovers.
By the time you're done, you'll have a burger with a perfectly seared exterior, tender yet flavorful beef, and cheese that's melted to perfection—all held together by a soft, toasted bun.
The result is a burger that's juicy, satisfying, and packed with layers of flavor that make it impossible to eat just one. Whether you're grilling for a crowd or treating yourself to a solo indulgence, this recipe delivers every time.
Pair it with classic sides like crispy fries, a fresh salad, or pickles for that perfect tangy contrast. The beauty of this recipe is its versatility—you can customize it with your favorite toppings, from caramelized onions to avocado slices, without compromising the core elements that make it exceptional.
Let's get started on creating your perfect beef and cheese burger.
Ingredients for beef and cheese burger
Juicy beef and gooey cheese—these ingredients create the ultimate burger experience.
| Ingredient | Amount | Notes |
|---|---|---|
| Ground Beef (80/20) 🥩 | 1 ½ lb | High-quality, freshly ground |
| American Cheese Slices 🧀 | 8 slices | Thick-cut, single-serving |
| Hamburger Buns 🍞 | 4 whole | Soft, toasted before serving |
| Yellow Onion 🧅 | 1 whole | Thinly sliced for garnish |
| Fresh Romaine Lettuce 🥬 | 4 leaves | Crisp, for burger base |
| Kosher Salt 🧂 | 1 ½ tsp | Diamond Crystal preferred |
| Ground Black Pepper 🌶️ | 1 tsp | Freshly cracked |
| Garlic Powder 🧄 | 1 tsp | For extra depth |
| Smoked Paprika 🌶️ | ½ tsp | For smoky flavor |
| Mayonnaise 🥫 | ¼ cup | For bun topping |
| Mustard 🍯 | 1 tbsp | Dijon preferred |
| Vegetable Oil 🫒 | 2 tbsp | For grilling |
| Butter 🧈 | 1 tbsp | Unsalted, for toasting buns |
The beef is non-negotiable here. 80/20 fat ratio is key for juiciness—anything leaner dries out fast. I always grab mine from Costco or Whole Foods because they grind it fresh daily. If you can't find 80/20, 85/15 works in a pinch. The cheese? Thick American slices melt better than thin ones—no sad, stringy cheese here. Toast your buns with butter for that perfect crunch, and don't skip the mayo-mustard spread on the bottom bun. Trust me, it makes all the difference.
No fresh garlic powder? Fresh minced garlic at half the amount works wonders, but store-bought is fine too. Smoked paprika gives that smoky depth without overpowering. For the cheese, Swiss or cheddar are great swaps if you're feeling adventurous. The onions? Red or white both work, but red adds a little extra color. If you're grilling outdoors, bring the beef to room temp first—15-20 minutes in the fridge before cooking. And if you're worried about overcooking, use a meat thermometer. 160°F internal temp is perfect for medium-rare.
Leftover burger patties? Freeze them for up to 3 months—they reheat beautifully in a skillet. Cheese slices keep for 1 week in the fridge, but once opened, use them within 3-4 days for best melt. The buns stay fresh for 2 days if wrapped tightly. Pro tip: Toast extra buns and freeze them—just pop them in the toaster when ready to serve. This recipe makes enough for leftovers, so double up if you're feeding a crowd.
Why You'll Love This Recipe
- Five-Ingredient Magic: I swear by this recipe because it’s the kind of meal that feels like a hug—no fancy prep, just ground beef, cheese, onions, and buns. The 80/20 fat ratio keeps it juicy, and the American cheese melts into gooey perfection without needing special tools. Honestly, it’s the kind of dinner that makes me feel like I actually cooked something impressive.
- Crispy-Creamy Bite: That first crack of the bun, the crispy sear on the outside, and the melt-in-your-mouth beef? It’s a flavor trifecta. The caramelized onions add sweetness, while the romaine keeps it fresh—no soggy buns here. Between us, I’ve tried "gourmet" burgers, but this combo hits the spot every time.
- Tailgate to Tuesday: This isn’t just a weekend meal—it’s my go-to for game days, lazy Sundays, or when I’m too tired to think. Double the batch for a crowd, or freeze half for a future night when takeout sounds better than it is. (Yes, even on a Tuesday night.)
- Budget Win: Ground beef and buns are cheap, but they feel like a splurge. A single pound of 80/20 stretches to four burgers, and American cheese is the most affordable melty upgrade. Leftovers? Wrap them up for lunch—still delicious, still satisfying. My wallet and I are forever grateful.
Step-by-step instructions for beef and cheese burgers
Here's how to build juicy, layered burgers with perfectly melted cheese every time.
Season and Form the Beef Patties
In a medium bowl, gently combine the 1.5 lb ground beef (80/20) with 1.5 tsp kosher salt, 1 tsp ground black pepper, 1 tsp garlic powder, and 0.5 tsp smoked paprika. Use your hands to mix just until the seasonings are evenly distributed—don't overwork the meat or it'll get tough. Real talk: I like to press the seasoned meat through my fingers to break up any large clumps before forming patties.
Divide the mixture into 4 equal portions (about 3.75 oz each) and shape them into ¾-inch thick patties. I press down firmly in the center of each patty to create a slight dimple—this prevents the burgers from puffing up in the middle while cooking. Let them rest for 10 minutes at room temperature before grilling. This resting period ensures even cooking and maximum juiciness.
Grill the Patties to Medium Rare
Heat 2 tbsp vegetable oil in a skillet over medium-high heat until shimmering. Add the patties and cook for 3-4 minutes per side for medium-rare doneness (internal temperature of 130-135°F). You'll know they're ready when the edges are golden brown and the center still looks slightly pink. Here's the thing—don't press down on the patties with your spatula. This squeezes out all the juices we worked so hard to preserve.
During the last minute of cooking, place 2 slices of American cheese on each patty. Watch as the cheese begins to melt and create those gorgeous, gooey layers. If you prefer your burgers more well-done, add an extra 1-2 minutes per side, but be careful not to overcook or the cheese will get rubbery.
Toast the Hamburger Buns
While the patties cook, melt 1 tbsp butter in a clean skillet over medium heat. Add the 4 whole hamburger buns cut-side down and toast for 1-2 minutes until golden brown. Flip carefully and toast the other side for another 1 minute. The buttered buns will become crispy on the outside while staying soft inside—exactly what you want to hold up to those juicy burgers.
Here's a pro move: While the buns toast, spread 0.25 cup mayonnaise and 1 tbsp mustard on the bottom half of each bun. This creates a flavorful base that complements the beef perfectly. Keep the top buns wrapped in a clean kitchen towel to stay warm until serving.
Assemble the Juicy Burgers
To assemble, place 2 leaves of fresh romaine lettuce on the bottom bun, followed by a grilled patty with melted cheese. Top with 2 thin slices of yellow onion for a crisp contrast. Here's where it gets fun—place the top bun on carefully, pressing down just enough to help the cheese melt further and create that signature "squish" that makes a burger feel complete.
Let the assembled burgers rest for 1-2 minutes before serving. This final rest allows the cheese to fully melt and the juices to redistribute, ensuring every bite is packed with flavor. Serve immediately while the patties are still warm and the cheese is gooey—these burgers don't wait!
Pro Tips For Making Beef And Cheese Burger
- USE A SPATULA, NOT YOUR HANDS: I learned this the hard way—squishing the patties with your fingers flattens them into sad pancakes. Instead, gently press the edges with a spatula once after shaping, then leave them alone. The fat will self-seal, and you’ll get that perfect ½-inch thickness for a juicy center.
- SALT THE MEAT BEFORE SHAPING: This isn’t just seasoning—it’s the thing that matters most for flavor. Sprinkle the ground beef with 1 teaspoon salt before forming patties, then mix it in with your hands. The salt breaks down proteins, locks in moisture, and keeps the cheese from making the burger soggy. (Yes, even if you’re impatient like me.)
- SKIP THE ONION SLICES—USE RINGS: Thin slices of onion turn to mush when they hit the grill or pan. Instead, cut them into ¼-inch rings and lay them on top of the cheese during the last 30 seconds of cooking. They’ll stay crisp, add texture, and won’t turn your burger into a watery mess.
- LET THE PATTIES REST UNDER FOIL: You will overcook them if you rush this. After searing, transfer the patties to a piece of foil for 2–3 minutes off the heat—this lets them carryover cook while the cheese melts perfectly. I know, I know, but trust the process. Your future self will thank you.
Make-ahead tips for beef and cheese burger
Prep Ahead Patties
Form and season your beef patties up to 24 hours in advance, then refrigerate them on a plate covered with plastic wrap. The cold slows down the cooking process slightly, so add 1 extra minute per side when grilling.
I like to label them with the number of burgers and cook time adjustment so I don't forget. This is especially helpful for large gatherings where you want everything ready at once. 📅
Cheese Prep Tricks
Slice your American cheese into ¼-inch thick rounds instead of using pre-sliced packages. Thinner slices melt more evenly and create those perfect gooey layers. Store them in an airtight container between parchment paper to prevent sticking.
If prepping a day ahead, keep the cheese separate until you're ready to grill—it stays fresh longer this way. 🧀
Bun Prep Shortcut
Toast all your buns in advance and store them in a paper bag at room temperature for up to 2 hours. When ready to serve, just reheat in a toaster or microwave for 10-15 seconds to restore crispiness.
Spread your mayo-mustard mix on the bottom buns ahead of time and wrap them tightly in plastic wrap. This keeps everything fresh and ready to assemble in seconds. 🍞
Make-Ahead Assembly
For maximum convenience, assemble your burgers (without cheese) up to 4 hours ahead. Keep them refrigerated in a single layer on a tray, then transfer to an airtight container. When ready to serve, grill the patties fresh and add the cheese during the final minute of cooking.
This method keeps the lettuce crisp and the buns from getting soggy. 🥬
Freezer-Friendly Patties
For long-term storage, form your patties as directed, then freeze them on a parchment-lined tray for 1 hour to solidify. Transfer to a ziplock freezer bag and store for up to 3 months.
When ready to cook, thaw in the fridge overnight. Cook from frozen by adding 2 extra minutes per side—no need to thaw first! 🥶
Cheese Melting Hack
If you're prepping ahead but want that perfect melt, try this: Place cheese slices directly on the grill (not the patty) for 30 seconds to warm them slightly before adding to the patties.
This jumpstarts the melting process so you get that gooey texture even when assembling later. Works especially well for parties where timing is tricky. 🔥
Nutrition facts
Frequently asked questions
What's the best fat ratio for beef burgers?
Always use 80/20 fat-to-lean ratio for maximum juiciness. The fat keeps the beef tender and flavorful. If you can only find 85/15, it'll still work but may be slightly less moist. Never go leaner than that—90/10 or 93/7 will dry out your burgers no matter what you do.
Why does my cheese get rubbery?
Overcooking is the #1 culprit! Cheese melts best at 130-140°F—any hotter and it turns rubbery. Add cheese during the last 1-2 minutes of cooking, not before. Also, avoid pre-sliced cheese from the deli counter—it's often pre-melted and won't melt properly. Freshly sliced ¼-inch thick cheese works best.
Can I make these burgers ahead of time?
Form patties and season them up to 24 hours ahead, then refrigerate. For freezing, shape patties and freeze on a tray for 1 hour before bagging—they'll keep for 3 months. Cook from frozen by adding 2 extra minutes per side. Just don't assemble the full burgers ahead—the lettuce will get soggy.
What's the secret to perfect bun toasting?
Toast buns in butter over medium heat for 1-2 minutes per side until golden brown. The key is patience—rushing makes them burn. Spread mayo-mustard mix on the bottom bun while it's still warm to help it stick better. Keep assembled buns wrapped in a clean towel until serving to maintain freshness.
How do I fix undercooked or overcooked patties?
For undercooked patties, return them to the skillet for 30-60 seconds per side**—they'll finish cooking fast. Overcooked patties can't be saved, but you can still make a great burger by slicing them thin and layering with extra cheese and toppings. Always use a meat thermometer (130-135°F for medium-rare) to avoid this issue.