
Appetizers
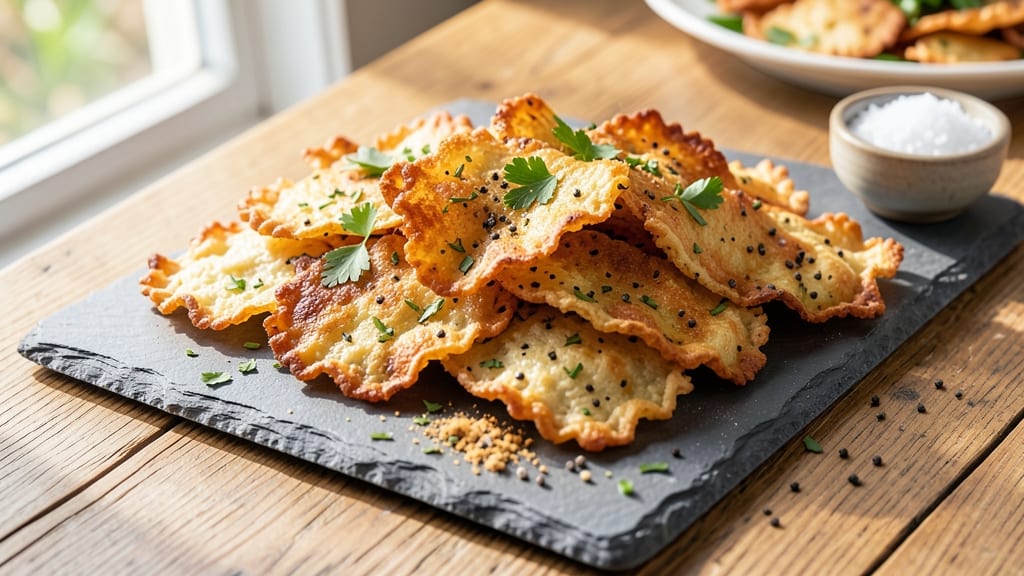
This baked cottage cheese crisps recipe transforms humble cottage cheese into addictively crispy, golden bites that disappear faster than you can say "second helping."
The secret lies in blending cottage cheese with a touch of flour and baking it at high heat for just 10 minutes, creating a texture that's crispy outside and tender inside—like a cheese cracker you never knew you needed.
What sets these crisps apart is their simplicity: just three ingredients and no fancy equipment required. The key to perfect crispiness is spreading the mixture thinly on a baking sheet and baking at 425°F until edges turn golden brown.
They're naturally gluten-free, vegetarian, and packed with protein—ideal for snacking, game day, or pairing with dips like ranch or hummus.
The result is a batch of crispy cheese bites that are savory, slightly tangy, and irresistibly crunchy. You can customize them with herbs, spices, or even a sprinkle of everything bagel seasoning before baking.
These crisps stay crispy for hours when stored in an airtight container, making them perfect for meal prep or gifting.
Whether you're looking for a healthy snack alternative or a crowd-pleasing appetizer, these cottage cheese crisps deliver big flavor with minimal effort. Let's get started on creating your own batch of these satisfying, cheesy bites!
Ingredients for baked cottage cheese crisps
Three core ingredients plus a few secret seasonings—simple but transformative.
| Ingredient | Amount | Notes |
|---|---|---|
| Large-Curd Cottage Cheese 🧀 | 16 oz | Full-fat for best crispiness |
| All-Purpose Flour 🌾 | ¼ cup | Gluten-free flour for GF option |
| Garlic Powder 🧄 | 1 tsp | Freshly ground preferred |
| Dried Parsley Flakes 🌿 | 1 tsp | Fresh parsley for brighter flavor |
| Salt 🧂 | ½ tsp | Diamond Crystal preferred |
| Black Pepper 🌶️ | ¼ tsp | Freshly cracked for heat |
| Olive Oil 🫒 | 1 tbsp | For greasing baking sheet |
The cottage cheese makes all the difference here. Full-fat works best—it crisps up beautifully, while low-fat can turn gummy. Trader Joe's or Whole Foods carry excellent large-curd options, but any good-quality brand will do. Look for cottage cheese with minimal additives—just milk and cultures. The flour acts as a binder, so King Arthur or Bob's Red Mill are reliable choices. If you're gluten-free, swap for almond flour or a gluten-free blend, but expect slightly less crispiness.
No garlic powder? Fresh minced garlic at double the amount works perfectly. The parsley flakes can be skipped if you're out, but fresh parsley adds a bright pop. Everything bagel seasoning is my favorite upgrade—just sprinkle it on top before baking. For extra crunch, add crushed potato chips or panko to the mix. The olive oil isn't just for greasing—drizzle a little on top before baking for extra golden color. And if you're feeling fancy, a pinch of smoked paprika adds depth.
These crisps stay crispy for 2-3 days in an airtight container, but they're best enjoyed fresh. For longer storage, freeze them on a tray first, then transfer to a bag—they'll keep for up to 3 months. Reheat in the oven at 350°F for 3-5 minutes to restore crispiness. I like to portion them into small containers for easy snacking, or gift them in cute jars for holidays. They're naturally vegetarian, gluten-free, and packed with protein—perfect for meal prep.
Why You'll Love This Recipe
- No-Fuss Assembly: I swear, this takes less effort than microwaving leftovers. Just mix cottage cheese with flour, sprinkle garlic and parsley, spread on a tray—no rolling, no fuss. The kids can even "help" press the mixture flat (it’s basically edible playdough).
- Umami Crunch Magic: That crispy edge with the creamy, tangy center? It’s like a cheesy, herby hug in every bite. The garlic powder gives it a savory punch, while the parsley keeps it bright—no weird aftertaste, just pure satisfaction.
- Snack Attack Ready: Honestly, these disappear faster than my willpower at 3 PM. Perfect for game day, movie nights, or when you’re craving something salty but don’t want chips. (Yes, even on a Tuesday night.)
- Pantry Staple Hack: Large-curd cottage cheese is cheap, and you’ll use it all up—no sad, watery leftovers. A single batch stretches for days, and the flour keeps it sturdy. My secret weapon for when I forget to buy chips but still need crunch.
Step-by-step instructions for crispy cottage cheese bites
Transform creamy cottage cheese into golden, shatteringly crisp bites with this foolproof method.
Preheat and Prepare Your Baking Surface
Preheat your oven to 425°F—this high temperature is crucial for achieving that perfect crispy texture. While the oven heats, line a rimmed baking sheet with parchment paper for easy cleanup. Lightly brush the parchment with 1 tablespoon olive oil (the amount specified in your ingredients) and spread it evenly with your fingers. This creates a nonstick surface while adding subtle flavor.
Here's the thing—using full-fat cottage cheese makes all the difference. The higher fat content creates those beautiful crispy edges while keeping the interior tender. If you're using low-fat, expect less crispiness, though they'll still be delicious. The oil on the parchment also helps prevent sticking, so don't skip this step even if your cottage cheese is full-fat.
Mix and Shape the Cottage Cheese Dough
In a medium bowl, combine the 16 oz large-curd cottage cheese with 0.25 cup all-purpose flour. Using a fork or rubber spatula, gently fold everything together until just combined—you're looking for a thick, spreadable consistency, not a smooth batter. The cottage cheese should hold its shape when dropped, but still be easy to work with.
Now add the seasonings: 1 teaspoon garlic powder, 1 teaspoon dried parsley flakes, 0.5 teaspoon salt, and 0.25 teaspoon black pepper. Mix these in thoroughly, pressing the spices into the cottage cheese mixture. The parsley adds a bright, fresh note that balances the richness, while the garlic gives subtle depth. Don't worry if the mixture looks lumpy—this is normal with cottage cheese.
Form Uniform Crisps for Even Cooking
Using a small ice cream scoop or tablespoon, portion the mixture into 12 equal mounds (about 1 tablespoon each). Place them on the prepared baking sheet, spacing them about 1 inch apart to allow for expansion. Here's where precision matters: keep the portions consistent so they all cook at the same rate. You want each crisp to be about the size of a golf ball when formed.
Gently flatten each mound slightly with your fingers, pressing down just enough to create a smooth, rounded top. This helps them spread evenly in the oven rather than puffing up unevenly. The key is to work quickly but carefully—cottage cheese can be sticky, so wet your fingers slightly if needed to prevent sticking.
Bake Until Golden and Crisp
Slide the baking sheet into the preheated oven and bake for 12-15 minutes, watching closely after the first 8 minutes. You're looking for crispy edges with a slightly golden color—this indicates they're perfectly cooked through. The centers should still be soft and creamy when you press gently with your finger.
I know it's tempting to peek, but every time you open the oven door, you lose heat and extend cooking time. If you see them browning too quickly, you can rotate the pan halfway through for even cooking. When they're done, they'll have that satisfying crunch you're after, with a warm, gooey center that oozes slightly when cut.
Cool and Serve Immediately
Remove the crisps from the oven and let them cool on the baking sheet for 2-3 minutes—this brief resting period helps them set slightly and makes them easier to handle. Serve them warm for maximum crispiness, but they'll still be delicious at room temperature if you need to wait.
These crisps are best enjoyed immediately while they're at their peak texture. For extra flavor, sprinkle with additional parsley or a pinch of smoked paprika before serving. They pair perfectly with marinara sauce, hummus, or even as a savory snack on their own. Store any leftovers in an airtight container for up to 3 days, though they won't be quite as crispy when reheated.
Pro Tips For Making Baked Cottage Cheese Crisps
- Use Room-Temp Cheese: Take the cottage cheese out of the fridge 30 minutes before mixing—it blends smoother and spreads more evenly. I learned this after fighting with lumpy dough; cold cheese just won’t cooperate.
- Spread Thin, Bake Hot: Roll the dough to ⅛-inch thickness and bake at 425°F (220°C) for 12–15 minutes—thinner = crispier. I used to overthink thickness, but this gives you that perfect snap every time.
- Salt the Flour, Not Just the Cheese: Mix the salt directly into the flour before adding it to the cottage cheese. The flavor distributes better, and you won’t end up with random salty spots. (Yes, I’ve done that.)
- Rotate the Pan Mid-Bake: Swap the baking sheets halfway through for even browning—edges burn faster than centers. I skipped this once and got a tray of uneven, sad crisps. Now I set a timer to flip them.
Wine and beer pairings for this baked cottage cheese crisps
Crispy Cheese & Crisp Beer
For a refreshing contrast, pair these savory crisps with a crisp lager like Heineken or Coors Banquet. The light, clean flavors of these beers cut through the richness of the cottage cheese without overpowering it.
I love sipping a chilled Heineken while enjoying these crisps—it’s like the perfect balance of salty, tangy, and effervescent. 🍺
White Wine Pairings
A dry Sauvignon Blanc from New Zealand or a crisp Pinot Grigio from Italy works beautifully with these crisps. The bright acidity and citrus notes in these wines complement the garlic and parsley flavors while keeping the palate fresh.
I recommend a glass of Kim Crawford Sauvignon Blanc—it’s light enough to let the crisps shine but has enough body to stand up to their savory profile.
Red Wine for Bolder Flavors
If you prefer red wine, go for a light-bodied option like Pinot Noir or Beaujolais. These wines have enough fruitiness to pair well with the crispy, cheesy bites without being too heavy.
A French Beaujolais with its cherry notes adds a fun contrast to the savory crisps. Just avoid heavy, tannic reds like Cabernet Sauvignon—they’ll clash with the delicate flavors.
Non-Alcoholic Options
For a non-alcoholic pairing, try a sparkling water with lemon or a ginger beer. The effervescence helps cleanse your palate between bites, while the citrus or ginger adds a refreshing twist.
I also love pairing these crisps with sparkling apple cider—it’s festive and complements the crispy, cheesy texture perfectly. 🥤
Sweet Contrast Pairings
If you want to play with flavors, try pairing these crisps with a dry Riesling or a sparkling rosé. The slight sweetness in these wines balances the salty, tangy notes of the crisps.
A chilled La Crema Rosé is my go-to for a summery, refreshing pairing that keeps things light and enjoyable.
Nutrition facts
Frequently asked questions
Why do my cottage cheese crisps turn out gummy instead of crispy? Gummy crisps usually mean one of two things: either your oven wasn't hot enough (425°F is critical) or you used low-fat cottage cheese. The fat content helps create crispy edges, so always use full-fat. Also,
Can I make these crisps without flour?
Yes! For a gluten-free version, replace the flour with 2 tablespoons ground almond flour or 1 tablespoon crushed potato chips (for extra crunch). The texture will be slightly different but still delicious. Just expect them to be a bit more delicate—handle with care when serving!
How can I make these crisps extra flavorful?
Try these upgrades: sprinkle with everything bagel seasoning before baking, mix in 1/4 teaspoon smoked paprika, or add 1 tablespoon grated Parmesan to the dough. For a tangy kick, stir in 1/2 teaspoon lemon zest. The possibilities are endless—don't be afraid to experiment!
Can I bake these crisps in an air fryer?
Spread the mixture into small mounds on the air fryer rack (no oil needed) and cook at 375°F for 8-10 minutes, shaking halfway. The air fryer creates crispiness with less fat, so they'll be even lighter. Watch closely—they cook faster than in the oven!
How do I store these crisps so they stay crispy?
Store them in an airtight container at room temperature for up to 3 days. For longer storage, freeze them on a tray first, then transfer to a bag. To revive crispiness, reheat in the oven at 350°F for 3-5 minutes. Pro tip: Layer them with parchment paper between crisp batches to prevent sticking!