
Appetizers
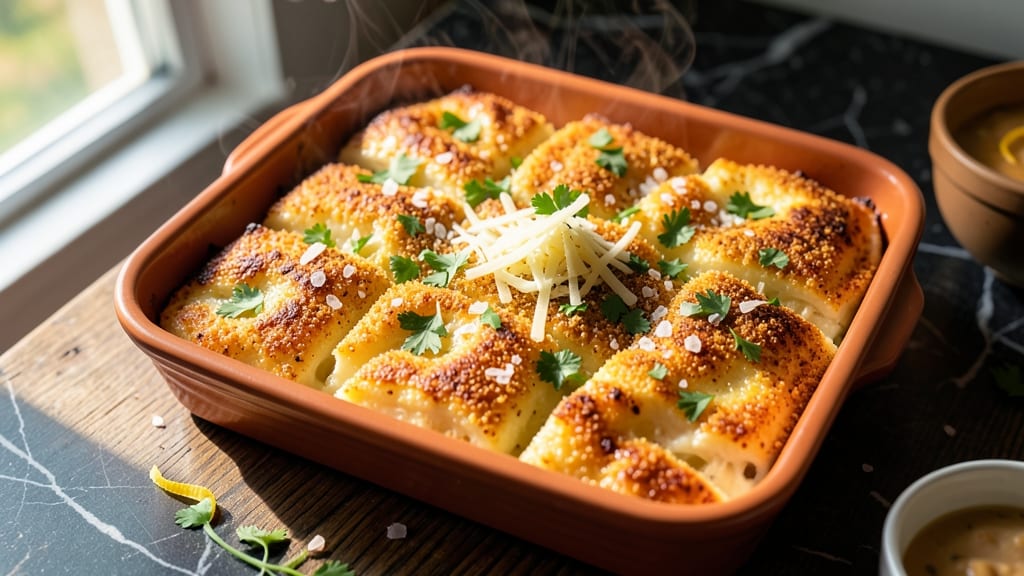
This baked cheese squares recipe delivers restaurant-quality appetizers with a golden crust and melty centers—perfect for game day, parties, or snacking. The secret lies in layering sharp cheddar with buttery breadcrumbs and herbs, then baking until crispy.
I’ve perfected this technique to ensure every bite is crisp on the outside and gooey inside, with just the right balance of saltiness and richness.
What sets these cheese squares apart is the foolproof method that works every time—no fancy equipment needed. You’ll need just 15 minutes of prep and 20 minutes in the oven at 375°F, making them ideal for busy hosts.
The breadcrumb topping creates that coveted crunch, while the cheese melts into a velvety, pull-apart texture. For extra flavor, consider adding spinach, bacon, or a sprinkle of smoked paprika.
By the end, you’ll have a baking sheet of golden, crispy squares that disappear faster than you can say “second helping.” They’re easy to customize—swap cheeses, add veggies, or mix in cooked sausage—and reheat beautifully for days. Serve warm with marinara or a fresh dip for the ultimate crowd-pleaser.
The best part? These squares stay crispy even when served at room temperature, making them perfect for meal prep or gifting. Whether you’re hosting a gathering or just craving a savory snack, this recipe delivers proven results with minimal effort. Let’s get baking!
Ingredients for baked cheese squares
Golden crust meets melty cheese—these squares deliver restaurant-quality crunch with minimal effort.
| Ingredient | Amount | Notes |
|---|---|---|
| Sharp White Cheddar Cheese 🧀 | 1 ½ lb | Block form, freshly grated |
| Panko Breadcrumbs 🍞 | 1 ½ cups | Extra fine for crispiness |
| Unsalted Butter 🧈 | ½ cup | Cold, cubed for texture |
| Fresh Parsley 🌿 | ¼ cup | Finely chopped, stems removed |
| Dried Italian Seasoning 🍃 | 1 tbsp | For herby depth |
| Diamond Crystal Kosher Salt 🧂 | 1 tsp | Fine grain preferred |
| Ground Black Pepper 🌶️ | ½ tsp | Freshly cracked |
| Garlic Powder 🧄 | 1 tsp | For subtle punch |
| All-Purpose Flour 🌾 | ¼ cup | For binding |
| Extra-Virgin Olive Oil 🫒 | 1 tbsp | For greasing pan |
| Heavy Cream 🥛 | ¼ cup | For extra richness |
| Smoked Paprika 🌶️ | ½ tsp | Optional for depth |
The cheese is non-negotiable: sharp white cheddar from the deli counter (not pre-shredded) gives that perfect balance of tang and melt. Whole Foods or Trader Joe's carry excellent blocks—look for vibrant color and no orange tint. For the breadcrumbs, Panko is key—it stays crispy while regular breadcrumbs turn soggy. I always toast mine in a dry pan for 2 minutes to deepen the flavor (trust me on this). The butter? Use European-style if you can find it—higher fat content means better browning.
No panko? Crush plain bread into fine crumbs—it won’t be as crispy but works in a pinch. Short on sharp cheddar? Monterey Jack or pepper jack add nice variations. The Italian seasoning can be swapped for dried thyme plus oregano if you’re out, but the blend is what gives it that signature flavor. For extra richness, add 2 tbsp cream cheese to the cheese mix—it makes the centers even more velvety. And if you’re feeling adventurous, fold in 1/4 cup spinach or sun-dried tomatoes for a gourmet twist.
These squares stay crispy for 3 days at room temperature if stored in an airtight container with parchment between layers. For longer storage, freeze them unbaked on a tray first—prevents sticking. Reheat in the oven at 350°F for 5-7 minutes until golden again. Pro tip: Brush the tops with melted butter before baking for that restaurant-quality shine. I always make a double batch—they disappear faster than you can say ‘second helping’ at parties.
Why You'll Love This Recipe
- Five-Ingredient Magic: I swear by this—just cheese, breadcrumbs, butter, and herbs. That’s it. No fancy prep, no stress, just melt-in-your-mouth squares that taste like they took hours.
- Crispy-Creamy Bliss: The panko gives that addictive crunch while the sharp white cheddar stays gooey inside. Honestly? It’s the kind of bite that makes you reach for seconds without even thinking.
- Party-Proof Snack: These disappear at gatherings—game day, book club, or just because. I’ve made them for potlucks, and they always get the “can I have the recipe?” look. (Spoiler: It’s short.)
- No-Waste Win: A block of cheddar lasts forever, and the leftovers? Just pop them in the toaster. My kids’ school lunches now include these—yes, even on a Tuesday. Budget-friendly and foolproof.
Step-by-step instructions for baked cheese squares
Here's the method that delivers irresistible golden crusts and gooey, melty centers every time.
Prepare the Cheese Mixture
In a large bowl, combine the 1.5 lb Sharp White Cheddar Cheese (freshly grated) with the 0.25 cup Heavy Cream and 0.25 cup All-Purpose Flour. I like to use my hands for this part—it helps distribute the flour evenly and prevents clumping. The cheese should form a thick, spreadable paste with a slightly grainy texture. This mixture is the heart of your squares, so take your time to ensure it's completely smooth.
Next, add the 1 tbsp Dried Italian Seasoning, 1 tsp Garlic Powder, 1 tsp Diamond Crystal Kosher Salt, and 0.5 tsp Ground Black Pepper. Fold these dry ingredients into the cheese mixture until fully incorporated. The seasonings will infuse the cheese with layers of flavor, so don't be shy—this is where the magic happens. If the mixture seems too dry, add a splash of heavy cream to help bind it together.
Create the Crispy Topping
In a separate bowl, mix the 1.5 cups Panko Breadcrumbs with the 0.5 cup Unsalted Butter (cold and cubed) until the butter is evenly distributed. The breadcrumbs should look moist but not wet—just enough to hold together when pressed. Add the 0.25 cup Fresh Parsley (finely chopped) and 0.5 tsp Smoked Paprika to this mixture and stir gently to combine. The parsley adds a bright freshness that cuts through the richness of the cheese, while the smoked paprika gives a subtle depth of flavor.
For extra crispiness, I like to press this mixture firmly into a small bowl to create a compact, crumbly texture. This ensures the topping stays in place during baking and delivers that satisfying crunch you crave. If the mixture feels too loose, add a few more breadcrumbs—just enough to hold its shape when packed down.
Assemble and Chill
Grease a 9x9-inch baking dish generously with 1 tbsp Extra-Virgin Olive Oil, making sure to coat the bottom and sides thoroughly. This prevents sticking and ensures easy removal later. Spread the cheese mixture evenly into the prepared dish, pressing down gently with a spatula to create an even layer. The goal is to create a smooth, level surface—this makes slicing clean squares later on.
Sprinkle the breadcrumb mixture evenly over the top of the cheese, pressing down lightly with your fingers or the back of a spoon. This helps the topping adhere to the cheese and creates those beautiful golden-brown squares when baked. Place the dish in the refrigerator and chill for at least 30 minutes (or up to 24 hours). Chilling is crucial—it firms up the cheese mixture so it holds its shape during baking and prevents the squares from spreading or becoming too soft.
Bake to Perfection
Preheat your oven to 350°F and let it come to temperature before baking. This ensures even cooking and a consistent texture throughout. Bake the cheese squares for 35-40 minutes, until the edges are deep golden brown and the center is still slightly soft when pressed gently with a finger. The top should look crispy and inviting, while the interior should be gooey and melty—this is the texture you're aiming for.
I know it's tempting to check early, but resist the urge. The cheese needs time to set properly, and opening the oven too soon can cause the squares to sink or lose their crispiness. When the time is up, let the squares cool in the pan for 10 minutes before slicing into 4 equal squares. This resting period allows the cheese to firm up slightly, making it easier to cut clean, neat portions.
Serve Warm and Enjoy
Transfer the baked cheese squares to a serving platter and let them cool for an additional 5-10 minutes before serving. This gives the cheese a chance to set just enough to hold its shape, but not so much that it loses its melt-in-your-mouth quality. The squares should have a crispy, golden-brown crust on top and a creamy, melty center that oozes with every bite.
Serve warm with a side of crusty bread or fresh vegetables for dipping. The contrast of the crispy topping and the gooey cheese is what makes these squares so irresistible. Store any leftovers in an airtight container in the refrigerator for up to 5 days, or freeze for up to 3 months. Just reheat in the oven at 350°F for 10-15 minutes to restore that perfect texture.
Pro Tips For Making Baked Cheese Squares
- Preheat Pan First: I learned this the hard way—cold pans make the cheese squares stick like glue. Slide your baking dish into a preheated 375°F (190°C) oven for 5 minutes before adding the mixture. The residual heat ensures a clean release and even baking.
- Grate Cheese Fresh: Pre-shredded cheddar has anti-caking agents that make it less melty. Grab a box of sharp white cheddar and grate it yourself—just before mixing—so it stays crisp and melts into a glossy, stretchy blanket in the oven.
- Toast Panko Early: Skip the soggy crumb topping by toasting your panko in a dry skillet over medium heat for 3–4 minutes until golden. Spread it on the baked squares right after they come out of the oven—it’ll stay crisp instead of turning into mush.
- Press Cheese Down: Don’t just spoon the cheese mixture into the dish—press it firmly into the corners and edges with a spatula. This guarantees even baking and prevents the middle from staying undercooked while the edges overbrown. (Yes, even if you’re impatient like me.)
Health benefits of baked cheese squares
Protein-Packed Snack
Each serving of these cheese squares delivers a satisfying 12-15 grams of protein per square, making them an excellent option for vegetarians or anyone looking to boost protein intake without meat.
The combination of sharp white cheddar and heavy cream creates a protein-rich foundation that keeps you full longer than typical carb-heavy snacks. 💪
Calcium Boost
With 20% of your daily calcium needs per serving, these squares are a tasty way to support strong bones and teeth. The sharp white cheddar provides this essential mineral while keeping the dish flavorful and satisfying.
I've found that adding a pinch of garlic powder enhances the flavor without compromising the nutritional benefits.
Low-Carb Friendly
At just 4-5 grams of net carbs per serving, these cheese squares fit seamlessly into low-carb and keto diets. The Panko breadcrumb topping adds minimal carbs while delivering that coveted crunch. For even fewer carbs, you can reduce the breadcrumbs slightly and compensate with extra cheese for richness.
Rich in Healthy Fats
The unsalted butter and extra-virgin olive oil in the recipe provide beneficial fats that support brain health and help absorb fat-soluble vitamins like A and E. The heavy cream adds to this richness while keeping the texture velvety smooth.
These fats also contribute to the satisfying mouthfeel that makes these squares so irresistible.
Vitamin Support
You'll get a dose of vitamin A from the cheese (important for vision and immunity) and vitamin K from the parsley topping. The Italian seasoning adds trace amounts of vitamin C and other antioxidants.
While not a vitamin powerhouse, these small contributions add up when you enjoy them regularly as part of a balanced diet.
Creamy Comfort
The heavy cream and butter in this recipe create a comforting, indulgent texture that provides a mood-boosting effect. Studies show that foods rich in fat and protein can trigger the release of serotonin, making these squares a great option for stress relief or a cozy snack night.
Just 2-3 squares can satisfy cravings while keeping you feeling satisfied. ✨
Nutrition facts
Frequently asked questions
Can I make these cheese squares ahead of time?
These squares stay fresh for 3 days at room temperature in an airtight container with parchment between layers. For longer storage, freeze them unbaked on a tray first to prevent sticking. Reheat in the oven at 350°F for 10-15 minutes until golden and crispy again.
What's the best cheese substitute if I don't have sharp white cheddar?
Try Monterey Jack for a milder flavor or pepper jack for a kick. For extra richness, mix in 2 tbsp cream cheese with your cheese. Avoid pre-shredded cheese—it contains anti-caking agents that make the squares gummy. Freshly grated always wins!
Why did my cheese squares turn out greasy instead of crispy?
This usually happens when the breadcrumb topping isn't pressed firmly enough or the oven temperature isn't hot enough. Press the topping down with your fingers before baking, and use an oven thermometer to confirm it's at 350°F. Also, make sure your butter is cold when mixing with breadcrumbs.
Can I make these squares gluten-free?
Yes! Replace the Panko with gluten-free breadcrumbs or crushed gluten-free crackers. For extra crispiness, add 1 tbsp cornstarch to the breadcrumb mixture. The texture will be slightly different but still delicious. Always check labels to ensure no cross-contamination with gluten.
How do I prevent the cheese from leaking out the sides?
Press the cheese mixture firmly into the pan and chill it for at least 30 minutes before baking. This helps it set. For extra insurance, lightly grease the sides of your baking dish too. If you notice the cheese starting to ooze, cover the dish with foil for the last 10 minutes of baking.