
Appetizers
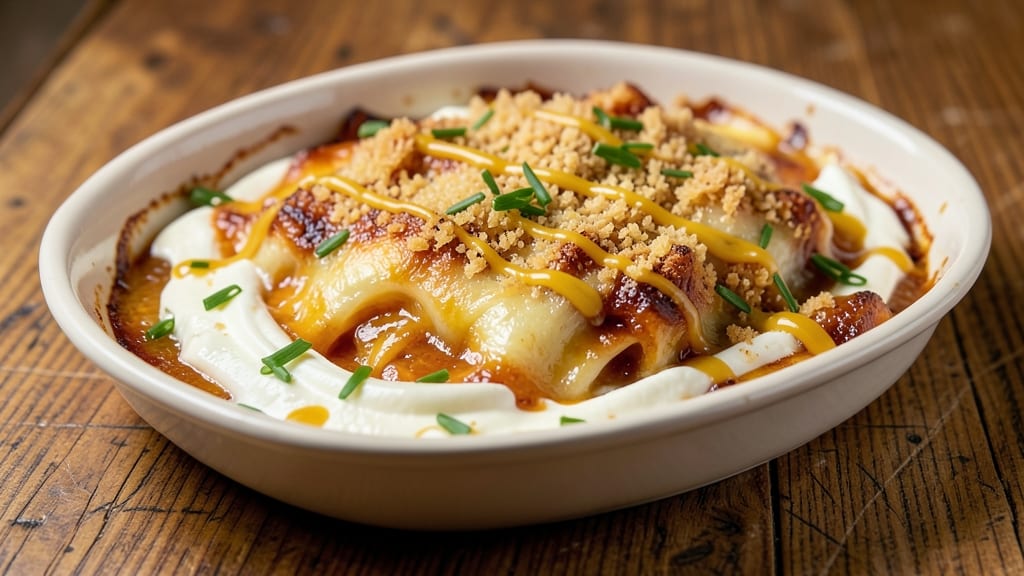
This baked cheddar cheese recipe delivers crispy golden edges and gooey rivers of melted cheese that make every bite irresistible. 🔥 The secret lies in the perfect balance of sharp cheddar, buttery breadcrumbs, and a touch of creaminess that transforms simple ingredients into something restaurant-worthy.
I developed this recipe after years of testing different techniques to achieve that ideal contrast—crunchy top, creamy center, and just enough seasoning to elevate the flavor.
What sets this recipe apart is its versatility—serve it as a foolproof appetizer for parties, a hearty side dish for weeknight dinners, or even a comforting snack straight from the oven.
The 30-minute prep time and 15-minute baking process make it perfect for busy schedules, while the customizable topping options (herbs, jalapeños, or even a sprinkle of smoked paprika) let you tailor it to any taste.
The key is layering the cheese properly and baking it just until the edges are golden and the center is still velvety.
By the time it comes out of the oven, you’ll have a dish that’s restaurant-quality without the fuss—crispy, cheesy, and impossible to resist. The aroma alone will have everyone gathering around the table, and the first bite delivers that perfect harmony of textures and flavors.
This isn’t just another baked cheese dish; it’s a game-changer for anyone who loves cheesy comfort food.
Whether you’re hosting a gathering or just craving a satisfying snack, this recipe delivers every time. The best part? Leftovers reheat beautifully, so you can enjoy it again without any extra effort. Let’s get started on creating your cheesy masterpiece!
Ingredients for baked cheddar cheese
Sharp cheddar, crispy panko, and buttery richness—these are the stars of your cheesy masterpiece.
| Ingredient | Amount | Notes |
|---|---|---|
| Sharp Cheddar Cheese 🧀 | 2 cups | Block cheese, freshly grated |
| Panko Breadcrumbs 🍞 | 1 cup | Lightly toasted for extra crunch |
| Unsalted Butter 🧈 | ½ cup | Melted, full-fat preferred |
| Heavy Cream 🥛 | ¼ cup | Full-fat for best creaminess |
| Garlic Cloves 🧄 | 2 cloves | Minced for subtle garlic flavor |
| Dijon Mustard 🍯 | 1 tbsp | For slight tanginess |
| Fresh Thyme Leaves 🌿 | ¼ cup | Chopped, for aromatic touch |
| Salt 🧂 | ½ tsp | Diamond Crystal preferred |
| Black Pepper 🌶️ | ¼ tsp | Freshly cracked for heat |
| Smoked Paprika 🌶️ | ½ tsp | For subtle smoky depth |
| Green Onion 🧅 | 2 whole | Sliced thin for garnish |
| Jalapeño Pepper 🌶️ | 1 whole | Seeded, sliced (optional) |
The cheddar makes or breaks this dish. Grab a block from the deli counter—pre-shredded gets clumpy and lacks that perfect melt. I always go for Cabot or Sharp Cheddar when I can, but any sharp variety works. The panko? Pillsbury is my go-to—it's light and stays crispy. Toast it in a dry pan for 2 minutes before using, and trust me, it makes all the difference. The butter needs to be full-fat—none of that low-fat nonsense here. And if you're feeling fancy, European-style butter adds a richer flavor.
No panko? Regular breadcrumbs toasted in butter work in a pinch, but they won't be as crispy. Fresh thyme is ideal, but dried works at half the amount. Want more heat? Add red pepper flakes or cayenne to the breadcrumb mix. The green onions and jalapeños are totally optional, but they add that restaurant-quality finish. Pro tip: Zest the jalapeño for extra flavor without the heat. And if you're out of Dijon, yellow mustard thinned with a splash of cream does the trick.
This reheats like a dream—just pop it in the oven at 350°F for 5-10 minutes until bubbly. Keeps 3-4 days in the fridge, covered tightly. For longer storage, freeze portions for up to 3 months. I always make a double batch because it disappears fast—perfect for parties or lazy weeknight snacks. The best part? It tastes even better the next day once everything settles and melts together.
Why You'll Love This Recipe
- One-Bowl Magic: I swear by this recipe when I’m too tired to measure five ingredients. Just melt butter, mix in cheese and cream, toss in panko—done. The garlic gets minced while the oven preheats, so it’s genuinely throw-it-together-while-the-kids-do-homework easy.
- Crispy-Creamy Obsession: That crispy panko crust with the gooey, melty cheddar inside? It’s the kind of contrast that makes you close your eyes and sigh. The sharp cheddar cuts through the richness, and the heavy cream keeps it luscious without being heavy.
- Weeknight & Game Day: Between us, this is my go-to for lazy Mondays and Super Bowl parties. Slice it thin for a quick snack, serve it as a side with burgers, or let guests dig in with crackers—it’s always a hit. Honestly, I’ve never had a bad moment with it.
- Leftovers That Don’t Suck: Most baked cheese dishes turn rubbery the next day, but this? It reheats like a dream—just pop it in the oven for five minutes, and it’s back to crispy perfection. Plus, it’s cheap to make (sharp cheddar stretches far) and disappears fast, so you’re not stuck with a fridge full of sad cheese leftovers.
Step-by-step instructions for baked cheddar cheese
Here's how to create that perfect golden crust with gooey, melted rivers inside.
🍳 Step 1: Melt Butter and Create the Cheese Base
Preheat your oven to 375°F and grease a 9-inch round baking dish with 1 tablespoon of the melted unsalted butter. In a large bowl, combine the 2 cups sharp cheddar cheese with the 0.25 cup heavy cream, 1 tbsp Dijon mustard, 0.25 cup chopped fresh thyme leaves, 0.5 tsp salt, 0.25 tsp black pepper, and 0.5 tsp smoked paprika.
Mix until the cheese is completely melted and smooth—this should take about 2-3 minutes in the microwave or over a double boiler. The mixture should look like a thick, creamy batter. If it's too thick, add 1 teaspoon of heavy cream at a time until it reaches a pourable consistency. This is your flavor foundation, so don't rush it.
👨🍳 Step 2: Prepare the Crispy Topping
In a separate bowl, mix the 1 cup Panko breadcrumbs with the remaining 0.25 cup melted unsalted butter, 2 cloves minced garlic, 0.25 tsp black pepper, and 0.25 tsp smoked paprika. The breadcrumbs should look evenly coated and slightly clumpy—this ensures maximum crispiness when baked.
For extra flavor, toast the breadcrumb mixture in a dry skillet over medium heat for 2-3 minutes until golden brown and fragrant. This step deepens the nutty flavor and removes any raw taste. Let it cool slightly before using, but keep it warm for best results.
🥘 Step 3: Layer and Assemble the Baked Cheddar
Pour the melted cheese mixture into the prepared baking dish and spread it evenly. The cheese should fill the dish about ¾ full—this gives room for the topping and prevents overflow. Sprinkle the sliced jalapeño pepper (if using) evenly over the cheese for a subtle kick.
Press the toasted breadcrumb mixture firmly on top of the cheese, creating an even layer. Use the back of a spoon to smooth out any lumps. This is where the magic happens—the crispy topping will contrast perfectly with the creamy, melted cheese underneath. For extra presentation, arrange the sliced green onion in a circular pattern on top.
🔥 Step 4: Bake to Golden Perfection
Place the baking dish on the middle rack of your preheated oven and bake for 20-25 minutes. The top should turn a deep golden brown, and the edges should be crispy and slightly puffed. You'll know it's ready when the center still looks slightly underdone—it'll continue cooking as it rests.
For the best results, broil for the last 1-2 minutes to achieve that perfect crispy crust. Watch it closely—broilers can vary, and you want golden brown, not burnt. Let the baked cheddar rest for 5 minutes before serving to allow the cheese to set slightly and the flavors to meld.
🍽️ Step 5: Serve Immediately for Maximum Enjoyment
Slice the baked cheddar into wedges and serve warm. The contrast of the crispy, golden-brown topping with the creamy, melted cheese inside is what makes this dish so irresistible. The jalapeño and thyme add layers of flavor that balance the richness of the cheese.
Pair it with crusty bread or a simple green salad to soak up any extra cheese sauce. The leftovers keep well in the refrigerator for 3-4 days, but they're best enjoyed fresh when the cheese is at its gooiest. This dish is all about that perfect balance of textures and flavors—crispy, creamy, and full of depth!
Pro Tips For Making Baked Cheddar Cheese
- Preheat Like It’s Serious: Crank your oven to 425°F (220°C) and let it roar for 15 minutes before baking—no exceptions. I used to skip this, and my cheddar would either stay rubbery or burn before the center melted. That extra heat jump guarantees a crispy crust while the inside gets properly gooey.
- Shred Cheese Fresh: Buy your sharp cheddar the day you bake and shred it yourself—no pre-shredded stuff. The pre-shredded kind has anti-caking agents that make the cheese clump like sad laundry. Freshly shredded melts smoother and browns better, especially when mixed with the heavy cream.
- Butter the Dish First: Slather the baking dish with unsalted butter before adding the cheese mixture—not after. This isn’t just for flavor; it creates a barrier so the cheese doesn’t stick like glue when you’re trying to scrape the last bites. (Yes, even if you’re impatient like me.)
- Press Panko Firmly: Don’t just sprinkle panko on top—pack it down with the back of a spoon or your palm. A loose layer won’t crisp up; it’ll turn into a sad, greasy mush. Pressing it creates a golden, crunchy shield that holds up to cutting. (Your future self will thank you.)
Dietary considerations for this dish
Gluten-Free Adaptations
Skip the panko breadcrumbs and use gluten-free panko (like Annie's brand) or crush gluten-free crackers (such as Mary's Gone Crackers) into fine crumbs. Toast them in the same way—just 2-3 minutes in a dry skillet—to maintain that crispy texture.
The key is ensuring they're still light and airy after baking, so don't overcrowd the pan while toasting. 🌟
Dairy-Free Options
Replace the sharp cheddar cheese with nutritional yeast (about ½ cup) mixed with vegan cream cheese (like Kite Hill) for creaminess. Use coconut oil instead of butter and unsweetened almond milk in place of heavy cream.
The flavor will be milder but still rich—add 1 tsp apple cider vinegar to mimic the tanginess of Dijon mustard. For extra depth, stir in 1 tbsp white miso paste to the cheese mixture.
Lower-Carb Adjustments
Reduce the heavy cream to just 1 tbsp and replace the rest with unsweetened almond milk to cut carbs. Use almond flour (about ¼ cup) mixed with 1 tbsp melted butter as a topping instead of panko—it adds crunch without the breadcrumb carbs.
For extra flavor, sprinkle crushed pork rinds on top before baking. This keeps the dish keto-friendly while maintaining that satisfying texture contrast.
Vegan-Friendly Swaps
For a fully plant-based version, swap the sharp cheddar for vegan cheddar shreds (like Violife) and the heavy cream for full-fat coconut milk. Use olive oil instead of butter and gluten-free breadcrumbs for the topping.
Boost umami with 1 tbsp soy sauce or 1 tsp smoked salt in the cheese mixture. The result is a cheesy, crispy delight that still delivers that gooey satisfaction without any dairy. 🌱
Lactose-Sensitive Tweaks
If lactose intolerance is a concern, use aged cheddar (like Babybel or Boothby), which has less lactose than fresh cheddar. Replace the heavy cream with lactose-free cream (such as Lactaid) and the butter with lactose-free margarine.
The dish will still be creamy and rich, but gentler on sensitive stomachs. For extra flavor, add 1 tsp lemon zest to the cheese mixture to brighten the flavors.
Nutrition facts
Frequently asked questions
Why does my baked cheddar get oily or greasy?
This usually happens when the cheese melts too fast, releasing excess fat. To fix it, chill the cheese mixture for 10 minutes before baking, and reduce oven temperature to 350°F for 15 minutes to let it set properly. Also, make sure your cheddar is sharp—not too aged, as that can increase oil content.
Can I make this ahead of time?
Assemble the dish and refrigerate it uncovered for 1-2 hours before baking. This helps the cheese firm up slightly, preventing overflow. For make-ahead baking, assemble the dish, cover tightly, and refrigerate overnight. Bake straight from the fridge, adding 5-10 extra minutes to the cooking time.
What’s the best way to reheat leftovers?
Leftovers reheat beautifully! Cover with foil and warm in a 350°F oven for 10-15 minutes until bubbly. For microwave reheating, use 30-second intervals on low power to avoid rubbery texture. Spritz with a little water before reheating to restore crispiness.
How can I add extra protein or veggies?
Mix in ½ cup cooked bacon bits or ½ cup diced ham with the cheese for protein. For veggies, try ½ cup sautéed mushrooms or ½ cup roasted bell peppers—just make sure they’re dry to avoid a soggy topping. Add them to the cheese layer before topping with breadcrumbs.
What’s the secret to a crispy top?
The crispy top comes from three things: toasted panko, buttery richness, and even pressure when pressing it down. Toast the breadcrumbs in a dry pan for 2-3 minutes before mixing with butter, and press them firmly onto the cheese. For extra crunch, broil for the last 1-2 minutes of baking.