
Breakfast & Brunch
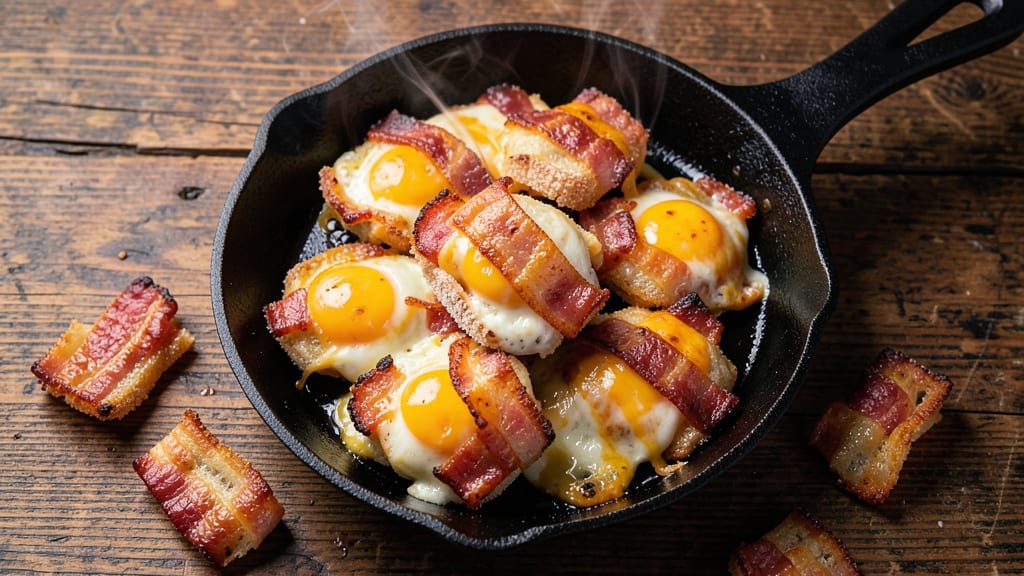
This bacon egg and cheese bombs recipe transforms breakfast into handheld, crispy-edged bites that disappear faster than you can say "morning rush."
The secret lies in perfectly cooked bacon, fluffy eggs, and melted cheese wrapped in a golden, flaky crust—each bite delivers smoky, savory, and cheesy satisfaction in one perfect package.
What makes this recipe stand out is the combination of textures: crispy edges that shatter slightly, tender eggs, and bacon that stays juicy, all held together by a buttery, golden exterior.
The beauty of these breakfast bombs is their speed—ready in under 30 minutes, they’re ideal for busy mornings, weekend brunches, or even a quick snack. The dough is simple to work with, and the assembly process is straightforward, making it a foolproof method for beginners and experienced cooks alike.
Whether you’re feeding a family or just craving a satisfying bite, these handheld delights deliver restaurant-quality flavor without the fuss.
By the time you’re done, you’ll have a tray of golden, crispy breakfast bites that look as good as they taste. The aroma of sizzling bacon and melting cheese will fill your kitchen, making it impossible to resist.
These bombs are perfect for dipping in hot sauce, ketchup, or even a creamy ranch—each bite is a balance of textures and flavors that keep you coming back for more.
Serve them warm for the best experience, or store leftovers in the fridge for a quick, grab-and-go breakfast. This recipe is designed to impress, whether you’re hosting a brunch or just treating yourself to a delicious start to the day. Let’s get cooking!
Ingredients for bacon egg and cheese bombs
Twelve crispy, cheesy bites packed with smoky bacon and fluffy eggs—ready in under 30 minutes!
| Ingredient | Amount | Notes |
|---|---|---|
| Thick-Cut Bacon 🥓 | 12 oz | Cut into 1-inch pieces, crispy preferred |
| Large Eggs 🥚 | 6 whole | Room temperature for even cooking |
| Shredded Sharp Cheddar Cheese 🧀 | 2 cups | Freshly shredded, full-fat preferred |
| All-Purpose Flour 🌾 | 2 cups | Plus 1 tbsp for dusting |
| Unsalted Butter 🧈 | ½ cup | Cold, cubed for dough |
| Ice Water 💧 | ½ cup | For dough elasticity |
| Salt 🧂 | ½ tsp | Kosher or sea salt |
| Black Pepper 🌶️ | ¼ tsp | Freshly cracked |
| Garlic Powder 🧄 | ½ tsp | For extra flavor |
| Vegetable Oil 🫒 | 2 tbsp | For frying, 350°F |
| Hot Sauce 🌶️ | ¼ cup | For dipping, optional |
The bacon is non-negotiable here—thick-cut, cut into 1-inch pieces—it gives that perfect smoky crunch. Costco or Trader Joe's have the best quality for this. If you're short on time, pre-cook the bacon and drain on paper towels to keep it crispy. The cheese? Freshly shredded sharp cheddar melts best—pre-shredded gets clumpy. For the dough, cold butter is key to flaky layers, so don’t skip chilling it. If your kitchen’s warm, pop the dough in the fridge for 15 minutes before rolling.
No sharp cheddar? Pepper jack or Monterey Jack work in a pinch, but sharpness is everything. Running out of eggs? Substitute with 6 tbsp of mayonnaise (yes, really—it binds like eggs). The dough gets sticky, so flour your hands and work surface if it’s too tough. Want extra flavor? Toss in 1/4 tsp smoked paprika with the garlic powder. And if you’re feeling fancy, wrap each bomb in a slice of bacon before frying for double the smoky goodness.
These stay crispy for 2 days in an airtight container, but honestly? They’re best fresh out of the fryer. Reheat in a 350°F oven for 5 minutes to restore that golden crunch. Freeze extras for up to 1 month—just thaw and reheat. Pro tip: Make a double batch. They disappear faster than you can say "morning rush." Store leftovers in a single layer on a wire rack to keep them crispy longer.
Why You'll Love This Recipe
- Five-Ingredient Magic: I swear by this list—thick-cut bacon, eggs, cheddar, flour, butter. That’s it. No fancy prep, no hidden steps. Just crack, fold, and fry. My lazy Sundays (and weeknights) thank me every time.
- Crispy-Creamy Obsession: The moment the cheese pulls away from the pan, revealing that golden crust? Chef’s kiss. The sharp cheddar melts into a stretchy, gooey center while the flour crust stays shockingly crisp—like a breakfast taco, but handheld and messier.
- Lunchbox Legend: Between us, these disappear faster than my willpower when I pack them for work. They reheat beautifully—just a quick toaster or skillet sizzle—and the kids actually choose them over cereal. (Yes, even on a Tuesday night.)
- Budget Breakfast Win: Thick-cut bacon’s the splurge, but one pan, one egg, one cheese pull—minimal waste. I make a batch on Sundays, freeze half, and still save money compared to takeout. Plus, the leftovers? Just as good cold, wrapped in foil like a little breakfast burrito.
Step-by-step instructions for bacon egg and cheese bombs
These handheld breakfast bites come together faster than you can say "crispy edges." Let's make them!
Cook the Bacon Until Crispy
Cut the 12 oz thick-cut bacon into 1-inch pieces—smaller than you might think for even cooking. Place them in a cold skillet over medium heat and cook undisturbed for 5 minutes until they start releasing fat. This slow start prevents burning while rendering the fat.
After 5 minutes, stir the bacon occasionally and cook for another 8-10 minutes until deep golden brown and crispy. Drain on paper towels, reserving 2 tablespoons of the bacon fat in the skillet—this golden liquid is pure flavor. If you need more oil, add the 2 tablespoons vegetable oil to the skillet now. The bacon fat alone won't be enough for frying later.
Make the Dough and Assemble the Bombs
In a large bowl, whisk together the 2 cups all-purpose flour, 0.5 tsp salt, 0.25 tsp black pepper, and 0.5 tsp garlic powder. Cut in the 0.5 cup cold unsalted butter using a pastry cutter or your fingers until the mixture resembles coarse crumbs with pea-sized butter pieces. This texture is crucial for flaky layers.
Add the 6 whole large eggs and mix until just combined. Then, gradually add the 0.5 cup ice water, mixing gently until a shaggy dough forms. Fold in the 2 cups shredded sharp cheddar cheese and the crispy bacon. The dough will be sticky—don't overwork it. Cover and refrigerate for 15 minutes to firm up slightly.
Shape and Fry the Bombs
Preheat 2 tablespoons vegetable oil (plus any reserved bacon fat) in a large skillet over medium heat until it reaches 350°F. While the oil heats, roll the chilled dough into 12 equal balls (about 1.5 inches in diameter). If the dough sticks, wet your hands slightly with water.
Carefully place 3-4 bombs at a time into the hot oil. Fry for 3-4 minutes per side until deep golden brown and cooked through. The centers should be set but still slightly soft—like a perfect breakfast bite. Transfer to a paper towel-lined plate to drain excess oil. Repeat with remaining dough, keeping the oil at 350°F between batches.
Serve Warm with Hot Sauce
Let the bombs rest for 2 minutes before serving—this helps them hold their shape. The outside should be crispy and golden, while the inside stays creamy and cheesy. Serve immediately with the 0.25 cup hot sauce for dipping, if desired. These handheld bites are best enjoyed fresh while the edges are still crisp.
Pro tip: If the bombs feel too soft, your oil might not have been hot enough. For extra crispiness, increase the heat slightly next time and fry for 30 seconds longer. The secret to these bombs is the hot oil and quick frying—don't rush, but don't linger either!
Pro Tips For Making Bacon Egg And Cheese Bombs
- CRISP THE BACON FIRST: Cook the thick-cut bacon until it’s crisp—not just chewy. I learned this the hard way: undercooked bacon makes the bombs soggy. Drain on paper towels and a wire rack to keep that crunch alive when you wrap them later.
- USE COLD BUTTER: Chill that unsalted butter before wrapping—it’ll stay firm and create a better seal. I was skeptical until I tried it: the cheese melts cleaner, and the crust holds together when frying. No need to rush; just pop it in the fridge for 10 minutes.
- DON’T OVERFILL THE WRAPS: Pack the egg, cheese, and bacon tightly but leave room—stuffing them like a sausage guarantees messy explosions. A loose spiral (not a log) keeps the filling contained. Trust me, your kitchen floor will thank you.
- FREEZE THEM BEFORE FRYING: Chill the wrapped bombs for 15 minutes before frying—it locks the filling in and prevents unraveling. I skip this when I’m lazy, but the difference in crispiness? Night and day. (Yes, even if you’re impatient like me.)
Dietary considerations for this recipe
Gluten-Free Adaptation
Swap the all-purpose flour for a 1:1 gluten-free baking flour blend like Bob’s Red Mill or King Arthur. Add 1 teaspoon xanthan gum to mimic gluten’s binding properties—this keeps the bombs from crumbling during frying.
Use 1 extra egg (7 total) to compensate for the lack of gluten structure. Chill the dough longer (20 minutes) since gluten-free doughs can be stickier. 🌾
Dairy-Free Options
Replace the sharp cheddar with nutritional yeast (¼ cup) for a cheesy flavor, or use dairy-free shreds like Violife or Daiya. For the dough, substitute 6 tablespoons melted coconut oil for the butter and ½ cup unsweetened almond milk instead of ice water.
Keep the eggs—unless avoiding them too, in which case use 6 tablespoons unsweetened applesauce as a binder. 🧀
Lower-Carb Version
Cut 1 cup of flour and replace with ½ cup almond flour for fewer carbs. Use 4 eggs instead of 6 to reduce calories while maintaining moisture. Skip the cheese or use ¼ cup grated Parmesan (lower in lactose).
The bombs will still be crispy but lighter—perfect for keto diets. Balance with extra bacon for fat content. 🥓
Egg-Free Binding
For vegan bombs, replace eggs with 6 tablespoons aquafaba (chickpea brine) or ½ cup mashed banana. Add 1 teaspoon apple cider vinegar to help bind the dough.
Use dairy-free cheese and ensure your flour blend includes xanthan gum. The texture will be slightly denser but still delicious when fried. 🍌
Allergen-Friendly Tips
Always check labels—some gluten-free flours contain soy or dairy. For nut allergies, use sunflower seed flour instead of almond flour. Store all adaptations in airtight containers to maintain freshness. Label each batch clearly to avoid cross-contamination. When in doubt, start with small test batches to perfect textures. ✨
Nutrition facts
Frequently asked questions
Can I make these without an air fryer?
This recipe uses traditional frying in a skillet with 350°F oil for that perfect golden crust. The bombs turn out just as crispy—no air fryer needed. Just maintain the oil temperature and fry in batches of 3-4 bombs at a time.
How do I keep the bombs from falling apart when frying?
Chill the dough for 15 minutes before shaping to firm it up, and handle gently when rolling the balls. If they still crumble, your oil may be too hot—adjust to 340°F for better control. Also, avoid overcrowding the pan to prevent steam buildup.
What’s the best way to reheat leftovers?
For crispy edges, reheat in a 350°F oven for 5 minutes on a wire rack. Microwaving works in a pinch, but they’ll lose some crunch. Store in an airtight container to keep them fresh for 2 days—though they’re best enjoyed fresh!
Can I use pre-cooked bacon?
Yes, but drain it thoroughly on paper towels to remove excess fat. Pre-cooked bacon works well, but freshly cooked bacon adds more flavor. If using store-bought crispy bacon, pat it dry to prevent soggy bombs during frying.
Are these bombs kid-friendly?
Kids love the handheld format, and the mild cheddar and bacon flavors are universally appealing. Serve with a side of ketchup or mild hot sauce for dipping. Just watch for the hot oil when frying—adult supervision is key!