
Main Courses
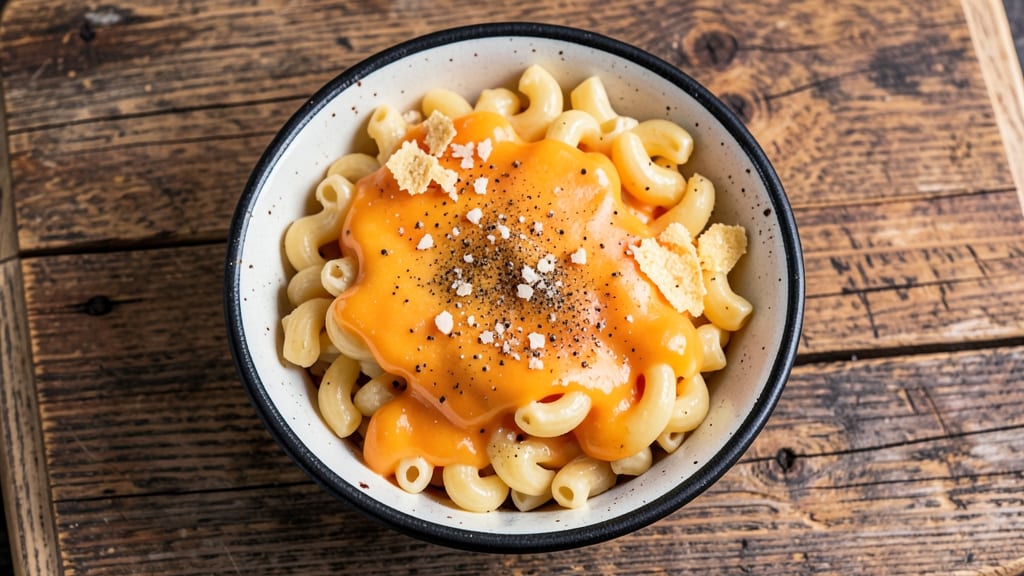
This backpacking mac and cheese recipe delivers restaurant-quality comfort in 15 minutes with just one pot and minimal gear. Designed for trail cooking, it uses dehydrated pasta and powdered cheese to cut weight without sacrificing creaminess.
The secret lies in pre-mixing your dry ingredients at home—no fancy equipment needed, just a lightweight camp stove and boiling water.
The beauty of this method is its simplicity: combine pre-portioned dry ingredients with hot water, stir until smooth, and let the heat work its magic. No measuring on the trail, no messy refrigeration—just one-pot convenience that transforms basic supplies into a satisfying meal.
The result is a velvety, cheesy sauce clinging to perfectly cooked noodles, proving backpacking food can be both nourishing and indulgent.
What makes this recipe truly special is how it adapts to outdoor conditions. The dehydrated components stay fresh for weeks, and the cooking process requires only one pot—minimal cleanup when you're miles from home.
Whether you're fueling up after a long hike or treating yourself to a campfire meal, this mac and cheese delivers the same creamy comfort you'd expect from a full kitchen.
Best of all, it's easy to customize: swap in powdered chicken or veggie mix for added protein, or adjust spice levels to match your preferences.
Pack it in a reusable bag for zero waste, and you've got a meal that's as kind to the environment as it is to your taste buds. Ready to make trail food taste like home?
Ingredients for backpacking mac and cheese
Pre-mix these dehydrated ingredients at home for lightweight, creamy backpacking mac and cheese.
| Ingredient | Amount | Notes |
|---|---|---|
| Dehydrated Elbow Macaroni 🍝 | ½ cup | Pre-cooked weight, dry measure |
| Powdered Sharp Cheddar Cheese 🧀 | ¾ cup | Non-dairy or powdered version |
| Powdered Milk 🥛 | ¼ cup | Non-fat or whole, for creaminess |
| Powdered Butter 🧈 | 2 tbsp | Or vegetable shortening substitute |
| Powdered Garlic 🧄 | ½ tsp | For flavor depth |
| Powdered Onion 🧅 | ½ tsp | Savory base |
| Mustard Powder 🌶️ | ¼ tsp | For tangy kick |
| Salt 🧂 | ½ tsp | Adjust to taste |
| Black Pepper 🌶️ | ¼ tsp | Freshly ground preferred |
| Powdered Chicken Bouillon 🍗 | 1 tbsp | Optional for extra flavor |
| Olive Oil 🫒 | 1 tbsp | For pre-mixing dry ingredients |
| Instant Mashed Potato Flakes 🥔 | 2 tbsp | For extra creaminess |
| Water 💧 | 1 ½ cups | Boiling, for cooking on trail |
The dehydrated components are the game-changers here. Mountain House or Backpacker's Pantry sell pre-dehydrated mac and cheese mixes, but you can DIY for better customization. For powdered cheese, Bob's Red Mill makes a great powdered cheddar that dissolves smoothly. The olive oil pre-mix (just a tablespoon) helps bind everything together—no clumping when you add water. If you're adding protein, swap in powdered chicken or veggie mix at home. The instant potato flakes might seem odd, but they add that signature creamy texture without extra weight.
No dehydrated pasta? Regular elbow macaroni works if you're willing to carry it dry (it's heavier, but doable). Short on powdered cheese? Powdered Parmesan plus a pinch of turmeric mimics sharp cheddar. The bouillon is optional but adds depth—Knorr or Maggi work great. For spice lovers, add cayenne powder to the mix. If you're cooking for kids, skip the mustard powder and use extra powdered butter for richness. The key is balancing the dry ingredients so they dissolve evenly in hot water—taste as you go when pre-mixing at home.
Pre-portion the dry mix into ziplock bags with a waterproof label. Keeps for 6-12 months in a cool, dry place. On the trail, just add boiling water, stir for 2 minutes, then let it sit covered for another 3 minutes. Packs out clean—no leftovers to worry about. For extra convenience, pre-mix individual servings in small reusable containers so you can just grab and go. The oil pre-mix means no measuring on the trail, and the dehydrated components eliminate refrigeration needs—perfect for multi-day trips.
Why You'll Love This Recipe
- No Boil, No Stress: I just dump the dehydrated mac into boiling water for 3 minutes—no measuring cups, no waiting for pasta to al dente. That powdered butter and cheese blend in like magic, and honestly? It’s the kind of meal that doesn’t demand your full attention.
- Garlic Bomb in a Cup: Between us, that powdered garlic might sound weird, but it packs a punch. One sprinkle and suddenly you’ve got that savory depth that makes this taste like a restaurant dish, not a backpacking hack. The sharp cheddar ties it all together—rich, tangy, and impossible to resist.
- Hiker’s Secret Weapon: This is my go-to when I’m prepping for camping trips or late-night study sessions. The dehydrated bits stay fresh for months, and I can make a full batch in one pot. Reheat it on a camp stove or microwave—it’s the ultimate lazy (but delicious) solution.
- Budget-Friendly Luxury: I’m paying pennies per serving, but it tastes like I spent hours in the kitchen. The powdered ingredients cut costs without sacrificing flavor, and leftovers? They’re just as good cold the next day—perfect for lunches or emergency snacks when you’re short on time.
Step-by-step instructions for backpacking mac and cheese
Here's how to make creamy, satisfying mac and cheese with just one pot and minimal cleanup.
Pre-Mix Dry Ingredients for Perfect Texture
In a medium bowl, combine the 0.5 cup dehydrated elbow macaroni, 0.75 cup powdered sharp cheddar cheese, 0.25 cup powdered milk, 2 tbsp powdered butter, 0.5 tsp powdered garlic, 0.5 tsp powdered onion, 0.25 tsp mustard powder, 0.5 tsp salt, 0.25 tsp black pepper, 1 tbsp powdered chicken bouillon, and 2 tbsp instant mashed potato flakes. Stir thoroughly with a spoon until all ingredients are evenly distributed—this ensures every bite gets that rich, creamy flavor.
Next, add the 1 tbsp olive oil to the dry mixture and stir again. The oil helps create a smoother consistency when combined with water later. I like to use a spoon to break up any clumps at this stage, so the ingredients blend seamlessly when you add the water. This pre-mixing step is what makes this backpacking version so foolproof—no lumps, no uneven texture.
Cook in Boiling Water Until Al Dente
Bring the 1.5 cups water to a rolling boil in your one-pot setup—whether that's a camp stove pot, jetboil, or even a zip-top bag with boiling water. Once boiling, add the pre-mixed dry ingredients all at once and stir immediately to prevent clumping. The mixture will look like a thick paste at first, but that's normal.
Let the mac and cheese simmer over medium heat for 8-10 minutes, stirring occasionally. You're looking for the noodles to soften and the sauce to thicken into a creamy consistency. If it's too thick after 8 minutes, add 1-2 tablespoons of hot water at a time until it reaches a smooth, pourable texture. The goal is that final spoonful of sauce should coat the back of your spoon without being too runny.
Adjust Consistency and Serve Warm
After simmering, give the mac and cheese one final taste and adjust the seasoning if needed. I usually add a pinch more salt or a crack of black pepper at this stage—backpacking ingredients can sometimes be less potent than fresh ones. The sauce should be thick enough to coat the noodles beautifully but still have a slight sheen, indicating creaminess.
Let the mac and cheese sit off heat for 2-3 minutes before serving. This resting period allows the flavors to meld together and the sauce to fully coat the noodles. Serve immediately while warm—this one-pot meal is at its best straight from the pot, with that perfect balance of creamy cheese and tender pasta. Pack extra powdered cheese on the side if you're extra hungry!
Pro Tips For Making Backpacking Mac And Cheese
- Boil Water First: Boiling water before adding the macaroni isn’t just about speed—it’s about texture. Cold water makes the dehydrated pasta clump and cook unevenly, while pre-boiled water guarantees even hydration and that perfect al dente bite. (Yes, even if you’re impatient like me, wait for a full rolling boil.)
- Mix Cheese Last: Powdered cheese burns faster than you’d think. Stir the sharp cheddar and powdered butter into the hot pasta after the macaroni has cooked and drained—otherwise, you’ll end up with a grainy, overcooked mess. Think of it like adding sugar to coffee: timing matters.
- Skip the Overcrowding: I learned this the hard way—dumping all the macaroni into a tiny pot turns it into a sad, mushy pile. Use a pot at least twice the volume of the dry pasta (seriously, measure it if you have to) to let the noodles move freely. Crowding = gluey disaster.
- Add Garlic Early: Powdered garlic loses its punch if you toss it in at the end. Sprinkle it into the boiling water with the pasta—it’ll infuse the noodles better and save you from that weak, afterthought flavor. (Pro move: crush the powder between your fingers first for extra aroma.)
Essential equipment for this recipe
One-Pot Essentials
Your backpacking mac and cheese only needs one lightweight pot—I recommend a 1-quart titanium pot like the Toaks 770 Titanium (lightweight at 5.4 oz and boils water fast).
For even more portability, use a Jetboil Flash (boils 1.5 cups water in 90 seconds) or a zip-top bag with boiling water for a no-pot option.
The key is a pot that fits your stove system—most backpacking stoves work with 1-2 quart pots, so check your setup before prepping. 🔥
Stove System
A canister stove like the MSR PocketRocket (weighs 2.2 oz) or Jetboil MiniMo (with built-in pot) handles this perfectly. For fuel efficiency, use white gas or butane—both burn cleanly and reliably at high altitudes. I avoid alcohol stoves for this recipe since they struggle with larger pots.
If you're cooking in cold weather, a windscreen (like the Snow Peak Parka) helps maintain steady heat for even cooking. Always bring extra fuel—you don’t want to run out mid-meal!
Water Handling
Carry pre-measured water in a collapsible silicone cup (like the Sea to Summit Pocket Cup) or directly in your pot. For longer trips, use a water filter (e.g., Sawyer Squeeze) to treat water on-site—just boil it afterward.
I like to pre-boil water at camp and store it in an insulated flask to keep it hot until cooking. Never use cold water—it won’t dissolve the powdered ingredients evenly, leading to a gritty texture. 💧
Storage Containers
Pre-portion your dry mix into reusable silicone bags (like Stasher bags) or small mason jars for easy packing. These keep ingredients fresh for 6-12 months in a cool, dry place. For individual servings, use ziplock bags with a waterproof marker to label portions.
On the trail, store your pre-mixed bags in a dry compartment of your backpack—moisture is the enemy of powdered ingredients. I also pack a small spoon (like the Toaks 770 Spoon) to stir directly in the pot while hiking.
Cleanup Gear
Minimize cleanup with a microfiber towel (like Sea to Summit Alpha) and biodegradable soap (e.g., Dr. Bronner’s). Pack a small scrubber (such as the GSI Outdoors Scrubba) to clean your pot efficiently. For no-mess cooking, use a zip-top bag with boiling water—just shake and eat!
Always pack out your trash, including food scraps, to keep trails clean. A small trash bag (like EcoBags) fits easily in your pocket. 🌿
Nutrition facts
Frequently asked questions
Can I make this backpacking mac and cheese without dehydrated pasta?
Yes, but you'll need to adjust your approach. Use regular elbow macaroni and cook it dry in your pot for 8-10 minutes before adding the powdered cheese mix and water. This adds about 1.5 oz per serving to your pack weight. For a lighter option, try pre-cooked and dehydrated pasta from brands like Mountain House, which weighs about 1/3 of regular pasta. The texture will be slightly different but still satisfying!
How do I prevent lumps in the powdered cheese sauce?
Pre-mixing all dry ingredients thoroughly at home is key! Use a whisk or fork to break up any clumps before storing. On the trail, stir immediately after adding to boiling water and cook at medium heat for 2-3 minutes before adding the pasta. If you still see lumps, add 1 tablespoon of hot water and stir vigorously. The olive oil in the mix also helps create a smoother sauce.
Can I add fresh ingredients like bacon or veggies on the trail? Fresh ingredients aren't practical for backpacking, but you can pre-cook and dehydrate extras at home. Try adding powdered bacon bits (like those from Mountain House) or freeze-dried veggies to your dry mix. For veggies, dehydrate and powder your own (like bell peppers or onions) or use instant dehydrated veggie mixes. Just
Will this recipe work at high altitudes?
Yes, but you may need to adjust cooking times slightly. Water boils at lower temperatures above 8,000 feet, so simmer for 1-2 extra minutes to ensure the noodles cook through. Use a windscreen if cooking in windy conditions to maintain consistent heat. The powdered ingredients will still dissolve properly—they're less affected by altitude than fresh ingredients. Always bring extra fuel for high-altitude cooking!
How do I store the pre-mixed ingredients long-term?
Store your pre-mixed backpacking mac and cheese in airtight, moisture-proof containers like Mylar bags with oxygen absorbers or glass jars with tight-sealing lids. Keep in a cool, dry place (like a pantry) for up to 12 months. For maximum freshness, add oxygen absorbers to Mylar bags. On the trail, store portions in ziplock bags inside your backpack's dry compartment to prevent moisture exposure.