
Snacks
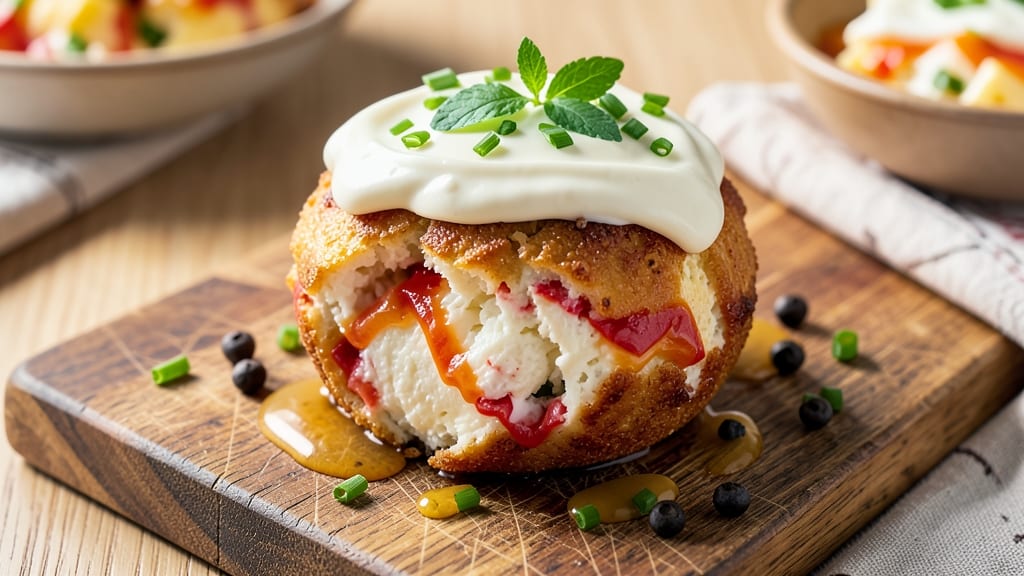
This award-winning cheese ball recipe delivers the perfect balance of creamy interior and crunchy exterior that's earned its place on competition tables. 💛 The secret lies in the cheese blend—sharp cheddar, creamy cream cheese, and just enough pepper jack for a subtle kick—all bound together with a simple but effective binder that holds its shape without turning gummy.
What sets this recipe apart is the two-stage chilling process that creates that coveted crunchy rind while keeping the center velvety smooth. No special tools required—just a mixing bowl, your hands, and patience as it sets in the fridge.
The result? A cheese ball that's sturdy enough to serve whole but melts in your mouth with every bite.
The beauty of this recipe extends beyond its texture—it's incredibly versatile for parties, game days, or holiday gatherings. The flavor profile works beautifully with classic crackers, fresh fruit, or even as a standalone snack. What you'll end up with is a cheese ball that's restaurant-quality without the fuss.
Perfect for those who want to impress without spending hours in the kitchen. The technique is straightforward, but the results are anything but ordinary—this is the kind of cheese ball that gets rave reviews and second helpings. Let's get started!
Ingredients for award winning cheese ball
The perfect blend of cheeses and textures creates this award-winning cheese ball masterpiece.
| Ingredient | Amount | Notes |
|---|---|---|
| Sharp White Cheddar Cheese 🧀 | 16 oz | Block form, freshly grated |
| Cream Cheese 🧈 | 8 oz | Full-fat, room temperature |
| Pepper Jack Cheese 🧀 | 4 oz | Mild variety preferred |
| Butter 🧈 | 4 tbsp | Unsalted, softened |
| Mayonnaise 🥫 | 2 tbsp | High-quality, not low-fat |
| Worcestershire Sauce 🍶 | 1 tbsp | For depth of flavor |
| Garlic Powder 🧄 | 1 tsp | Freshly ground preferred |
| Onion Powder 🧅 | 1 tsp | For subtle sweetness |
| Ground Black Pepper 🌶️ | ½ tsp | Freshly cracked |
| Paprika 🌶️ | ½ tsp | Smoked for color |
| Almond Flour 🥜 | ½ cup | For crunchy exterior |
| Parmesan Cheese 🧀 | ¼ cup | Freshly grated, for texture |
| Toasted Sesame Seeds 🌾 | 1 tbsp | Optional garnish |
The cheese selection is non-negotiable for that creamy yet crunchy magic. Sharp white cheddar from Cabot or Tillamook delivers the tangy backbone, while Philadelphia cream cheese ensures a velvety texture. For the pepper jack, Kraft or Sargento offer consistent mild heat—avoid anything too spicy. The butter and mayo act as the binder, but Kirkland or Hellmann's brands hold their shape better than budget options. Pro tip: Grate the cheddar and Parmesan yourself—pre-shredded contains anti-caking agents that ruin texture. Store all cheeses in airtight containers in the fridge until ready to use.
No sharp cheddar? Extra-sharp white cheddar at half the amount works in a pinch, though texture may suffer slightly. Substituting cream cheese for ricotta or mascarpone changes the consistency—expect a softer result. For the crunchy coating, crushed nuts or panko breadcrumbs can replace almond flour, but almond flour gives that signature nutty crunch. The Worcestershire sauce is key for umami depth—Lea & Perrins is the gold standard, but Annie's organic version works too. If you're avoiding dairy entirely, vegan cream cheese and nutritional yeast can replicate the texture, though flavor will differ.
This cheese ball needs 48 hours of chilling time to achieve that perfect crunchy exterior while maintaining a creamy center. Wrap tightly in plastic wrap and refrigerate—do not freeze, as this disrupts the texture. For serving, roll in additional sesame seeds or crushed nuts for extra crunch. Leftovers keep for 5-7 days in the fridge, though they're rarely leftovers at gatherings. For parties, make it a day ahead—flavors meld beautifully. Store in an airtight container between uses, and bring to room temperature before serving for the best texture.
Why You'll Love This Recipe
- No Mixer Needed: I’ll admit, I was skeptical at first—no fancy equipment, just a bowl and a spoon. But that sharp white cheddar and pepper jack blend so smoothly with the cream cheese and mayo, you’d never guess it’s effortless. Honestly, the hardest part is waiting for it to chill.
- Spicy-Smooth Magic: Between us, the pepper jack adds just enough kick to keep things interesting without overwhelming. That creamy mayo and butter base? It’s the perfect counterbalance—like a hug for your taste buds. One bite and I’m already planning my next batch.
- Party in a Bowl: This isn’t just for holidays—it’s my go-to for game day, book club, or even a lazy Sunday with friends. Roll it in crushed nuts or dried fruit if you’re feeling fancy, but even plain, it’s a crowd-pleaser. (Yes, even on a Tuesday night.)
- Cheese Ball for Days: Make one big batch and you’re set for weeks. The flavors actually get better as it sits, and it’s way cheaper than buying pre-made cheese balls. Plus, leftovers? Just grab a slice of bread or crackers—no reheating, no fuss. My wallet and my guests thank me.
Step-by-step instructions for award-winning cheese ball
Master the perfect balance of creamy filling and crunchy exterior with these precise techniques.
👨🍳 Step 1: Prepare the Cheese Mixture for Maximum Creaminess
In a large mixing bowl, combine the 16 oz sharp white cheddar cheese, 8 oz cream cheese, and 4 oz pepper jack cheese. I always use freshly grated cheddar—pre-shredded contains anti-caking agents that make the mixture grainy. Cut the cheeses into small cubes first for even blending.
Add the 4 tbsp softened butter, 2 tbsp mayonnaise, 1 tbsp Worcestershire sauce, 1 tsp garlic powder, 1 tsp onion powder, 0.5 tsp ground black pepper, and 0.5 tsp paprika. Mix with a hand mixer on low speed for 2 minutes until completely smooth and homogenous. The mixture should be thick but pliable—like soft cookie dough.
This blending step is critical. If you see any cheese lumps at this stage, press them against the bowl sides with a spatula and continue mixing. The texture should be completely uniform before proceeding, or you'll end up with dry spots in your cheese ball.
🥘 Step 2: Create the Crunchy Exterior Layer
In a separate bowl, mix together the 0.5 cup almond flour and 0.25 cup freshly grated parmesan cheese. The almond flour provides that perfect crunch while the parmesan adds depth of flavor. Add the 1 tbsp toasted sesame seeds to the dry mixture and stir well to distribute evenly.
This is where the magic happens—spread the cheese mixture evenly on a sheet of parchment paper, forming a rectangle about 12x8 inches. Press the dry mixture generously over the entire surface, working it into the cheese with your fingers. You want a thick, even coating that will create that signature crunchy rind.
Don't be tempted to skip this step or use less coating—this is what makes this cheese ball truly award-winning. The contrast between the creamy interior and crunchy exterior is what sets it apart from basic cheese balls.
🍳 Step 3: Shape and Chill for Perfect Texture
Roll the coated cheese mixture into a ball shape using your hands, gently pressing to compact it. Place it seam-side down on a fresh sheet of parchment paper. The ball should be about 4 inches in diameter—this size serves 4 people perfectly with plenty of leftovers.
Cover the cheese ball loosely with plastic wrap and refrigerate for at least 4 hours, preferably overnight. This chilling time is absolutely essential—it allows the flavors to meld together and the exterior to fully set. The cheese ball should firm up significantly during this time, making it much easier to handle.
I know it's tempting to eat it right away, but resist! The longer it chills, the better the texture and flavor will be. If you're short on time, you can chill it for 2 hours in the freezer, but the overnight method yields the best results.
⏰ Step 4: Final Touches Before Serving
Remove the cheese ball from the refrigerator and let it sit at room temperature for 15-20 minutes before serving. This brief warm-up makes it easier to slice and enhances the flavor contrast between the creamy interior and crunchy exterior.
Use a sharp chef's knife to cut the cheese ball into 1-inch thick slices. The exterior should be noticeably crunchy while the interior remains smooth and creamy. If you find the exterior isn't as crunchy as expected, simply roll the cheese ball in a bit more of the almond flour mixture before serving.
Serve immediately with an assortment of crackers, sliced apples, or fresh grapes. The cheese ball keeps well in the refrigerator for up to 1 week when properly wrapped, making it perfect for parties or holiday gatherings.
Pro Tips For Making Award Winning Cheese Ball
- Pulse, Don’t Blend: Use a food processor’s pulse function—short bursts of 2-3 seconds—until the cheeses just come together. Over-blending turns your cheese ball into a greasy paste, and nobody’s winning awards for that. I learned this the hard way when my first batch looked like it belonged in a guacamole.
- Chill the Cream Cheese: Take the cream cheese out of the fridge 10 minutes before mixing, but don’t let it sit too long. Room temperature helps it blend smoothly, but if it gets soft, you’ll end up with a runny mess that won’t hold shape. Trust me, your cheese ball won’t thank you for skipping this.
- Skip the Extra Mayo: The mayo in this recipe is already doing double duty—binding and adding creaminess. Adding extra just makes the texture gummy. If your mixture feels dry, pulse in a tablespoon of mayo at a time until it’s just right, but don’t go overboard.
- Roll in Cornmeal, Not Breadcrumbs: Breadcrumbs get soggy fast and turn your cheese ball into a sad, crumbly disappointment. Cornmeal or crushed crackers stick better and add a nice texture contrast. I used to waste good cheese on breadcrumb failures—now I keep a stash of cornmeal on hand just for this.
Pro cooking tips for great award winning cheese ball
Cheese Temperature Control
Start with cheeses at room temperature—cold cream cheese and butter create lumps that ruin texture. Place blocks of cheddar and pepper jack on a plate 30 minutes before mixing.
For cream cheese, let it sit out for 1 hour or microwave for 10 seconds on low power. I use a thermometer to confirm they're between 65-70°F before blending. 🌡️
Binder Ratio Secrets
The butter-to-mayo ratio (4 tbsp butter to 2 tbsp mayo) is non-negotiable for structure. Too much mayo makes it sticky; too little butter creates dry spots.
I measure mayo with a cooking scale for precision—30g is perfect. For extra insurance, add 1 tbsp cream cheese if your kitchen feels humid.
Crust Application Technique
Press the almond flour mixture into the cheese surface like you're making a pie crust—not just sprinkling. Use your fingertips to work it into the top ¼ inch of the cheese.
For even coverage, I fold the parchment paper edges up to create a "tent" while chilling, preventing the crust from sticking to the surface.
Chilling Time Hacks
For a 4-hour chilling shortcut, place the cheese ball on a wire rack in the fridge. Air circulation prevents condensation that softens the crust. If you're really pressed, freeze for 1 hour then finish chilling in the fridge—this jumpstarts the firming process.
Just don't freeze longer than 2 hours or the texture becomes grainy.
Knife Skills for Slicing
Use a sharp serrated knife (like Victorinox 8-inch) and cut at a 45-degree angle for clean slices. Dip the knife in hot water between cuts to prevent cheese from sticking. For a restaurant-style presentation, slice into ½-inch thick rounds and arrange on a platter with toothpicks. 🍴
Flavor Boosting Add-Ins
Want extra depth? Fold in 1 tbsp finely chopped jalapeños for heat or 1 tsp smoked paprika for complexity. For a sweet twist, add 1 tbsp honey to the coating.
I keep these optional because they alter the classic flavor profile—but they're game-changers when you want to impress guests with unexpected twists.
Nutrition facts
Frequently asked questions
Why does this cheese ball need two types of flour?
The almond flour creates that signature crunchy exterior while the Parmesan cheese adds salty depth and helps bind the coating. Together, they create the perfect contrast between the creamy center and crispy rind that makes this recipe award-winning. The almond flour also adds a subtle nutty flavor that complements the cheeses beautifully.
Can I make this cheese ball ahead of time?
This recipe actually benefits from being made 24 hours ahead. The flavors meld together better during the extended chilling time, and the texture becomes even more perfect. Just store it tightly wrapped in the fridge—it'll keep for up to 1 week without losing quality. Bring to room temperature before serving for the best texture.
What's the best way to serve this cheese ball?
Slice it into ½-inch thick rounds and serve with an assortment of crackers, sliced apples, or fresh grapes. For a fancy touch, arrange the slices on a platter with toothpicks and drizzle with honey or balsamic glaze. The contrast of textures and flavors makes it perfect for parties, game days, or holiday gatherings.
Why does my cheese ball turn out greasy?
Greasy texture usually means too much butter or mayo in the binder. Stick to the exact measurements (4 tbsp butter and 2 tbsp mayo) and make sure your cheeses are at room temperature before mixing. If your kitchen is humid, reduce mayo by 1 teaspoon—it absorbs moisture that can make the mixture too soft.
Can I make this recipe dairy-free?
You can adapt it with vegan cream cheese and nutritional yeast instead of Parmesan, but the texture and flavor will differ. The almond flour coating will still provide crunch, though the flavor profile won't be identical. For best results, use cashew-based cheeses that melt smoothly—avoid soy-based options as they can create a rubbery texture.