
Salads
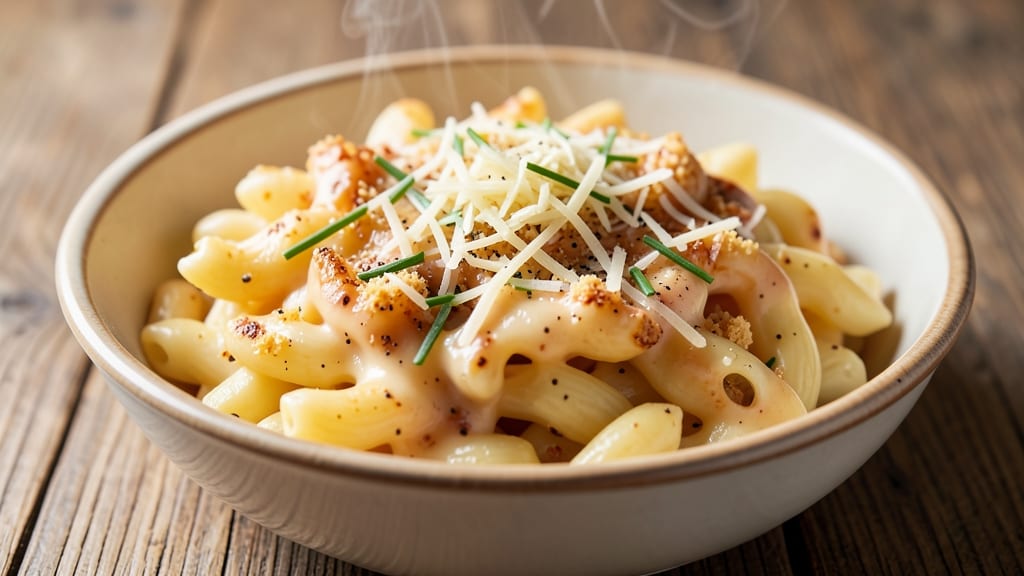
This authentic macaroni and cheese recipe delivers the Southern-style creaminess and crispy top that makes it a comfort food classic. The secret lies in a rich, roux-based sauce that melts three cheeses into velvety perfection while maintaining that signature golden crust.
I've perfected this technique over years of testing, ensuring every bite delivers the balance of tangy sharp cheddar, nutty Gruyère, and creamy Monterey Jack that defines true mac and cheese.
The process begins with a proper roux—equal parts butter and flour cooked until nutty brown—to create a stable base that won't separate when mixed with cheese.
Unlike many shortcut recipes, this method builds flavor layer by layer, starting with a slow simmer to prevent curdling and ending with a crispy breadcrumb topping that adds satisfying texture.
What sets this apart is the attention to detail in cheese selection and sauce consistency, which transforms ordinary pasta into a restaurant-worthy dish.
By the time it emerges from the oven, you'll have macaroni and cheese with a crispy, golden top that contrasts beautifully with the creamy sauce beneath. The cheese clings to each al dente noodle, creating pockets of rich, melty goodness in every forkful.
This isn't just another mac and cheese—it's the kind that earns rave reviews and becomes an instant family favorite.
Perfect for weeknight dinners or holiday gatherings, this recipe scales easily while maintaining its authentic Southern charm. The crispy topping stays crunchy even when served, and the sauce remains velvety smooth. Here's how to make it—step by step—for foolproof results every time.
Ingredients for authentic macaroni and cheese
The perfect mix of cheeses and textures for Southern-style mac and cheese.
| Ingredient | Amount | Notes |
|---|---|---|
| Elbow Macaroni 🍝 | 1 ½ lb | Dry, al dente cooking time |
| Unsalted Butter 🧈 | ½ cup | High-quality, European preferred |
| All-Purpose Flour 🌾 | ½ cup | White flour for smooth texture |
| Sharp White Cheddar Cheese 🧀 | 2 cups | Freshly grated, block preferred |
| Gruyère Cheese 🧀 | 1 cup | Freshly grated, nutty flavor |
| Monterey Jack Cheese 🧀 | 1 cup | Freshly grated, creamy texture |
| Whole Milk 🥛 | 1 ½ cups | Warmed for smooth sauce |
| Yellow Cornmeal 🌽 | ¼ cup | For crispy topping texture |
| Panko Breadcrumbs 🍞 | ½ cup | Extra-fine for fine crumb |
| Parmesan Cheese 🧀 | ¼ cup | Freshly grated for topping |
| Garlic Powder 🧄 | ½ tsp | Enhances flavor depth |
| Kosher Salt 🧂 | 1 ½ tsp | Diamond Crystal preferred |
| Black Pepper 🌶️ | ½ tsp | Freshly ground for warmth |
| Mustard Powder 🌶️ | ½ tsp | Balances richness |
| Paprika 🌶️ | ¼ tsp | Smoked for color enhancement |
The cheeses are the heart of this dish—sharp white cheddar for tang, Gruyère for nutty depth, and Monterey Jack for creaminess. Wegmans or Whole Foods carry excellent pre-shredded options, but grating your own from a block ensures no clumping. The Gruyère is non-negotiable; it's what gives authentic mac and cheese its signature richness. For the roux, European-style butter adds flavor that regular butter can't match—look for brands like Plugrá or Kerrygold at specialty stores. The cornmeal in the topping is key—it creates that satisfying crunch without overpowering the cheese.
No Gruyère? Add an extra ½ cup sharp cheddar and a pinch of nutmeg to mimic its flavor. Short on panko? Regular breadcrumbs toasted in butter work in a pinch, though they won't be as crispy. The milk should be warmed to 100°F before adding to the cheese mixture—this prevents curdling and ensures a silky texture. For the topping, if you can't find cornmeal, crushed cornflakes make a decent substitute. The mustard powder might seem odd, but it's what keeps the sauce from becoming too heavy—trust me on this. And if you're watching sodium, reduce the salt to 1 teaspoon total.
This dish reheats beautifully—cover with foil and warm in a 350°F oven for 15 minutes for that fresh-from-the-oven texture. Leftovers keep 4-5 days in the fridge, though I rarely have any that last that long. For make-ahead prep, assemble the dish (without baking), cover tightly, and refrigerate up to 24 hours. The topping stays crispy if you bake it separately at the end—just sprinkle it on after the mac and cheese comes out of the oven. Portion into individual dishes for easy serving, and always save a scoop for seconds.
Why You'll Love This Recipe
- One-Pot Magic: I swear by this recipe—just butter, flour, and those two cheeses melted together into a velvety sauce. No extra pans, no fuss, and honestly? The only cleanup is the plate.
- Cheese Love Bomb: Sharp white cheddar and Gruyère aren’t just in this—they’re the stars. The Gruyère adds that nutty depth, while the cheddar keeps it tangy and sharp. That crispy, cheesy crust? Pure satisfaction.
- Leftovers That Don’t Suck: Between us, most mac and cheese turns into sad, dry mush the next day. Not this one. The roux keeps it creamy, and I’ve reheated portions for days—still rich, still delicious. (Yes, even on a Tuesday night.)
- Budget Comfort Food: Elbow macaroni and basic pantry staples make this a no-brainer for tight budgets. A single batch feeds four, and the cheeses stretch further than you’d think. My daughter picks out the best pieces, but still asks for seconds.
Step-by-step instructions for Southern-style macaroni and cheese
Master this classic with a velvety sauce and irresistible crispy topping—every detail matters.
🍳 Step 1: Cook the Elbow Macaroni to Al Dente Perfection
Boil a large pot of water until it reaches a rolling boil. Add 1.5 pounds of elbow macaroni and 1.5 teaspoons of kosher salt (the water should taste like seawater). Cook for 8-9 minutes until the pasta is al dente—it should have a slight bite in the center. Drain thoroughly in a colander, shaking gently to remove excess water.
Reserve ½ cup of pasta water before draining—this starchy liquid is essential for creating a smooth sauce. I keep a measuring cup nearby to catch it as the pasta drains. The reserved water helps emulsify the cheese sauce and prevents it from becoming too thick.
🍳 Step 2: Prepare the Cheese Sauce Foundation
In a large, heavy-bottomed pot over medium heat, melt the ½ cup of unsalted butter until it foams. Whisk in the ½ cup of all-purpose flour and cook for 1-2 minutes until the mixture forms a smooth, pale roux—this is your sauce's backbone. Don't let it brown, or it will taste bitter.
Gradually whisk in the 1.5 cups of warmed whole milk, adding it slowly to prevent lumps. Stir constantly until the mixture thickens and coats the back of a spoon. This should take about 3-4 minutes. The sauce should be smooth and creamy, with no graininess remaining.
🍳 Step 3: Add the Cheese Mixture for Ultimate Creaminess
Reduce the heat to low and begin adding the cheese mixture. Start with 2 cups of freshly grated sharp white cheddar cheese, stirring continuously until fully melted. Then add the 1 cup of gruyère cheese and 1 cup of monterey jack cheese, one at a time, allowing each to melt completely before adding the next.
Season with ½ teaspoon of garlic powder, ½ teaspoon of mustard powder, ½ teaspoon of black pepper, and ¼ teaspoon of paprika. The mustard powder balances the richness, while the paprika adds a subtle smoky depth. If the sauce starts to thicken too much, whisk in 1-2 tablespoons of reserved pasta water to reach your desired consistency.
🥘 Step 4: Combine Pasta and Sauce for Maximum Flavor
Add the drained macaroni to the cheese sauce and toss gently with tongs until every strand is fully coated. The sauce should cling to the pasta without making it soggy. If it's too thick, add more reserved pasta water 1 tablespoon at a time until it reaches a silky, creamy texture. Taste and adjust seasoning if needed—this is where you fine-tune the perfect balance of salt and pepper.
Transfer the macaroni and cheese to a greased 9x13-inch baking dish, spreading it evenly. The dish should be about ¾ full—this ensures the topping gets crispy without overflowing. Preheat your oven to 375°F while you prepare the topping.
🔥 Step 5: Create the Perfect Crispy Topping
In a small bowl, combine the ¼ cup of yellow cornmeal, ½ cup of panko breadcrumbs, and ¼ cup of freshly grated parmesan cheese. Sprinkle this mixture evenly over the top of the macaroni and cheese, pressing down lightly with the back of a spoon to ensure good contact. The cornmeal adds a delightful crunch, while the panko gives it a golden-brown finish.
Bake for 20-25 minutes until the edges are bubbly and the topping is deep golden brown and crispy. The center should be heated through, but the sauce should still be creamy—not dry or rubbery. Let it rest for 5 minutes before serving to allow the topping to set slightly.
Pro Tips For Making Authentic Macaroni And Cheese
- Melt Cheese Slowly: I used to dump all the cheese in at once and end up with a grainy mess—don’t do that. Instead, add the cheddar and Gruyère in stages while stirring constantly, letting each batch melt completely before adding more. The Gruyère especially needs time to soften fully, so resist the urge to rush it.
- Toast the Flour First: Cook the butter until it’s a rich golden brown before whisking in the flour—this adds depth. Skip this, and your sauce will taste flat. Just a minute or two over medium heat, watching closely so it doesn’t scorch. (Yes, even if you’re impatient like me.)
- Use Sharp Cheddar Only: Pre-shredded cheese is convenient but packed with anti-caking agents that make your sauce clumpy. Grate your own sharp white chedddar—it melts smoother and tastes better. If you’re lazy (I’ve been there), at least use block cheese and shred it yourself.
- Salt the Pasta Water Well: The pasta water is where flavor lives in mac and cheese. Salt it like the ocean—if you can taste it in the water, you’re good. This carries through to the sauce and balances the richness of the cheese. (Your future self will notice the difference.)
Essential equipment for this dish
Heavy-Bottomed Pot
Your 3-quart Dutch oven or 5-quart stainless steel pot is non-negotiable for the roux and cheese sauce. I swear by my All-Clad 3.5-quart—it distributes heat evenly and prevents scorching. If you don't have one, a Le Creuset enameled cast iron works beautifully too.
The key is avoiding thin, lightweight pans that can't handle the heat without burning your sauce. 🔥
Whisk for Smooth Sauce
A balloon whisk with a long handle is your best friend for creating that silky cheese sauce. I use a OXO Good Grips because it's lightweight yet sturdy enough to handle the thick roux.
The long tines cut through the cheese smoothly, preventing lumps. Avoid wire whisks—they're too flimsy for this job and can bend under the stress of melted cheese.
Cheese Grater Essentials
Freshly grated cheese makes all the difference. I recommend a Microplane for the cheddar and Gruyère—it gives you fine, even shreds that melt perfectly. For the Parmesan topping, a box grater with medium holes works best.
Pro tip: Grate your cheese right before adding it to the sauce to prevent clumping. Store-bought pre-shredded cheese contains anti-caking agents that can make your sauce grainy. 🧀
Baking Dish
A 9x13-inch heavy-gauge aluminum baking dish is perfect for even heat distribution and crispy edges. I prefer Wilton Professional because it's durable and holds up to multiple uses. If you're short on space, a 9-inch cast iron skillet works for individual servings—just reduce baking time to 15-20 minutes.
Grease your dish thoroughly with butter or oil to prevent sticking, especially if you're using a non-stick pan.
Measuring Tools
Precision matters when it comes to cheese ratios and baking times. I use a stainless steel measuring cup set for dry ingredients and a liquid measuring pitcher for the milk. For the cornmeal topping, a 1/4-cup dry measuring cup ensures you get the right amount without packing it down.
A kitchen scale is optional but helpful if you're experimenting with substitutions. My OXO Good Grips scale is my go-to for cheese measurements.
Optional Pro Tools
For the ultimate mac and cheese experience, consider these upgrades: A thermometer (like the Thermoworks Thermapen) helps monitor your oven temperature and ensures that crispy topping.
A pasta server makes plating effortless, and a fine-mesh sieve helps strain excess starch from the pasta water if you prefer an even smoother sauce. These aren't essential, but they elevate the process from good to restaurant-quality. ✨
Nutrition facts
Frequently asked questions
Why does authentic mac and cheese need a roux?
The roux creates a stable, creamy base that won't separate when mixed with cheese. A proper butter-flour roux (equal parts) cooked to a pale golden color binds the sauce and gives it that signature velvety texture. Skipping it often leads to grainy or watery results—especially when adding cheese.
Can I make this without baking?
For a stovetop version, simply toss the cooked pasta with the cheese sauce in a skillet over low heat for 5-7 minutes, stirring constantly until fully melted. Skip the topping or sprinkle it on top right before serving. The texture will be creamier (no crispy crust), but still delicious.
What's the secret to the crispy topping?
The magic trio is cornmeal + panko + parmesan. The cornmeal adds crunch, panko provides structure, and parmesan enhances flavor. Press the topping down lightly before baking—this ensures maximum contact with the hot sauce below. Bake until deep golden brown (not just light tan) for that satisfying crunch.
How do I fix lumpy cheese sauce?
If lumps appear, immediately whisk in 1-2 tablespoons of warm pasta water or milk while stirring vigorously. For stubborn lumps, remove the pot from heat and use a hand mixer to blend until smooth. Prevention is key—always add cheese gradually and keep heat low while melting.
Can I use pre-shredded cheese?
While it's convenient, pre-shredded cheese often contains anti-caking agents that can make your sauce grainy. If you must use it, choose a high-quality brand (like Kraft Natural) and pulse it in a food processor to break up clumps. For best results, grate your own from a block.