
Side Dishes
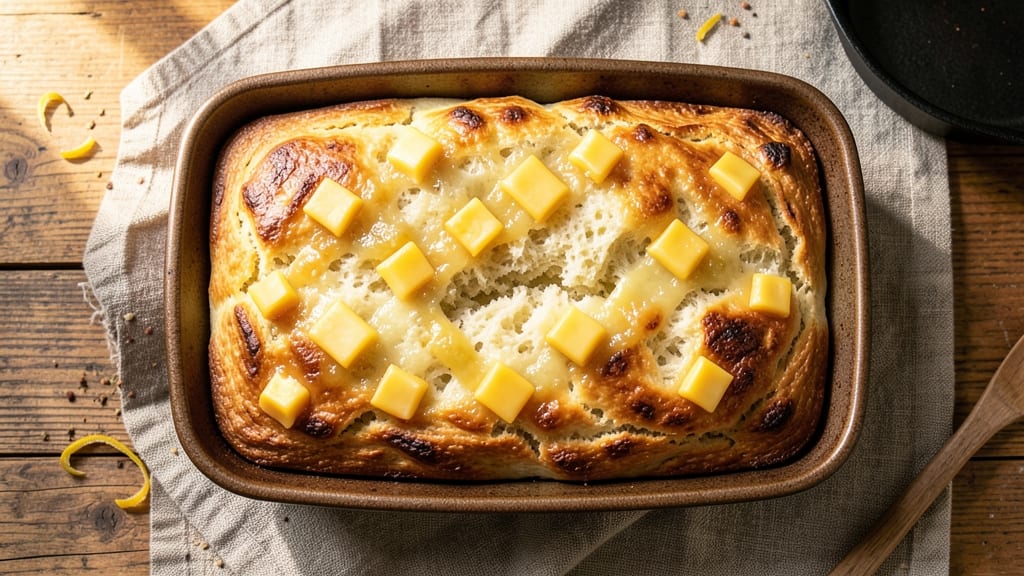
This artisan cheddar cheese bread recipe delivers the perfect balance of chewy, pull-apart texture and sharp, melty cheddar in every bite. The secret lies in a two-stage kneading technique that distributes the cheese evenly without overworking the dough, resulting in a crust that's crispy yet tender.
I developed this recipe after years of testing—because homemade cheese bread should rival anything you'd find in a bakery.
The dough starts with a high-hydration formula that creates that signature open crumb structure, while the sharp cheddar (I recommend aged for maximum flavor) melts into gooey pockets during baking.
What makes this recipe stand out is the cheese pull method: gently stretching the dough before the final proof to create those signature tear-and-share moments. It's a technique that transforms a simple loaf into an impressive centerpiece.
By the time it emerges from the oven, you'll have a golden-brown loaf with a crumbly crust that gives way to tender, cheesy layers inside. The aroma alone is enough to bring everyone to the table—imagine the first pull when warm, with cheese stretching and melting dramatically.
This bread is versatile enough for breakfast toast, a hearty sandwich, or served alongside soups and stews.
The best part? This recipe builds on classic techniques but includes professional shortcuts to ensure success—like proofing in the fridge for better flavor development and using a Dutch oven for that bakery-style crust.
Whether you're feeding a crowd or treating yourself, this cheddar cheese bread delivers restaurant-quality results with every pull.
Ingredients for artisan cheddar cheese bread
Twelve ingredients, one professional technique: the cheese pull method transforms ordinary dough into bakery-worthy cheddar bread.
| Ingredient | Amount | Notes |
|---|---|---|
| All-Purpose Flour 🌾 | 5 cups | High-protein preferred for chewiness |
| Active Dry Yeast 🍞 | ¼ oz | Or 2 packets (2.25 tsp) |
| Granulated Sugar 🍚 | ¼ cup | Feeds yeast, not for sweetness |
| Sharp Cheddar Cheese 🧀 | 2 ½ cups | Aged 12+ months, shredded |
| Unsalted Butter 🧈 | ¾ cup | Cold, cubed, for dough |
| Milk 🥛 | ¾ cup | Warm (110°F) for activation |
| Salt 🧂 | 1 ½ tsp | Diamond Crystal preferred |
| Garlic Powder 🧄 | 1 tsp | Fresh preferred for depth |
| Onion Powder 🧅 | 1 tsp | For savory balance |
| Egg 🥚 | 1 whole | For egg wash |
| Cornmeal 🌽 | ¼ cup | For Dutch oven base |
| Water 💧 | ½ cup | For final dough hydration |
The cheddar is non-negotiable here—aged 12+ months delivers that sharp, tangy depth you crave in artisan bread. Whole Foods and specialty cheese shops carry excellent options, but Kraft sharp cheddar works in a pinch if you're in a hurry. Shred it yourself; pre-shredded packs contain anti-caking agents that prevent proper melting. For the flour, King Arthur or Caputo Tipo 00 create that signature open crumb structure, though all-purpose works fine for home baking. The butter should be cold and cubed—room temperature butter creates steam pockets that weaken the dough structure during kneading.
No aged cheddar? Pepper jack or smoked Gouda add complexity, though the sharpness will differ. Substitute milk with buttermilk for extra tang, or use water plus 1 tsp vinegar. The yeast is critical—if it's old, proof it in warm milk for 5 minutes before adding to flour. For the garlic and onion powders, McCormick brand is reliable, but fresh minced garlic (1 tsp) can replace the powder if you're feeling ambitious. The egg wash isn't just for color—it creates that golden, crisp crust. If you're avoiding eggs, brush with milk mixed with 1 tsp melted butter instead.
This dough is best made 12-18 hours ahead—the slow fermentation in the fridge develops deeper flavor. Store wrapped in plastic in the fridge for up to 3 days, or freeze the shaped loaf for 3 months. For serving, keep wrapped at room temperature for 2 hours before slicing—this allows the cheese to soften and stretch properly. The bread reheats beautifully: wrap slices in foil and warm at 350°F for 5-7 minutes to restore that bakery-fresh texture. Portion into individual slices for easy grab-and-go meals—perfect for breakfast or snacking.
Why You'll Love This Recipe
- No-Knead Magic: I swear by this dough—just mix, let it rise, and it comes together without a single elbow grease moment. The yeast does all the work while I sip my coffee, and by the time I’m ready to shape it, the house smells like a bakery.
- Sharp Cheese Bliss: That first pull-apart bite of gooey, aged cheddar melting into buttery bread? It’s the kind of flavor that makes you pause mid-slice. The sugar caramelizes just enough to balance the tang, and the butter keeps it rich without being heavy.
- Weeknight Hero: This bread is my go-to for lazy dinners—toss it in a pan with a little honey butter for breakfast, or serve it warm with soup when the kids are home. It’s the one thing I never skip planning for, because it always works.
- Budget-Friendly Staple: A block of sharp cheddar and a stick of butter stretch further than you’d think, and the dough freezes beautifully. I make two loaves on Sunday, pop one in the freezer, and have fresh bread all week without extra shopping trips.
Step-by-step instructions for artisan cheddar cheese bread
Master this savory loaf with a golden crust and tender, cheesy interior using precise technique.
Activate the Yeast and Prepare the Dough Base
In a stand mixer fitted with the dough hook attachment, combine the 5 cups all-purpose flour and 1.5 tsp salt. Mix on low speed for 30 seconds to aerate the flour. In a separate bowl, whisk together the 0.75 cup warm milk (110°F), 0.25 cup granulated sugar, and 0.25 oz active dry yeast. Let the yeast mixture sit for 5-10 minutes until foamy—this confirms it's active and ready to work.
Add the yeast mixture to the flour mixture and mix on low speed until combined. Then incorporate the 0.75 cup cold cubed unsalted butter and the 2.5 cups shredded sharp cheddar cheese. The dough will appear shaggy at first, but don't worry—this is normal. Mix on medium speed for 3-4 minutes until the dough begins to come together and pulls away from the sides of the bowl.
Knead Until Smooth and Elastic
Continue kneading on medium speed for 5-7 minutes until the dough is smooth, elastic, and passes the windowpane test. To test, stretch a small piece of dough between your fingers—if it forms a translucent membrane without tearing, it's ready. If the dough feels too sticky, add 1 tablespoon of water at a time until it reaches the proper consistency.
This kneading step is crucial for developing gluten, which gives the bread its structure. The cheese and butter make the dough particularly dense, so you'll need to work it longer than with regular bread dough. Once properly kneaded, the dough should be soft but not sticky, and it should spring back slowly when pressed.
First Rise and Cheese Incorporation
Lightly grease a large mixing bowl with vegetable oil and place the dough inside. Cover the bowl with a damp kitchen towel and let it rise in a warm place for 1-1.5 hours, or until it has doubled in size. The dough should feel light and airy when pressed gently—it should leave a slight indentation but not collapse completely.
After the first rise, punch down the dough to release any air bubbles. On a lightly floured surface, gently stretch the dough into a 12x16-inch rectangle about ½-inch thick. Sprinkle evenly with 1 tsp garlic powder and 1 tsp onion powder, then fold the dough over itself like a letter. This creates layers of flavor that will develop during baking.
Shape and Second Rise
Transfer the folded dough to a parchment-lined baking sheet and shape it into a 12-inch round loaf by pulling the edges toward the center and pinching gently. Brush the top with the 1 whole egg beaten with 1 tablespoon water for a golden finish. Cover loosely with plastic wrap and let it rise for another 45-60 minutes until puffy and nearly doubled in size.
The second rise is shorter because the dough has already developed structure. Look for the top to dome slightly and small bubbles to form on the surface. This is your signal that the dough is ready for the oven. Preheat your oven to 375°F while the dough rises, ensuring it reaches the proper temperature before baking.
Bake with Cornmeal for Crispy Crust
Place a Dutch oven in the preheated oven for 30 minutes to heat thoroughly. Carefully transfer the risen dough to the hot Dutch oven using the parchment paper. Sprinkle 0.25 cup cornmeal evenly over the bottom of the Dutch oven—this creates a crispy, crumbly crust that's characteristic of artisan bread.
Bake covered for 25 minutes, then remove the lid and bake for another 10-15 minutes until the bread is deep golden brown and internal temperature reaches 190-195°F. The crust should be crispy and slightly blistered, while the interior should be soft and chewy. Let the bread cool on a wire rack for 10 minutes before slicing to allow the steam to escape and prevent a gummy texture.
Pro Tips For Making Artisan Cheddar Cheese Bread
- USE COLD BUTTER FOR DOUGH: Mixing the butter into the dough when it’s still cold—just softened enough to press with a finger—keeps the gluten from overworking. I learned this the hard way after ending up with a dense, chewy loaf instead of the tender crumb I wanted, especially with all that sharp cheddar pulling moisture.
- GRATE CHEESE FINE AND DRY: Skip the pre-shredded cheese—it’s coated with anti-caking agents that make the bread gummy. Grate your own sharp cheddar on the finest setting of a box grater, then let it sit in the fridge for 10 minutes to dry out. This prevents a soggy center and lets the flavor shine.
- LET THE DOUGH RISE UNTIL IT’S Almost Ready: Resist the urge to rush the first rise—your dough should puff up to about double its size, then keep rising slowly for another 15-20 minutes. This extra time develops flavor and ensures the cheddar melts evenly instead of pooling at the bottom like a lazy river.
- BAKE WITH STEAM THEN CRISP: Start the bread in a cold oven with a baking sheet of boiling water on the bottom rack for 10 minutes. This creates steam that keeps the cheese gooey and the crust from browning too fast. After 10 minutes, crank the heat to 375°F (190°C) and bake until golden—no peeking, or you’ll dry it out.
Pro cooking tips for this recipe
Cheese Pull Technique
The cheese pull is what transforms this bread from ordinary to showstopping. After the first rise, stretch the dough into a rectangle and sprinkle with garlic and onion powder before folding it like a letter.
This creates pockets of flavor that burst during baking. When ready to shape, gently pull the edges toward the center and pinch—this builds tension that makes the cheese stretch dramatically when pulled apart. 🧀
For the ultimate pull, bake the bread slightly longer than called for (up to 15 minutes uncovered) to ensure the cheese melts completely. The moment it emerges from the oven, let it rest for 3-5 minutes—this allows the cheese to soften and stretch more easily.
Serve warm, and watch as guests tear into it with dramatic, cheesy results.
Dutch Oven Mastery
A Dutch oven is non-negotiable for that bakery-style crust. Preheat it for 30 minutes before adding the dough—this ensures even heat transfer. I use a Le Creuset 5.5-quart for its even heat distribution, but any heavy, enameled Dutch oven works.
The cornmeal on the bottom creates that signature crumbly, crispy crust—don’t skip this step!
When transferring the dough, use parchment paper to slide it in—this prevents sticking and makes removal easier. After baking covered for 25 minutes, uncover and bake for 10-15 minutes until the top is deep golden brown.
The steam trapped under the lid creates a tender crumb, while the final uncovered phase develops that crisp exterior.
Proofing in the Fridge
For deeper flavor, let the dough proof in the fridge overnight (12-18 hours). This slow fermentation develops complex, tangy notes in the cheese and enhances the bread’s texture.
Place the dough in an airtight container and let it rise at 40°F or below. The cold slows yeast activity, creating a more controlled rise and better gluten development.
When ready to bake, bring the dough to room temperature for 1-2 hours before shaping. This prevents shock to the yeast and ensures an even bake. I often shape the dough in the morning and bake it for dinner—this hands-off approach makes it perfect for busy schedules.
The fridge-proofed version has a more pronounced cheddar flavor and a tighter crumb structure.
Egg Wash Secrets
The egg wash isn’t just for color—it creates that golden, crisp crust. Beat 1 whole egg with 1 tablespoon water for a glossy finish. Brush it generously over the shaped dough before the final rise.
For extra shine, add ½ teaspoon honey to the wash—this caramelizes slightly in the oven, adding a subtle sweetness that balances the sharp cheddar.
If you’re avoiding eggs, mix 1 tablespoon melted butter with 1 tablespoon milk for a similar effect. Brush the wash on just before baking—this prevents it from drying out during the long rise.
The wash also helps the bread brown more evenly, especially in the center where the cheese might otherwise steam and pale.
Troubleshooting Sticky Dough
Cheese and butter make this dough sticky, but it’s fixable. If the dough feels too wet after kneading, add 1 tablespoon of flour at a time until it pulls away from the bowl.
Overworking it can develop too much gluten, making the bread dense. Instead, let the dough rest for 5 minutes between kneading sessions—this relaxes the gluten and makes handling easier.
For extra insurance, chill the dough for 15-20 minutes before shaping. Cold dough is firmer and less sticky, making it easier to handle. If the dough tears during shaping, simply press the edges together—it’ll still bake beautifully.
The key is gentle handling—don’t force it, or you’ll deflate the air bubbles you worked so hard to create.
Nutrition facts
Frequently asked questions
Why does this recipe use aged cheddar instead of regular?
The sharp, tangy flavor of aged cheddar (12+ months) creates that signature artisan depth. Regular cheddar lacks the complexity, and pre-shredded cheese contains anti-caking agents that prevent proper melting. For best results, shred your own cheese using a box grater for maximum flavor and texture.
Can I make this bread without a Dutch oven?
Yes, but the crust won't be as crispy. Use a heavy oven-safe skillet or baking stone, and bake at 375°F for 35-40 minutes covered with foil, then uncover for the last 10 minutes. For extra crunch, sprinkle cornmeal on the baking surface before adding the dough. The interior will still be tender, but the crust will be less dramatic.
How do I know when the dough is fully kneaded?
Perform the windowpane test: Stretch a small piece of dough between your fingers. If it forms a translucent membrane without tearing (like a windowpane), it's ready. The dough should also spring back slowly when pressed. For this recipe, knead for 5-7 minutes total—overworking develops too much gluten, making the bread dense.
What's the best way to reheat sliced bread?
Wrap slices in foil and warm at 350°F for 5-7 minutes to restore that bakery-fresh texture. For extra crispiness, broil for 1-2 minutes on high. Never microwave—it makes the cheese rubbery. Store leftovers in an airtight container at room temperature for 2 days or freeze for 3 months.
Can I add other cheeses to this recipe?
Try pepper jack for heat or smoked Gouda for depth. For a sweeter twist, add ½ cup white cheddar or monterey jack. Keep the total cheese to 2.5 cups to maintain proper dough consistency. The key is using sharp, flavorful cheeses—mild varieties won't deliver that artisan punch.