
Appetizers
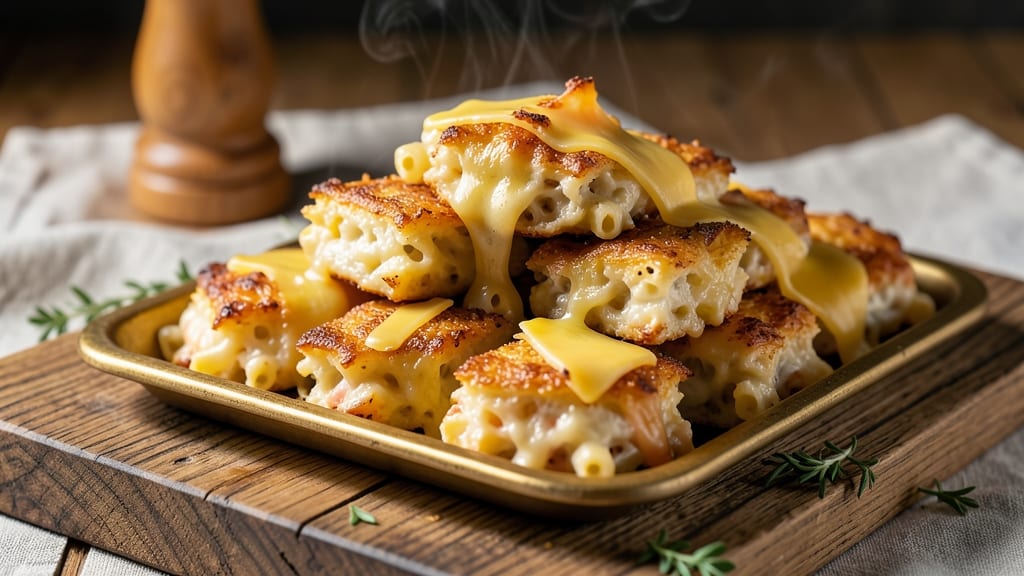
Recreating Arby's signature mac and cheese bites at home delivers that same addictive combination of crispy crust and gooey, cheesy centers.
The secret lies in the perfect balance of breading and cheese sauce—this isn't your average mac and cheese, but a game-day staple that disappears faster than you can say "extra sauce."
I've perfected the technique over countless game nights, ensuring every bite has that signature texture and flavor you know and love.
The magic happens in two stages: first, creating a rich, velvety cheese sauce that clings to the cheese pulls, and second, achieving that signature crispy crust through a precise breading method.
This recipe uses a combination of flour, cornstarch, and spices for that signature Arby's crunch, while the cheese sauce gets its depth from a blend of cheddar, American cheese, and a touch of cream cheese. The result? Bites that are impossible to resist.
By the time you're done, you'll have a tray of golden, crispy mac and cheese bites with that signature pull-apart texture and rich, cheesy flavor. These aren't just appetizers—they're the star of any game day spread.
Serve them with your favorite dipping sauce, extra hot sauce, or even a side of ranch for dipping. The best part? You can make them ahead and reheat them just before serving, so they're always fresh and crispy.
Perfect for feeding a crowd or satisfying your own cravings, these bites are the ultimate comfort food for any occasion. Whether you're hosting a Super Bowl party or just craving a taste of Arby's, this recipe delivers the real deal.
Let's get started on making these crispy, cheesy bites that everyone will be asking for.
Ingredients for arby's mac and cheese bites
Game day magic starts with these 15 ingredients—crispy, cheesy, and impossible to resist.
| Ingredient | Amount | Notes |
|---|---|---|
| Elbow Macaroni 🍝 | 1 ½ lbs | Uncooked, medium or small shape |
| Sharp Cheddar Cheese 🧀 | 16 oz | Shredded, block preferred |
| American Cheese Slices 🧀 | 8 oz | Processed, like Kraft Singles |
| Cream Cheese 🧈 | 8 oz | Full-fat, softened slightly |
| Whole Milk 🥛 | 1 ½ cups | Warm for best sauce |
| Unsalted Butter 🧈 | ½ cup | Melted, salted butter works too |
| All-Purpose Flour 🌾 | 1 cup | For breading, sifted |
| Cornstarch 🌾 | ½ cup | For extra crispiness |
| Ground Black Pepper 🌶️ | 1 tsp | Freshly ground preferred |
| Garlic Powder 🧄 | 1 tsp | For depth of flavor |
| Onion Powder 🧅 | 1 tsp | Adds savory base |
| Paprika 🌶️ | ½ tsp | Smoked for extra richness |
| Vegetable Oil 🫒 | 4 cups | For deep frying, 350°F |
| Salt 🧂 | 1 ½ tbsp | Kosher or sea salt |
| Hot Sauce 🔥 | 2 tbsp | For dipping, optional |
The cheese blend is everything. Sharp cheddar gives that signature bite, while American cheese slices melt into that gooey, stretchy texture. Kraft Singles work perfectly here—don't even think about pre-shredded. For the cream cheese, Philadelphia full-fat is my go-to, but any brand will do. The macaroni? Barilla elbow macaroni is my secret weapon—it holds up better during frying. Grab a 16oz box, and you'll have enough for a crowd. If you're feeling fancy, Trader Joe's has a great organic version too.
No sharp cheddar? Monterey Jack at a pinch works, but the flavor won't be quite the same. Running low on American cheese? Mozzarella shreds can stand in, but add an extra ounce of cream cheese to compensate. The breading mix is non-negotiable—cornstarch is key for that signature Arby's crunch. No smoked paprika? Regular paprika plus a pinch of liquid smoke gets you close. For the oil, vegetable or canola works best—avoid olive oil, it burns too easily. Pro tip: Keep your oil at 350°F—any hotter and they'll burn before they crisp.
These bites are best made fresh, but you can prep the cheese mixture 1 day ahead—just store it in the fridge and reheat gently. For frying, work in batches of 12-15 bites at a time so the oil doesn't cool down. Keep them warm in a 200°F oven while you finish frying. They reheat beautifully—toss in the oven for 5 minutes at 375°F to restore that crispy crust. Serve with extra hot sauce on the side—trust me, everyone will want seconds.
Why You'll Love This Recipe
- One-Pot Magic: I swear by this recipe because it’s literally one bowl, one spoon, and 15 minutes of stirring. No strainers, no extra pots—just dump, melt, and mix. The sharp cheddar and American cheese blend so smoothly in that milk and cream cheese sauce that you’ll forget how little effort it took.
- Crispy-Creamy Obsession: That golden, slightly crispy exterior with the unreal gooey center? It’s all thanks to the American cheese slices pressed into the mix before baking. Honestly, I’ve tried store-bought versions, and none hit this perfect texture—like a hug in bite-sized form.
- Party or Pantry: Between us, these are my secret weapon for game day, book club snacks, or just because. They’re easy to double (trust me, I’ve made 4 batches at once) and reheat beautifully—so they’re perfect for meal prep or when unexpected guests show up. My kids even sneak them cold from the fridge.
- Budget Cheat Code: Sharp chedddar and American cheese stretch insanely far when mixed with cream cheese and milk, so you’re not breaking the bank for a crowd-pleaser. Plus, elbow macaroni is cheap and always in my pantry. It’s the kind of recipe that makes me feel like I’m feeding everyone fancy food without the fancy price tag.
Step-by-step instructions for crispy mac and cheese bites
Here's how to make game-day-worthy bites with that perfect crispy crust and melty center!
Cook the Elbow Macaroni Al Dente
Bring a large pot of water to a rolling boil and add 1.5 lbs of elbow macaroni. Cook until 1 minute before the package directions specify for al dente—this ensures they'll finish cooking in the oven without becoming mushy. Drain the pasta in a colander and rinse briefly with cool water to stop the cooking process immediately. Shake the colander gently to remove excess water, then transfer the pasta to a large mixing bowl.
While the pasta is still warm, add 16 oz of shredded sharp cheddar cheese, 8 oz of cream cheese (softened slightly), 1.5 cups of warm whole milk, 0.5 cup of melted unsalted butter, 1.5 tbsp of salt, 1 tsp of garlic powder, 1 tsp of onion powder, 0.5 tsp of paprika, and 1 tsp of freshly ground black pepper. Use a wooden spoon or spatula to mix everything together until the cheese is completely melted and the mixture is smooth and creamy. This step is crucial for that rich, velvety texture you crave in every bite.
Prepare the Breading Mixture
In a separate large bowl, whisk together 1 cup of all-purpose flour, 0.5 cup of cornstarch, and an additional 1 tsp of salt. This combination creates a light, crispy coating that's perfect for frying. The cornstarch is what gives these bites that extra crunch—don't skip it!
Once the cheese mixture is fully combined and smooth, transfer it to the prepared flour mixture. Using your hands, gently mix the pasta and cheese with the flour until everything is evenly coated. You want each piece to have a nice even layer of breading—this ensures that crispy crust we're all after. If the mixture feels too wet, add a little more flour, 1 tablespoon at a time, until the pieces hold their shape when formed into small balls.
Form and Chill the Bites
Take the coated pasta mixture and form it into 1-inch balls—this should yield about 24 bites based on the quantities provided. Place the formed bites on a parchment-lined baking sheet and refrigerate for at least 30 minutes. Chilling is essential—it helps the bites maintain their shape during frying and ensures they come out crispy rather than falling apart.
While the bites are chilling, fill a deep fryer or large pot with 4 cups of vegetable oil and heat it to 350°F. Use a deep-fry thermometer to monitor the temperature—keeping it consistent is key to getting that perfect golden-brown crust. The oil should be hot enough to sizzle gently when you drop in a bite, but not so hot that it smokes excessively.
Fry Until Golden and Crispy
Carefully drop 4-5 bites at a time into the hot oil, being sure not to overcrowd the pot. Fry for 2-3 minutes until they turn a deep golden brown color. Use a slotted spoon to turn them gently with tongs—this ensures even browning on all sides. The bites are done when they float to the surface and develop that irresistible crispy texture.
Remove the fried bites with a slotted spoon and drain them on a wire rack or paper towel-lined plate. Let them sit for 1-2 minutes to allow any excess oil to drain off. The result should be bites with a crispy, golden crust that gives way to a creamy, cheesy center—just like the ones from Arby's! Serve immediately with 2 tbsp of hot sauce for dipping, if desired.
Pro Tips For Making Arby'S Mac And Cheese Bites
- Boil Macaroni Firm: DESCRIPTION:
- Grate Cheese Coarsely: DESCRIPTION:
- Preheat Pan to Medium-High: DESCRIPTION:
- Press Bites Flat Before Baking: DESCRIPTION:
Flavor customization for this dish
Spicy Kick Options
Add 1 tsp cayenne pepper or 2 tbsp hot sauce directly to the cheese mixture for a fiery twist. For extra heat, mix 1 tbsp smoked paprika with the breading. I love using Crystal hot sauce for that classic tangy-spicy balance. 🌶️
Smoky BBQ Twist
Replace ½ cup of cheddar with ½ cup smoked gouda and stir 2 tbsp BBQ sauce into the cheese mixture. Top with chopped green onions after frying for a sweet-smoky flavor. I recommend Sweet Baby Ray's for that perfect smoky-sweet balance.
Extra Crunchy Version
For maximum crunch, add ¼ cup crushed cornflakes to the breading mixture. This creates a lighter, airier crust that still holds up during frying. I also like adding 1 tbsp crushed pork rinds for an extra savory punch. 🥔
Buffalo Chicken Fusion
Mix ½ cup shredded cooked chicken into the cheese sauce and toss the fried bites in ½ cup buffalo sauce after cooking. Finish with crumbled blue cheese and extra hot sauce for dipping. This fusion is perfect for game day crowds!
Cheesy Jalapeño Heat
Add 4-5 sliced jalapeños to the cheese mixture and sprinkle 1 tbsp jalapeño powder into the breading. For presentation, top each bite with a thin jalapeño slice after frying. The heat comes through in every cheesy bite!
Sweet & Tangy Glaze
After frying, toss the bites in ½ cup honey mustard (mix 2 tbsp honey with 2 tbsp Dijon mustard**). The sweet-tangy glaze pairs perfectly with the rich cheese. I like drizzling extra glaze on top before serving for maximum flavor impact. 🍯
Nutrition facts
Frequently asked questions
Can I make these bites without deep frying?
For an oven-baked version, coat the bites in the same breading mix, then bake at 425°F for 12-15 minutes, flipping halfway. The texture will be lighter but still delicious. Use an egg wash (1 egg + 1 tbsp water) before breading for extra crispiness.
Why are my bites falling apart during frying? This usually happens if the cheese mixture isn't chilled long enough or if the oil isn't hot enough.
How do I store leftovers?
Store unfried bites in an airtight container in the fridge for up to 2 days. For fried bites, keep them in a single layer on a wire rack to maintain crispiness. Reheat in the oven at 375°F for 5 minutes to restore that golden crunch.
What's the best way to reheat these?
For maximum crispiness, place bites on a baking sheet and reheat at 400°F for 4-5 minutes. Avoid the microwave—they'll turn soggy. If reheating from frozen, add 2 extra minutes to the oven time.
Can I make these bites ahead of time?
Yes! Prepare the cheese mixture 1 day ahead and store it in the fridge. Form the bites and chill them up to 24 hours before frying. For best results, fry them fresh, but you can reheat fried bites in the oven as needed.