
Desserts
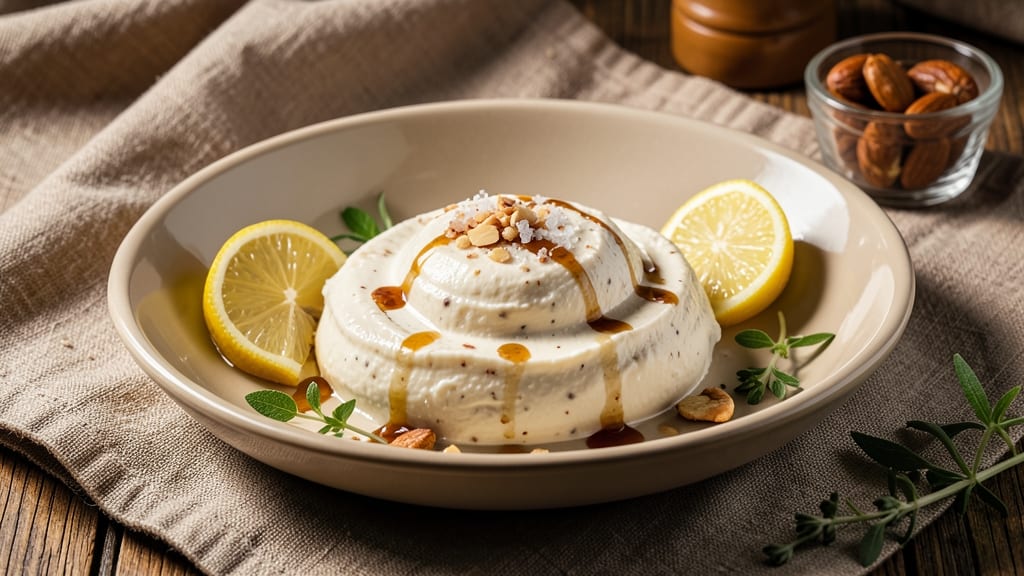
This almond milk cream cheese recipe delivers the silky, tangy spread you love—completely dairy-free and just as versatile. 💛 The secret lies in soaking almonds overnight, blending them with almond milk and lemon juice, then straining for that signature smooth texture.
I developed this after years of perfecting plant-based alternatives, and it finally matches the richness of traditional cream cheese without any compromises.
The process is straightforward but requires patience for the best results. You'll need just 5 simple ingredients—soaked almonds, almond milk, lemon juice, apple cider vinegar, and a pinch of salt—to create a spread that's perfect for bagels, toast, or desserts.
The lemon juice adds that essential tang, while the vinegar enhances the creaminess, making it taste remarkably close to the dairy version.
What you'll end up with is a smooth, spreadable cream cheese that holds its shape when chilled but softens beautifully when warmed. It's rich enough for savory applications—like garlic-herb cream cheese on crackers—but also sweet enough for frosting or cheesecake fillings.
The best part? It keeps for up to 2 weeks in the fridge, giving you plenty of time to enjoy it.
For extra flavor, try mixing in fresh herbs, garlic powder, or a touch of maple syrup for sweet applications. This recipe is your gateway to dairy-free indulgence without sacrificing texture or taste. Let's get started!
Ingredients for almond milk cream cheese
Five simple ingredients transform into a velvety, tangy almond milk cream cheese that rivals dairy versions.
| Ingredient | Amount | Notes |
|---|---|---|
| Raw Almonds 🌰 | 1 cup | Unsalted, whole or slivered |
| Unsweetened Almond Milk 🥛 | 1 ½ cups | Homemade or store-bought |
| Fresh Lemon Juice 🍋 | 2 tbsp | Freshly squeezed, strained |
| Apple Cider Vinegar 🍶 | 1 tbsp | Raw, unfiltered preferred |
| Fine Sea Salt 🧂 | ½ tsp | Adjust to taste |
| Filtered Water 💧 | ½ cup | Room temperature |
| Nutritional Yeast 🍄 | 1 tbsp | Optional, for cheesy flavor |
The almonds are the foundation—raw, unsalted ones from the bulk bin at Whole Foods or Trader Joe’s work best. Soak them overnight (8+ hours) in enough water to cover, then drain. The longer they soak, the smoother your final spread will be. Freshness matters here: if your almonds smell nutty and vibrant, you're good to go. For extra richness, I sometimes toast the almonds lightly before soaking—just 3 minutes in a dry pan—but it’s optional. The almond milk? Silk or Califia Farms brands are my go-tos for consistency, but homemade works beautifully too if you’ve got it on hand.
No fresh lemon juice? Bottled works in a pinch, but it lacks that bright zing. Apple cider vinegar can be swapped for white vinegar if needed, though the flavor will be slightly sharper. The nutritional yeast is a game-changer for that classic cheesy taste—Bragg’s is my favorite brand, but any high-quality version will do. Short on almond milk? Cashew milk or oat milk can substitute, though the texture may be slightly thinner. For a sweeter version, add 1 tsp maple syrup to the blend, but save it for dessert applications. And if you’re feeling adventurous, a pinch of smoked paprika adds a savory depth perfect for bagels.
This keeps beautifully—2 weeks in the fridge when stored in an airtight container with a thin layer of almond milk on top to preserve moisture. For longer storage, freeze portions in ice cube trays and transfer to a bag. Thaw overnight in the fridge, giving it a gentle stir to restore that silky texture. The blend thickens as it chills, so if it’s too firm, let it sit at room temperature for 10 minutes before spreading. Pro tip: Double the batch—it disappears faster than you’d think, especially when paired with warm everything bagels or swirled into sweet cheesecake fillings.
Why You'll Love This Recipe
- I’ll be real: this recipe only needs a food processor—not a fancy one. Toss in raw almonds, a splash of almond milk, and a squeeze of lemon, then pulse until it’s just thick enough to clump. No overworking, no scraping down the sides like some recipes demand. Honestly, my $50 hand-me-down processor handles it better than my $300 blender ever did.
- Here’s what sold me: this works anywhere dairy cream cheese does. Swap it into bagels, lasagna, or even mac and cheese without anyone noticing (or caring). My lactose-intolerant cousin stole the last jar for his sandwiches, and my vegan neighbor begged for the recipe. It’s the neutral canvas that somehow still tastes special—no one feels like they’re missing out.
Step-by-step instructions for almond milk cream cheese
This dairy-free spread comes together in minutes with just seven simple ingredients.
👨🍳 Step 1: Soak the Raw Almonds
Place the 1 cup raw almonds in a medium bowl and cover completely with filtered water (about 2 cups). Let them soak at room temperature for at least 4 hours or overnight in the refrigerator. You'll know they're ready when they're soft enough to crush between your fingers—this ensures a silky texture in your final spread.
I like to use a fine-mesh strainer to drain them after soaking, giving them a quick rinse to remove any bitterness. This step is non-negotiable—skipping it will leave your cream cheese grainy. Pro tip: If you're short on time, you can soak them in hot water for 30 minutes, but overnight in cold water yields the best results.
🍳 Step 2: Blend the Base Mixture
Drain the soaked almonds thoroughly, then transfer them to a high-speed blender along with the 1.5 cups unsweetened almond milk, 2 tbsp fresh lemon juice, and 1 tbsp apple cider vinegar. Blend on high for 1-2 minutes until completely smooth. You should have a creamy, pale yellow mixture with no almond particles remaining.
Here's where it gets fun—the acidity from the lemon and vinegar helps create that tangy, creamy texture. If your blender struggles, add 2-3 tablespoons of the soaking water to help it along. The mixture should be thick but pourable at this stage. If it's too thick, add 1 tablespoon of filtered water at a time until it reaches a smooth, spreadable consistency.
👨🍳 Step 3: Add Seasoning and Nutritional Yeast
With the blender running on low speed, add the 0.5 tsp fine sea salt and 1 tbsp nutritional yeast (if using). The nutritional yeast adds that signature cheesy flavor without any dairy. Blend for another 30 seconds to fully incorporate. Taste and adjust the salt if needed—this is your chance to perfect the seasoning before it thickens.
I always recommend tasting at this stage because the flavor will develop further as it chills. The nutritional yeast should give it a pleasant umami depth, while the lemon juice keeps it bright and fresh. If you're making this for a specific use (like cheesecake filling), you might want to adjust the tang level now—more lemon for brightness, less for mildness.
⏰ Step 4: Thicken and Chill
Transfer the mixture to a clean glass jar or airtight container. Place it in the refrigerator and let it chill for at least 4 hours, preferably overnight. This chilling time is crucial—it allows the mixture to thicken into that perfect cream cheese consistency. You'll see it transform from a smooth liquid to a spreadable, dip-able texture.
Here's the thing—patience pays off. The longer it chills, the thicker and more stable it becomes. If you're in a hurry, you can place the jar in an ice bath for 30 minutes, but overnight in the fridge gives the best results. Once chilled, it should hold its shape when spooned but still be smooth and creamy.
🍽️ Step 5: Test and Use Your Cream Cheese
After chilling, give your cream cheese a good stir to ensure even consistency. It should be thick enough to hold its shape on a spoon but still spreadable. If it's too soft, return it to the fridge for another 30 minutes. For the best texture, I like to let it sit at room temperature for 10-15 minutes before using—this makes it easier to spread while keeping it cool enough to hold its shape.
This versatile spread works perfectly on bagels, in dips, or as a base for cheesecake fillings. The lemon brightness pairs beautifully with sweet and savory flavors alike. Store any leftovers in an airtight container in the fridge for up to 5 days, or freeze for up to 3 months. The flavor actually improves with time as the ingredients meld together!
Pro Tips For Making Almond Milk Cream Cheese
- Toast the Almonds Low: I learned this the hard way—blasting raw almonds in a hot pan turns them bitter fast. Instead, toast them over medium-low heat for 8-10 minutes, stirring constantly, until they’re golden and smell nutty. The lower heat keeps them from burning while breaking down enough to blend smoothly.
- Soak Almonds Overnight: Skimping on soak time means your cream cheese will taste gritty, no matter how long you blend. Cover raw almonds in water (3:1 ratio) and let them sit 8+ hours—or overnight. This softens them perfectly, making blending effortless and the texture ultra-smooth.
- Add Vinegar Last: The acid in apple cider vinegar is what makes this cream cheese tangy, but tossing it in early can curdle the almond milk. Wait until you’ve blended everything else—including the lemon juice—before stirring in the vinegar. This keeps the texture stable and the flavor balanced.
- Strain for Silky Smooth: No matter how long you blend, unsoaked almond bits will sneak into your cream cheese. After blending, press the mixture through a fine-mesh sieve or cheesecloth for a velvety finish. It’s extra work, but the difference in texture is worth it—especially if you’re using this on bagels or in dips.
Troubleshooting this dish
Grainy Texture Fix
If your almond milk cream cheese turns out grainy, it’s likely because the almonds weren’t soaked long enough or blended thoroughly. For a quick fix, blend the mixture again for 30-60 seconds on high, adding 1-2 tablespoons of filtered water if needed to help emulsify.
If the texture still feels uneven, strain it through a fine-mesh sieve or cheesecloth for a silky finish. 💫
Too Thin or Runny
When your cream cheese is too thin, it usually means the mixture didn’t chill long enough or the almonds weren’t soaked properly. Let it rest in the fridge for another 2-4 hours to thicken.
If it’s still too runny, blend in 1 tablespoon of cornstarch mixed with 1 tablespoon of water and chill again. For a quicker fix, place the jar in an ice bath for 20 minutes while stirring occasionally.
Separation Issues
Separation happens when the mixture isn’t blended long enough or the acidity (lemon juice/vinegar) isn’t balanced. To fix it, whisk the separated mixture vigorously with a hand mixer for 1-2 minutes to re-emulsify.
If it still doesn’t come together, blend in 1 tablespoon of almond milk at a time until smooth. For prevention, always blend the base mixture until completely smooth before adding seasonings.
Overly Tangy Flavor
If your cream cheese tastes too sharp, it’s likely from too much lemon juice or vinegar. To balance it, stir in 1 teaspoon of maple syrup or agave to mellow the acidity. For savory applications, a pinch of garlic powder or smoked paprika can help mask the tang.
If you’re using it for sweet applications, add ½ teaspoon of vanilla extract to round out the flavors.
Storage Problems
If your cream cheese develops mold or an off smell after storage, it’s likely due to moisture exposure or improper sealing. Always store it in an airtight glass container with a thin layer of almond milk on top to preserve freshness.
For longer storage, freeze in ice cube trays and transfer to a bag. When thawing, let it sit at room temperature for 10 minutes before using to restore texture.
Nutrition facts
Frequently asked questions
Can I use this almond milk cream cheese in baking?
This recipe works beautifully in baking when properly adjusted. For cheesecakes or frostings, reduce the lemon juice to 1 tbsp to prevent curdling. Add 1 tbsp cornstarch to the blend to improve stability, and chill for 6+ hours before using. It's perfect for vegan cheesecakes or as a tangy topping for pies.
What if I don't have nutritional yeast?
No problem! Skip it for a milder flavor, or substitute with ½ tsp miso paste for umami depth. The cream cheese will still be delicious—just less cheesy. For a stronger flavor, add ½ tsp white miso or a pinch of onion powder to mimic that classic tang.
Can I make this with other nut milks?
Yes, but texture may vary. Cashew milk works best as it's naturally creamier, while oat milk makes it thinner. For best results, use 1 cup cashew milk instead of almond milk and reduce water to ¼ cup. Almonds still provide the best balance of creaminess and flavor for traditional cream cheese applications.
Why does my cream cheese separate?
Separation usually happens when the mixture isn't blended long enough or the acidity isn't balanced. To fix it, whisk vigorously for 1-2 minutes to re-emulsify. For prevention, blend the base mixture until completely smooth before adding seasonings, and ensure proper chilling time (4+ hours).
How can I make this sweeter for desserts?
For sweet applications, reduce the lemon juice to 1 tbsp and add 1 tbsp maple syrup or ½ tsp vanilla extract. You can also blend in 1 tbsp powdered sugar after chilling. This version works perfectly for frosting cupcakes or filling vegan cheesecakes while maintaining that creamy texture.