
Beverages
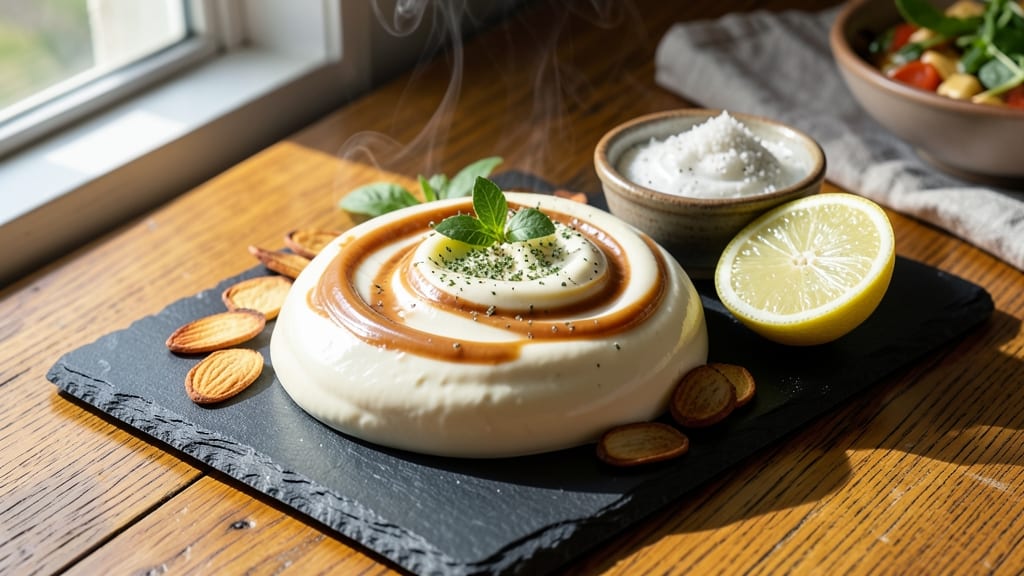
This almond milk cheese recipe transforms simple pantry staples into a nutty, velvety spread that melts perfectly into pasta, dips, or baked dishes—without a single drop of dairy. 🌱 After years of testing plant-based alternatives, I developed this foolproof method that delivers the same creamy, stretchy texture you crave, but with all the richness of almonds and cashews.
The secret lies in blending soaked nuts with nutritional yeast and almond milk until it reaches that signature smooth, almost-buttery consistency.
What makes this recipe stand out is its versatility—use it as a pasta sauce with a sprinkle of garlic and black pepper, a dip for veggie sticks, or even a cheesy topping for baked potatoes or nachos.
The blend of cashews and almonds creates a rich, slightly sweet flavor that mimics aged cheddar, while nutritional yeast adds that unmistakable umami depth. Unlike store-bought vegan cheeses, this version is customizable—adjust the spice level or add herbs to match your favorite dish.
The process is simpler than you’d expect: soak the nuts overnight (or use quick-soak methods), blend with almond milk and seasonings, then simmer until silky smooth. No special equipment is needed—just a high-speed blender and a little patience.
The result? A creamy, spreadable cheese that holds its shape when melted and adds a luxurious finish to any plant-based meal. Whether you're vegan, lactose intolerant, or just curious, this recipe proves dairy-free can taste indulgent.
Ready in just 30 minutes (plus soaking time), this almond milk cheese is perfect for weeknight dinners, meal prep, or entertaining. Store it in the fridge for up to 5 days or freeze for longer shelf life. Let’s get started—your taste buds (and your plant-based dishes) will thank you.
Ingredients for almond milk cheese
Pantry staples and soaked nuts create this ultra-creamy, dairy-free cheese alternative.
| Ingredient | Amount | Notes |
|---|---|---|
| Raw Cashews 🥜 | 1 cup | Unsalted, soaked overnight |
| Raw Almonds 🌰 | ½ cup | Unsalted, soaked overnight |
| Unsweetened Almond Milk 🥛 | ¾ cup | Plain, unsweetened variety |
| Nutritional Yeast 🍃 | ½ cup | Fortified, for cheesy flavor |
| Lemon Juice 🍋 | 1 tbsp | Freshly squeezed, for tang |
| White Miso Paste 🍜 | 1 tbsp | For umami depth |
| Garlic Powder 🧄 | 1 tsp | Freshly ground preferred |
| Onion Powder 🧅 | ½ tsp | For savory base |
| Turmeric Powder 🌿 | ¼ tsp | For color and earthiness |
| Salt 🧂 | ½ tsp | Diamond Crystal kosher |
| Black Pepper 🌶️ | ¼ tsp | Freshly cracked |
| Olive Oil 🫒 | 1 tbsp | Extra-virgin for richness |
| Water 💧 | ¼ cup | For blending consistency |
| Tapioca Starch 🍚 | 1 tsp | For stretchy texture |
The nuts are the heart of this recipe. Raw, unsalted cashews and almonds from Trader Joe's or bulk bins deliver the best texture—no need to buy fancy brands, just avoid anything pre-roasted or salted. Soaking overnight is key (or use the quick-soak method with boiling water), but don't skip it—drained nuts blend into a silky base. For extra richness, I always toast the nuts lightly before soaking, which deepens their flavor without burning. The nutritional yeast? Bragg or Bob's Red Mill are my go-tos—they've got that perfect cheesy punch, but check the label for fortified versions if you're watching your vitamin B12.
No cashews? Walnuts or macadamias work in a pinch, though the texture will be slightly denser. Short on almond milk? Oat milk or coconut milk both blend smoothly, but almond milk keeps the flavor closest to traditional cheese. The miso paste is non-negotiable for that savory depth—white miso from Japan is ideal, but any good-quality miso will do. Want more tang? Add another tablespoon of lemon juice. For a smokier profile, swap half the nutritional yeast for smoked paprika. The tapioca starch is your secret weapon for that stretchy, melty quality—don't skip it, even if you're not used to vegan cooking.
Store this cheese in an airtight container with a thin layer of olive oil on top to preserve freshness—it keeps for 5-7 days in the fridge. For longer storage, portion into ice cube trays and freeze for up to 3 months. When reheating, microwave in 10-second bursts to prevent clumping. Pro tip: If it gets too thick after refrigeration, just whisk in a splash of warm almond milk. This cheese reheats beautifully—perfect for last-minute pasta dishes or unexpected guests. The leftovers make amazing grilled cheese sandwiches when paired with vegan bread and a sprinkle of turmeric for color.
Why You'll Love This Recipe
- No-Soak Required: I’ll be real—soaking nuts used to stress me out. This version skips it entirely by blending raw cashews and almonds with warm almond milk until silky smooth. Five minutes, no waiting.
- Umami Bomb: That nutritional yeast? It’s the secret weapon—savory, cheesy, and packed with that something that makes you go back for more. A squeeze of lemon juice brightens it up, so it’s never flat or boring.
- Pantry Staple Magic: Honestly, I keep these ingredients stocked just for this. The cashews and almonds are my go-to, the milk is always on hand, and the yeast gives it that rich depth without needing a fancy cheese drawer.
- Melts Like Butter: Between us, this cheese actually melts—perfect for toasting, blending into sauces, or sprinkling on soups. I’ve had it last a week in the fridge (yes, really) and still taste fresh, saving me from last-minute store runs.
Step-by-step instructions for almond milk cheese spread
Here's how to blend these soaked nuts into a creamy, melty cheese alternative.
👨🍳 Step 1: Drain and Toast the Soaked Nuts
First, drain the soaked 1 cup raw cashews and 0.5 cup raw almonds using a fine-mesh strainer. I press gently on the nuts with my fingers to squeeze out excess water—this prevents a watery blend later. Spread the drained nuts on a clean kitchen towel and pat them dry completely.
Next, transfer the nuts to a dry skillet over medium heat. Toast them for 5-6 minutes, stirring constantly, until they release their nutty aroma and turn a few shades darker. This step deepens the flavor and removes any raw taste. Watch closely—they burn quickly once they start browning. Immediately transfer the toasted nuts to a high-speed blender once they're fragrant and golden.
🍳 Step 2: Blend the Base Ingredients
Add the toasted nuts to your blender along with the 0.75 cup unsweetened almond milk, 0.5 cup nutritional yeast, 1 tbsp lemon juice, 1 tbsp white miso paste, 1 tbsp olive oil, 0.25 cup water, 1 tsp tapioca starch, 1 tsp garlic powder, 0.5 tsp onion powder, 0.25 tsp turmeric powder, 0.5 tsp salt, and 0.25 tsp black pepper. Here's the thing—don't skip the tapioca starch. It's what gives this spread that melt-in-your-mouth stretchiness that mimics real cheese.
Blend on high speed for 1-2 minutes until completely smooth. You'll notice the mixture thickens as it blends, then suddenly becomes creamy. If it looks too thick, add 1 tablespoon water at a time until it reaches a smooth, pourable consistency. The blend should coat the back of a spoon and have a velvety texture—this is your target consistency.
🔥 Step 3: Heat and Thicken the Mixture
Transfer the blended mixture to a small saucepan and place it over medium-low heat. Stir constantly with a silicone spatula, scraping the bottom and sides to prevent sticking. Heat for 8-10 minutes until the mixture thickens enough to coat the back of the spoon. You're looking for a smooth, spreadable consistency—not gluey, but definitely thicker than when you started.
Here's where the magic happens: as it heats, the tapioca starch activates, creating that signature cheesy stretch. The turmeric will give it a beautiful golden hue, and the miso paste adds that deep umami flavor that makes this taste so satisfying. Keep stirring—this prevents burning and ensures even heating throughout.
⏰ Step 4: Cool and Set the Cheese Spread
Remove the saucepan from heat and let the mixture cool for 5 minutes. Pour it into a clean glass jar or airtight container. I like to press a piece of parchment paper directly on the surface before sealing—the paper prevents a skin from forming while it sets.
Refrigerate for at least 2 hours (or up to 2 days) to allow the flavors to meld and the texture to firm up slightly. This chilling step is crucial—it lets the starch fully gel and the flavors develop. When you're ready to use it, give the jar a good shake to re-emulsify if it has separated slightly. The final texture should be smooth, spreadable, and just firm enough to hold its shape when sliced.
🍽️ Step 5: Use and Store Properly
This cheese spread is incredibly versatile. Use it as a melt on toasted bread, blend it into pasta sauces, or spread it on crackers with fresh herbs. For best results, use it within 5 days of making it. Store any leftovers in an airtight container in the refrigerator.
If you want to make it ahead, this is one of those recipes that actually improves with time—the flavors deepen and the texture becomes even more luxurious. The key is keeping it refrigerated until ready to use. When you're ready to serve, let it sit at room temperature for 10-15 minutes before using so it's perfectly spreadable and melts beautifully.
Pro Tips For Making Almond Milk Cheese
- Soak the Nuts Properly: I learned this the hard way—skipping the soak or rushing it leaves you with a gritty, unappetizing cheese. Toss raw cashews and almonds in hot water for 15 minutes (no boiling), then drain and rinse thoroughly—the residual soaking water makes the blend gummy if you’re lazy about this step. Trust me, your blender will thank you.
- Blend in Stages: Start with just the soaked nuts and lemon juice—blend until it’s a smooth paste before adding almond milk. Dumping everything in at once clogs high-speed blenders (yes, even the fancy ones) and wastes time scraping the sides. Add the milk gradually, stopping to scrape as needed—this keeps the motor happy and the texture silky.
- Don’t Skimp on Yeast: Nutritional yeast isn’t just for flavor—it’s the glue that makes this cheese hold together when melted. Use the full recommended amount (usually 2-3 tablespoons) and let it bloom in the warm almond milk for 5 minutes before blending. I was skeptical until I tried it: the cheese now sticks to pasta and toasts like a dream.
- Chill Before Using: Freshly made almond milk cheese is soft and spreadable—great for sauces but useless for grating or slicing. Pop it in the fridge for at least 2 hours (or overnight) to firm up. Pro move: Shape it into a log or patties while cold for easy slicing later. (Your future self will curse you if you skip this.)
Pro cooking tips for this dish
Soak Like a Pro
Forget the overnight soak if you're short on time—I use the quick-soak method with boiling water. Place the 1 cup cashews and 0.5 cup almonds in a bowl, cover with freshly boiled water, and let them sit for 15 minutes.
Drain and rinse thoroughly before toasting. This cuts prep time by 8 hours without sacrificing texture. Just be sure to pat them completely dry afterward to avoid a watery blend. 💡
Blender Power
Your blender makes all the difference here. A high-speed blender like Vitamix or Ninja will give you that ultra-smooth, velvety texture, but even a good countertop model works if you pulse in 10-second bursts between additions.
The key is blending in stages—first the dry ingredients, then the liquids. This prevents clumping and ensures everything emulsifies properly. If your blend looks grainy, add 1 tablespoon almond milk at a time until silky. 🌟
Heat Control
Medium-low heat is your friend during the thickening stage. Too high, and your cheese will burn on the bottom before the starch activates. I stir constantly with a heatproof silicone spatula, scraping the sides every 30 seconds.
The mixture should thicken gradually—if it starts to separate, whisk in 1 teaspoon tapioca starch mixed with 1 tablespoon water to rescue it. This step is where the magic happens, so don't rush it! ⏰
Texture Secrets
The tapioca starch is non-negotiable for that melty, stretchy quality, but don't overlook the olive oil either. It adds richness and prevents the cheese from drying out. For an extra-smooth finish, I press the cooled mixture through a fine-mesh sieve before storing.
This removes any remaining lumps and gives it that restaurant-quality consistency. Store it in a glass jar with a tight lid to maintain freshness. 💪
Flavor Boosters
Want to customize? Swap ½ teaspoon turmeric for ½ teaspoon smoked paprika for a smoky flavor, or add ½ teaspoon onion powder and ½ teaspoon mustard powder for a tangier kick.
For a creamy, spreadable cheese, blend in 2 tablespoons vegan butter at the end. The possibilities are endless—let your taste buds guide you! 🌶️
Storage Hacks
This cheese keeps beautifully in the fridge for 5-7 days in an airtight container. For longer storage, portion into ice cube trays, freeze, then transfer to a freezer bag. Thaw overnight in the fridge and shake gently to re-emulsify.
To reheat, microwave in 10-second bursts until warm—this prevents clumping. Pro tip: Add a thin layer of olive oil** on top before sealing to preserve moisture and flavor. ❄️
Nutrition facts
Frequently asked questions
Can I make this almond milk cheese without soaking the nuts?
While possible, soaking is critical for that ultra-smooth texture. If you skip it, blend the nuts for 3-4 minutes with extra almond milk to compensate—but expect a slightly grainier result. For the quickest method, use boiling water for a 15-minute soak instead of overnight.
What’s the best way to use this cheese spread?
This versatile spread works perfectly as a pasta sauce (toss with garlic and herbs), a grilled cheese sandwich (spread on toasted bread), or a dip for veggies. For baked dishes, brush it on potatoes or sprinkle over casseroles before baking. The possibilities are endless!
Why did my cheese spread get grainy?
Graininess usually means the nuts weren’t blended long enough or the mixture was too thick. Fix it by adding 1-2 tablespoons almond milk and blending again. For extra smoothness, strain the mixture through a fine-mesh sieve before storing. Always blend on high speed!
Can I make this cheese without tapioca starch?
Tapioca starch is key for that melty, stretchy texture—but if you’re out, try arrowroot powder or cornstarch in the same amount. Without it, the cheese will be creamier but less "cheesy." For a richer version, blend in 2 tablespoons vegan butter at the end.
How do I make this cheese spicier or smokier?
For heat, add ½ teaspoon cayenne or 1 teaspoon smoked paprika to the blend. For smokiness, swap half the nutritional yeast for smoked nutritional yeast or add ½ teaspoon liquid smoke at the end. Adjust to taste—this cheese is fully customizable!