
Appetizers
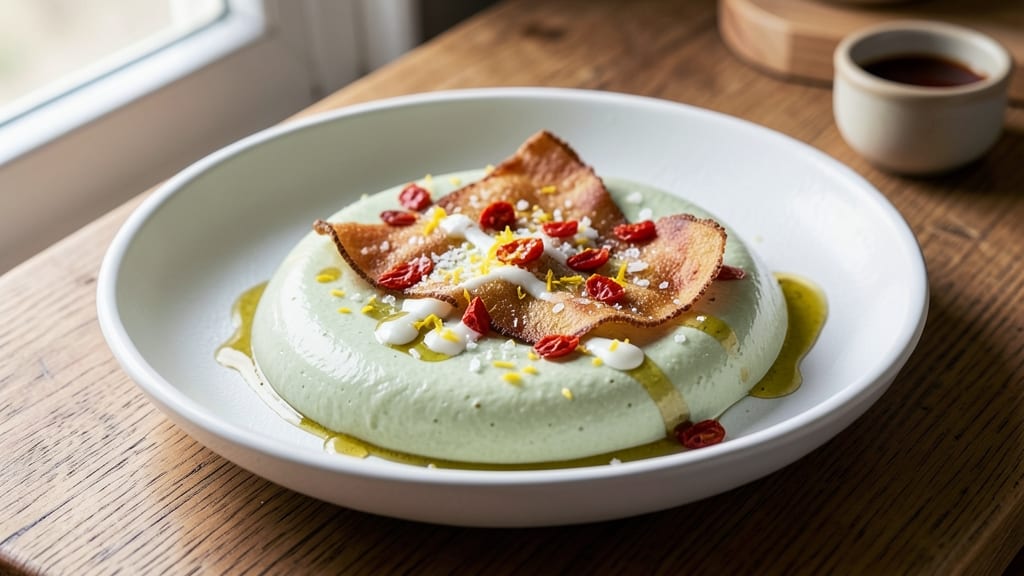
This agar agar cheese recipe delivers a silky-smooth vegan dip that mimics the best of traditional cheese without dairy. The secret lies in agar agar—a plant-based thickener that creates that perfect creamy yet firm texture, ideal for spreading or slicing.
I developed this recipe after years of experimenting, and it’s now my go-to for plant-based gatherings where texture matters as much as flavor.
The beauty of agar agar is its ability to transform simple ingredients into something rich and satisfying. Unlike tofu or cashew-based cheeses, this version holds its shape when chilled while still offering that velvety melt-in-your-mouth quality.
The recipe uses minimal ingredients—just a few staples you likely already have—and requires no special equipment beyond a saucepan and a bowl.
What you’ll end up with is a versatile vegan cheese that can be served as a dip, spread on crackers, or even sliced for charcuterie boards. The flavor is neutral enough to pair with herbs, spices, or citrus, but it’s rich enough to stand alone.
Best of all, it sets firmly when refrigerated, making it perfect for meal prep or last-minute entertaining.
Whether you’re vegan, lactose intolerant, or simply looking to expand your plant-based repertoire, this recipe proves you don’t need dairy to achieve that restaurant-quality cheese experience. Let’s get started—your taste buds (and guests) will thank you.
Ingredients for agar agar cheese
Just 12 ingredients transform agar agar into restaurant-quality vegan cheese—creamy, firm, and utterly addictive.
| Ingredient | Amount | Notes |
|---|---|---|
| Agar Agar Powder 🌿 | 1 ½ tbsp | High-quality, pure agar agar |
| Unsweetened Almond Milk 🥛 | 1 ½ cups | Vanilla or plain, unsweetened |
| Raw Cashews 🥜 | ½ cup | Soaked 2+ hours for creaminess |
| Nutritional Yeast 🧀 | ¼ cup | Fortified for cheesy flavor |
| Lemon Juice 🍋 | 1 tbsp | Freshly squeezed |
| White Miso Paste 🍶 | 1 tbsp | For umami depth |
| Apple Cider Vinegar 🍎 | 1 tsp | Balances flavors |
| Sea Salt 🧂 | ½ tsp | Diamond Crystal preferred |
| Black Salt (Kala Namak) 🌶️ | ¼ tsp | Optional for sulfuric tang |
| Extra-Virgin Olive Oil 🫒 | 1 tbsp | For richness |
| Water 💧 | ¼ cup | Adjust for desired consistency |
| Freshly Ground Black Pepper 🌶️ | ¼ tsp | Freshly cracked |
Agar agar is the game-changer here—look for pure, food-grade powder at health food stores or online (I swear by NOW Foods brand). The cashews need soaking—2+ hours in hot water—for that velvety texture, but if you're in a rush, blend them with the almond milk first. Nutritional yeast is non-negotiable for that authentic cheesy punch; Bob's Red Mill makes the best fortified version. For the miso, grab white miso paste from the Asian aisle—it's milder and won't overpower the delicate flavors. The black salt adds that signature 'egg-like' tang, but skip it if you prefer a cleaner taste.
No agar agar? Kappa carrageenan works at half the amount, though texture won't be identical. Swap almond milk for soy or oat milk if nut-free is a must, but cashews are irreplaceable for creaminess. Running low on nutritional yeast? Dried mushrooms powder adds depth, though it lacks the umami kick. The lemon juice can be bottled, but fresh is always better—it brightens everything. For a sharper flavor, add a pinch of smoked paprika to the mix. This cheese sets beautifully when chilled, so plan ahead if you're serving it sliced—it needs at least 2 hours to firm up properly.
Store the set cheese in an airtight container with parchment between layers to prevent sticking—it keeps for up to 2 weeks in the fridge. For longer storage, portion into silicone molds and freeze; thaw overnight in the fridge. The texture changes slightly after freezing (more crumbly), but it's perfect for melting over dishes. Make extra—this stuff disappears fast at parties. I always double the batch and give half away; everyone wants the recipe after tasting it.
Why You'll Love This Recipe
- No Blender Needed: Honestly, I’ll admit—this is one of those recipes where you can skip the blender if you’re in a rush. Soak the cashews overnight, then pulse them in a food processor until they’re almost smooth. The texture still comes out rich, and honestly? No one will guess you didn’t blend it to perfection.
- Umami Bomb: Between us, nutritional yeast is the unsung hero here. That lemon juice brightens it up, but the yeast? It’s like a cheesy, savory hug. Spread it on toast, toss it in pasta, or melt it into soups—it’s the kind of flavor that makes you go back for seconds without even thinking.
- Weeknight Meal Prep: I make a big batch on Sundays and keep it in the fridge for snacks or quick meals. The agar agar sets it up like a firm vegan cheese, so you can slice it, cube it, or crumble it over anything. No reheating required—just grab and go.
- Budget-Friendly Luxury: Cashews and agar agar might sound fancy, but they stretch so far. A single batch feeds my family for days, and the almond milk keeps it light without breaking the bank. Plus, no dairy means no spoilage—it lasts longer than store-bought cheese, every time.
Step-by-step instructions for agar agar cheese recipe
This silky-smooth vegan dip delivers restaurant-quality texture with no dairy substitutes.
Soak and Blend the Cashew Base
Start by draining and rinsing the soaked 0.5 cup raw cashews thoroughly. Transfer them to a high-speed blender along with the 1.5 cups unsweetened almond milk, 1 tbsp extra-virgin olive oil, and 0.25 cup water. Blend until completely smooth, scraping down the sides as needed—this ensures no gritty texture in your final dip.
Here's the thing—cashews should blend into a creamy, almost custard-like consistency. If it looks too thick, add 1-2 tablespoons more almond milk until it reaches a velvety smoothness. The goal is to create a neutral base that will later transform into rich, cheesy goodness when we add the flavor elements.
Infuse Flavor with Umami and Acid
Add the 0.25 cup nutritional yeast, 1 tbsp white miso paste, 1 tbsp lemon juice, 1 tsp apple cider vinegar, 0.5 tsp sea salt, 0.25 tsp black salt (kala namak), and 0.25 tsp freshly ground black pepper to the blender. Blend again for 30 seconds until all ingredients are fully incorporated and the mixture is completely smooth.
This is where the magic happens—the nutritional yeast gives that classic cheesy flavor, while the miso and vinegar add that perfect umami depth. The black salt contributes a subtle eggy sulfur note that's characteristic of high-quality cheese. Taste at this stage—you should detect a complex balance of tangy, salty, and savory flavors without any bitterness.
Thicken with Agar Agar for Perfect Texture
Transfer the blended mixture to a medium saucepan and place over medium heat. Sprinkle the 1.5 tbsp agar agar powder evenly over the surface—this prevents clumping. Stir constantly for 3-5 minutes until the mixture reaches a gentle simmer and thickens noticeably. The agar agar needs to fully hydrate and activate.
Don't walk away during this process—agar agar can burn quickly if unattended. You'll know it's ready when the mixture becomes thick and glossy, almost like a pudding. It should coat the back of a spoon and hold its shape when you run a finger through it. If it's still too thin, simmer for another 1-2 minutes—but don't overcook or it'll become grainy.
Pour and Set for Firm Cheese Texture
Immediately pour the hot mixture into a 4-inch square or round dish (or individual ramekins for portion control). Tap the dish gently on the counter to remove any air bubbles from the surface. Let it cool at room temperature for 1 hour, then refrigerate for at least 4 hours or until completely firm.
This cooling process is absolutely critical—the agar agar needs time to fully set and develop that perfect cheese-like firmness. Don't be tempted to rush it in the fridge; patience here ensures your dip will slice cleanly and hold its shape when serving. The texture should be firm enough to cut with a knife but still have that luxurious melt-in-your-mouth quality when warmed slightly.
Serve Warm or Cold with Confidence
Once fully set, remove the agar agar cheese from the mold and slice into ¼-inch thick pieces using a sharp knife. For the best texture, warm the slices gently in the microwave for 10-15 seconds before serving—this reactivates the agar agar slightly for that authentic cheesy melt.
Serve immediately with toasted baguette slices, warm pretzels, or fresh vegetables. The contrast between the firm exterior and creamy interior will impress even the most skeptical cheese lovers. Store any leftovers in the fridge for up to 5 days, reheating gently before serving to maintain that perfect texture.
Pro Tips For Making Agar Agar Cheese
- Whisk the agar first: Mix the agar agar powder directly into the warm almond milk—before adding anything else—until it’s fully dissolved. I learned this the hard way: clumps later mean grainy cheese, and nobody wants that. Use a small whisk or fork, and let it sit for 1-2 minutes to hydrate properly.
- Soak cashews overnight: Skip the quick-soak if you’re in a rush, but your cheese will taste flatter and denser. Cover raw cashews in water for at least 6 hours (or overnight) to soften them completely—this makes blending smoother and the final texture creamier. Trust me, your blender will thank you.
- Strain the mixture: After blending, pour the cheese through a fine-mesh sieve or nut milk bag to remove any gritty bits. I used to skip this, and the result was a slightly scratchy texture. It’s a little extra work, but the payoff is a silky-smooth spread every time.
- Acidify before setting: Add the lemon juice after the mixture cools to just under boiling, not before. Agar agar sets best in a slightly acidic environment, but too much acid too early can weaken its gelling power. A splash of lemon juice at the right moment keeps the cheese firm and tangy.
Flavor customization for this recipe
Herb-Infused Variations
Transform your agar agar cheese into a herb garden delight by blending in 2 tbsp chopped fresh herbs like chives, dill, or basil during the final blending stage.
For a Mediterranean twist, add 1 tsp dried oregano and ½ tsp garlic powder—this creates a perfect pairing for grilled vegetables or crusty bread. I love this variation for summer gatherings where fresh herbs elevate every bite. 🌿
Spicy Kick Options
Add heat with ½ tsp smoked paprika and ¼ tsp cayenne pepper for a smoky, fiery version that pairs beautifully with roasted sweet potatoes or warm naan.
For a milder but still spicy option, blend in 1 tbsp finely chopped jalapeño or ½ tsp chipotle powder—this adds depth without overwhelming the delicate cheese texture. Trust me, your guests will ask for seconds.
Citrus Zest Brighteners
Boost brightness with 1 tsp grated lemon zest or orange zest during the blending stage—this cuts through the richness and adds a refreshing twist. For a tropical vibe, mix in ½ tsp ground turmeric and ¼ tsp cinnamon with the zest.
This variation shines when served with fresh fruit platters or warm spiced nuts. The citrus also helps balance any overly savory notes in the cheese. ✨
Umami Bomb Upgrades
Deepening the umami flavor is easy—add 1 tbsp tahini or 1 tsp soy sauce to the initial blend for a richer, more complex base. For a mushroom lover’s version, blend in 2 tbsp finely chopped shiitake mushrooms (soaked in hot water first) or 1 tsp mushroom powder.
This works wonders on garlic toast or roasted Brussels sprouts. The extra umami makes it irresistible. 🍄
Sweet and Tangy Twists
For a dessert-friendly version, reduce the lemon juice to ½ tbsp and add 1 tbsp maple syrup or agave nectar to the initial blend. Stir in ½ tsp vanilla extract and a pinch of cinnamon for a cheesecake-like texture that’s perfect for fruit toppings.
This sweetened version is a crowd-pleaser at holiday parties—just be sure to label it as a dessert option! 🍯
Smoky and Charred Notes
Infuse smokiness by adding ½ tsp liquid smoke or 1 tbsp finely chopped smoked paprika to the initial blend. For a charred flavor, lightly toast 1 tsp sesame seeds in a dry pan and blend them in—this adds a nutty, toasted depth.
This version pairs perfectly with grilled meats or smoky BBQ dishes. The charred notes make it feel like a gourmet upgrade. 🔥
Nutrition facts
Frequently asked questions
Can I make this agar agar cheese without cashews?
Yes, but the texture will be less creamy. For a nut-free version, use ½ cup cooked and cooled chickpeas or ½ cup silken tofu instead of cashews. Blend until completely smooth to avoid any graininess. The flavor will be slightly different but still delicious when paired with herbs or spices.
Why does my agar agar cheese turn out too soft? This usually happens when the agar agar isn't fully activated or the mixture didn't cool properly.
How can I make this cheese meltable like traditional cheese?
This recipe is designed to be firm for slicing, but you can create a meltable version by reducing the agar agar to 1 tbsp and adding 1 tbsp tapioca starch to the blend. Heat the mixture gently after pouring to activate the starch, then let it cool completely. This version works best for melting over dishes or toasting.
Can I use this cheese in savory dishes like lasagna?
While this recipe is perfect for dips and spreads, it's not ideal for layered dishes like lasagna due to its firm texture. For baking applications, try a agar agar-based ricotta recipe with more liquid and less agar agar. This version holds its shape better when sliced but won't melt or blend like traditional cheese in cooked dishes.
How do I store leftovers to maintain texture?
Store any remaining cheese in an airtight container with parchment paper between layers to prevent sticking. It keeps well in the fridge for 5 days. For longer storage, portion into silicone molds and freeze. Thaw overnight in the fridge—microwaving can make it too soft. The texture will be slightly more crumbly after freezing but still delicious.