
Appetizers
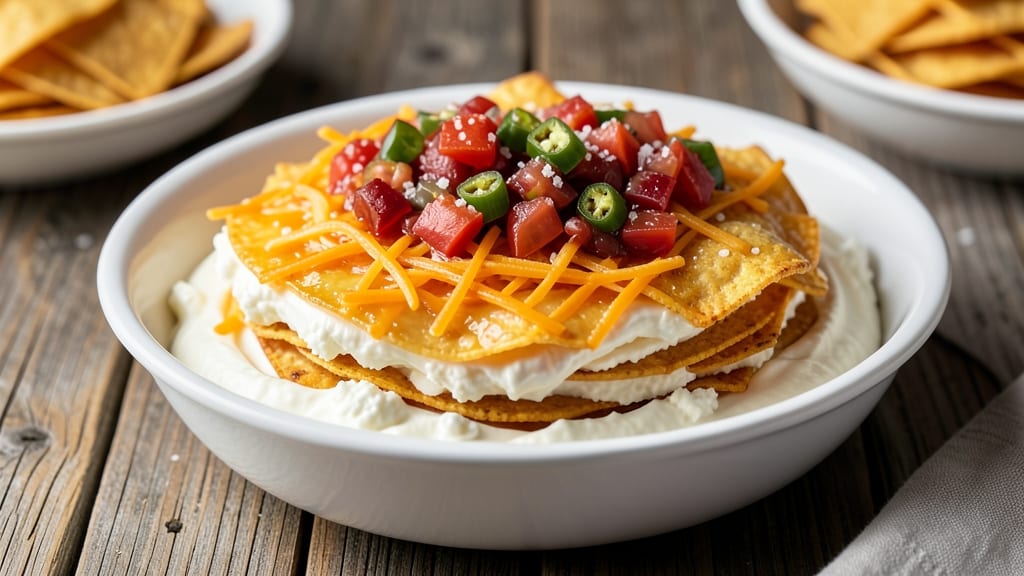
This seven layer cheese dip recipe transforms any gathering into a cheesy celebration—creamy, rich, and impossible to resist. 🔥 The secret lies in carefully layered ingredients that bake into a golden, bubbling masterpiece, perfect for parties where the appetizer table never stays full.
I’ve perfected the technique over years of hosting, ensuring every layer stays distinct yet melds into one velvety, melt-in-your-mouth experience.
The beauty of this recipe is its simplicity: just seven ingredients stacked in the right order, baked to perfection, and ready to serve with chips, crackers, or fresh veggies. No fancy equipment needed—just a baking dish and patience for the layers to set.
The result? A dip so creamy and flavorful that guests will keep reaching for seconds (or thirds).
What makes this dip truly special is how the layers work together—each one adding texture and flavor, from the tangy sour cream base to the crispy top layer of crushed chips.
The baking time is short (20–25 minutes at 350°F), so you won’t spend hours in the kitchen. Once cooled, it’s even better, with flavors deepening as it rests.
Serve it at game day, holiday parties, or casual get-togethers—this dip is a guaranteed hit. Store leftovers in the fridge for up to 5 days, or reheat in the oven to restore that gooey perfection. Let’s dive into the recipe!
Ingredients for 7 layer cheese dip
Seven simple layers create a party-worthy dip that's creamy, rich, and impossible to resist.
| Ingredient | Amount | Notes |
|---|---|---|
| Sour Cream 🧀 | 1 cup | Full-fat for creaminess |
| Cream Cheese 🧀 | 8 oz | Room temperature for blending |
| Shredded Cheddar Cheese 🧀 | 2 cups | Freshly shredded preferred |
| Shredded Monterey Jack Cheese 🧀 | 1 ½ cups | For mild flavor balance |
| Salsa 🍅 | 1 cup | Medium heat preferred |
| Tortilla Chips 🍞 | 2 cups | Crushed into crumbs |
| Green Onions 🧅 | 3 whole | Sliced thin for garnish |
| Garlic Powder 🧄 | 1 tsp | For subtle flavor depth |
| Onion Powder 🧅 | 1 tsp | Enhances savory notes |
| Salt 🧂 | ½ tsp | Kosher or sea salt |
| Black Pepper 🌶️ | ¼ tsp | Freshly ground preferred |
| Hot Sauce 🔥 | 1 tbsp | Optional for heat kick |
The cheeses are the stars here. Cheddar brings the classic tang, while Monterey Jack adds a smoother, milder note that keeps the dip approachable for all guests. I always grab the sharp cheddar from the store's deli counter—it melts better than pre-shredded. For the sour cream and cream cheese, full-fat versions are non-negotiable; they create that signature velvety texture. Trader Joe's carries excellent options for both, and their tortilla chips are perfect for the top layer. Look for salsa with visible chunks—it adds texture that pre-blended salsas can't match.
No sour cream? Greek yogurt at half the amount works in a pinch, though it's slightly tangier. Pre-shredded cheese? Freshly shredded is ideal, but if that's not an option, pack the bag and let it sit for 10 minutes to remove excess starch. The green onions can be swapped for chives or scallions if you prefer. For extra richness, add 1/4 cup of cream cheese to the base layer. The hot sauce is optional but recommended—it cuts through the richness beautifully. If you're sensitive to heat, reduce to 1/2 tbsp or omit entirely.
Layering order matters—start with the sour cream base, then cream cheese, cheddar, Monterey Jack, salsa, and finish with crushed chips. Bake uncovered at 350°F for 20-25 minutes until bubbly and golden. Let it rest 10 minutes before serving—this helps the layers set properly. Leftovers keep in the fridge for 5 days, covered tightly. To reheat, cover with foil and warm at 350°F for 10 minutes. The flavors deepen as it rests, so it's even better the next day.
Why You'll Love This Recipe
- No-Fuss Layers: I swear, this is the kind of recipe where you measure once, layer once, and forget about it. Five minutes of prep—just spreading sour cream, cream cheese, and those melty cheddar/Monterey Jack layers—then the salsa on top. Honestly, it’s the kind of dish that feels like a hug when you walk in the door.
- Creamy-Spicy Magic: That first bite? The tangy sour cream and rich cream cheese balanced by the sharp cheddar and smoky Jack, all topped with zesty salsa—it’s ridiculously good. The salsa cuts through the richness without overpowering, and the layers mean every forkful has that perfect mix of textures.
- Game for Any Gathering: Between us, this dip is my secret weapon for movie nights, tailgates, or even a lazy Sunday with friends. It’s hearty enough for a crowd but easy to scale down for two. I’ve served it warm or cold, and honestly? No one judges.
- Leftovers That Don’t Let You Down: Here’s what sold me—this dip tastes just as good the next day, if not better. The cheeses meld overnight, and the salsa doesn’t get soggy. Plus, it’s cheap to make (a big bag of shredded cheese goes far) and stretches across multiple meals. Win-win.
Step-by-step instructions for seven layer cheese dip
Here's how to build this crowd-pleasing dip with perfect layering and creamy texture every time.
👨🍳 Step 1: Prepare the Base Mixture
In a medium microwave-safe bowl, combine the 8 oz cream cheese and 1 cup sour cream. Microwave in 30-second intervals, stirring between each, until completely melted and smooth. This should take about 1-1.5 minutes total. The mixture should be warm but not hot to the touch—just enough to blend easily.
While still warm, add the 1 teaspoon garlic powder, 1 teaspoon onion powder, 0.5 teaspoon salt, and 0.25 teaspoon black pepper. Stir vigorously for 1 minute until fully incorporated. Here's the thing—adding spices to warm cream cheese helps them dissolve completely, preventing any gritty texture in your finished dip. Let the mixture cool slightly for 5 minutes while you prepare the next layer.
🥘 Step 2: Layer the Cheeses
Spread 1 cup of the shredded cheddar cheese evenly over the cream cheese mixture. Press down gently with a spatula to create a smooth layer. Then add 1 cup of the shredded Monterey Jack cheese on top, again pressing lightly to help it adhere. This layering technique ensures each flavor is distinct while blending beautifully when served.
Next, add 1 tablespoon hot sauce to the cheddar layer. Gently swirl it into the cheese using a spoon—this creates subtle heat pockets throughout the dip. The hot sauce will mingle with the melted cheeses as they warm, distributing heat evenly without overwhelming any single layer. Cover the bowl loosely with plastic wrap and microwave for 1 minute to begin melting the cheeses together. 3
🍳 Step 3: Assemble the Complete Dip
Remove the bowl from the microwave and stir the melted cheeses until completely smooth. Let it cool for 2 minutes to thicken slightly—this prevents the salsa layer from sinking too quickly. Then spread 1 cup salsa evenly over the cheese mixture. Use a spoon to create gentle swirls rather than a flat layer, which looks more appealing and allows flavors to blend naturally when served.
Finally, crush 2 cups tortilla chips into coarse crumbs and sprinkle them evenly over the salsa. This creates the signature crispy topping that adds texture contrast. The crushed chips will soften slightly when warm but maintain their crunchy edges. Chill the dip in the refrigerator for at least 30 minutes before serving—this allows all layers to set properly and prevents the chips from sinking.
🥘 Step 4: Garnish and ServeSlice the 3 whole green onions thinly and arrange them in concentric circles on top of the chilled dip. The green onions add freshness that cuts through the richness of the cheese. Serve immediately in a deep dish with tortilla chips for dipping. The layers should be clearly visible when sliced, with each flavor profile distinct yet harmonious.
For best results, serve at room temperature so the cheeses are fully melted and creamy. If the dip appears too thick after chilling, microwave for 15-20 seconds to loosen it before serving. The perfect seven-layer dip balances creamy, spicy, and crunchy textures in every bite—ideal for parties where everyone wants a flavorful dip to share.
Pro Tips For Making 7 Layer Cheese Dip
- MIX THE BASE COLD: Cream cheese and sour cream are stubborn when warm—mix them straight from the fridge. I learned this the hard way after trying to blend them at room temp and ending up with a grainy, lumpy mess. A cold base melts smoothly when baked, and your layers won’t fight you.
- SHRED CHEESE FINE: Skip the pre-shredded cheese if you can—it’s packed with anti-caking agents that make it clump like glue. Use a box grater for sharp, even shreds that melt into a silky layer instead of a gummy one. (Yes, it takes 10 extra minutes, but trust me.)
- BAKE UNTIL SET: Don’t pull the dip out the second it looks melted—wait until the edges are firm and the center jiggles just slightly. I used to rush it, and the layers would slide apart like a sad lasagna. A good rule: if it wobbles like Jell-O, give it 5 more minutes.
- LAYER SALSA LAST: Add the salsa right before serving, or it’ll soak into the cheese like a sponge. If you bake it in, your dip turns into a sad, watery nacho cheese impersonator. Pro move: Keep the salsa in a small bowl nearby and let guests spoon it on themselves.
Pro cooking tips for perfect results
Layering Order Matters
The secret to a perfect seven-layer dip is building layers from bottom to top in this exact order: sour cream base, cream cheese, cheddar, Monterey Jack, salsa, and crushed chips.
Start with the sour cream and cream cheese mixture as your foundation—this creates the creamy base that holds everything together. Press each cheese layer gently with a spatula to ensure they adhere without mixing prematurely.
I’ve found that using freshly shredded cheddar (not pre-shredded) prevents clumping and melts more evenly. 🧀
Temperature Control
Never microwave the cream cheese and sour cream mixture at full power—30-second intervals on medium-high prevent scorching while ensuring a smooth texture. After adding spices, let the mixture cool slightly (5 minutes) before layering cheeses.
This prevents the salsa from sinking too quickly when added later. For baking, always use 350°F—any hotter risks burning the top layer of chips while the center stays undercooked. 🌡️
Preventing Sinking Layers
To keep the salsa from sinking into the cheese, swirl it gently with a spoon instead of spreading it flat. This creates pockets that hold the salsa in place while allowing flavors to blend naturally when served.
Chilling the dip for at least 30 minutes before serving is non-negotiable—this lets all layers set properly. If you’re short on time, place the assembled dip in the fridge for 15 minutes while you prep toppings. The key is patience here; rushing leads to a messy, runny dip. ⏰
Crispy Top Layer
For the perfect crunchy top, crush 2 cups tortilla chips into coarse crumbs using a rolling pin or food processor. Avoid fine crumbs—they soften too quickly. I recommend Trader Joe’s Flamin’ Hot chips for their bold flavor and sturdy texture.
Sprinkle them evenly over the salsa layer and press down lightly with a spatula. This helps them adhere and creates a golden, crispy finish when baked. 🍟
Garnish Like a Pro
Slice the 3 green onions thinly and arrange them in concentric circles on top of the chilled dip. This not only looks stunning but also adds a fresh, crisp contrast to the rich cheeses.
For extra flair, sprinkle a pinch of smoked paprika or a drizzle of hot honey before serving. These finishing touches elevate the dip from good to showstopping. The garnish should be the last step—adding it too early can make it soggy. ✨
Reheating Perfection
If you need to reheat leftovers, cover the dip tightly with aluminum foil and warm in a 350°F oven for 10 minutes. Microwaving works in a pinch, but it can make the chips soggy. For best results, reheat only what you’ll serve immediately.
The dip’s texture changes slightly after reheating—expect it to be slightly thicker, but the flavors remain rich and satisfying. Always let it sit for 2 minutes after reheating before serving. 🔥
Nutrition facts
Frequently asked questions
Can I make this seven-layer dip ahead of time?
Assemble the dip completely (including all layers) and refrigerate it for up to 24 hours before baking. When ready to serve, bake as directed at 350°F for 20-25 minutes. This actually enhances the flavors as the cheeses meld together overnight. For best texture, let it rest 10 minutes after baking before serving.
What if I don't have tortilla chips for the top layer?
No problem! Use crushed Ritz crackers, corn chips, or even panko breadcrumbs for a different texture. For extra flavor, try Fritos or Doritos—their seasoning adds a nice kick. Just crush them finely to create a similar crumbly topping.
Why is my dip too runny after baking?
This usually happens when the dip isn't chilled long enough before serving or if too much moisture (like extra salsa) was added. To fix it, place the baked dip in the fridge for 30 minutes to thicken. If it's still too thin, sprinkle 1 tablespoon of crushed cornstarch over the top and bake for 5 more minutes to absorb excess moisture.
Can I make this dip without sour cream?
Yes, but the texture will be slightly different. Replace the 1 cup sour cream with 1 cup Greek yogurt (plain, not flavored) or 1/2 cup mayonnaise. For extra richness, add 1/4 cup more cream cheese to compensate. The Greek yogurt version will be tangier, while mayo makes it creamier.
How do I make this dip vegetarian-friendly?
This recipe is already vegetarian! Just ensure your salsa and hot sauce don't contain hidden animal products (some brands use lard or other additives). For extra assurance, check labels on your cream cheese and cheddar—most store-bought versions are vegetarian. The crushed chips are typically veggie-friendly too.