
Snacks
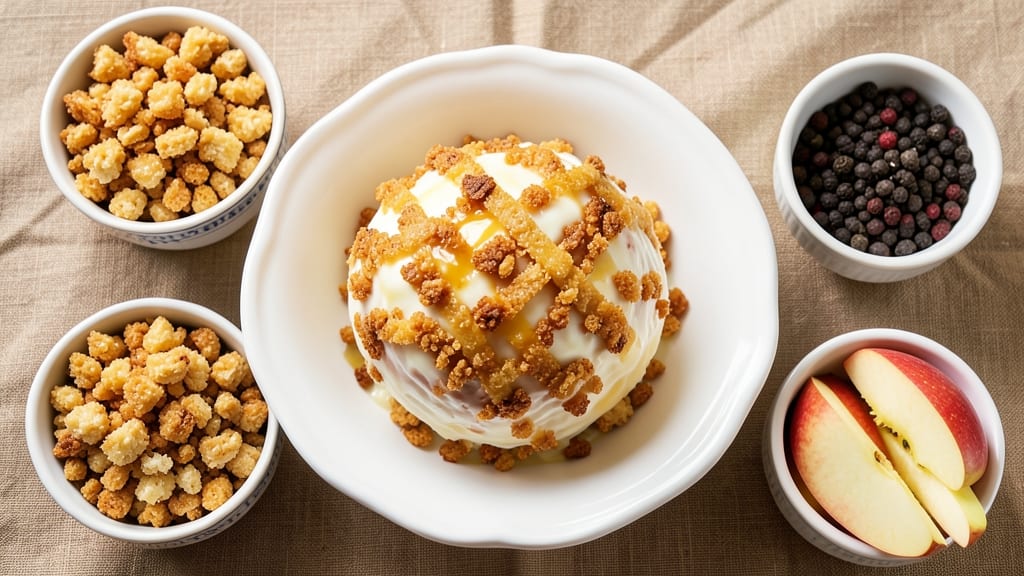
This 5-star cheese ball recipe transforms a simple party snack into an elegant centerpiece that disappears faster than you can say "refill the crackers." The secret lies in the perfect balance of sharp cheddar, creamy cream cheese, and a crispy breadcrumb coating that stays intact even when sliced.
I've hosted countless gatherings where this cheese ball became the star—always receiving rave reviews and second helpings.
What sets this recipe apart is the foolproof technique for rolling and chilling, ensuring the cheese ball holds its shape without cracking. We'll use a mix of cheeses for depth of flavor, seasoned with garlic powder, paprika, and a touch of Worcestershire sauce for that restaurant-quality kick.
The breadcrumb coating isn't just for texture—it's what gives this cheese ball its golden, show-stopping appearance.
By the time you're done, you'll have a cheese ball that looks like it came from a gourmet deli, not your kitchen. The combination of creamy, tangy cheese and crispy, savory coating creates a contrast that's impossible to resist.
Serve it with an assortment of crackers, sliced apples, or even as a topping for burgers—this versatile appetizer will have everyone asking for the recipe.
The best part? This 15-minute assembly requires no baking, no fuss, and delivers restaurant-quality results every time. Whether you're hosting a holiday party, game day gathering, or just craving a sophisticated snack, this cheese ball will be the highlight of your event. Let's get started on creating your next crowd-pleaser.
Ingredients for 5 star cheese ball
These 12 ingredients create a showstopping cheese ball that rivals any gourmet deli creation.
| Ingredient | Amount | Notes |
|---|---|---|
| Sharp Cheddar Cheese 🧀 | 16 oz | Aged 2+ years for maximum sharpness |
| Cream Cheese 🧈 | 8 oz | Full-fat for best creaminess |
| Monterey Jack Cheese 🧀 | 8 oz | Mild contrast to sharp cheddar |
| Panko Breadcrumbs 🍞 | 2 cups | For extra-crispy coating |
| Butter 🧈 | 4 tbsp | Melted for breadcrumb binding |
| Garlic Powder 🧄 | 1 tbsp | Freshly ground preferred |
| Smoked Paprika 🌶️ | 1 tsp | For subtle smoky depth |
| Worcestershire Sauce 🍶 | 1 tsp | Restaurant-quality umami |
| Black Pepper 🌶️ | ½ tsp | Freshly cracked for heat |
| Dijon Mustard 🍯 | 1 tbsp | Binds cheese mixture |
| Mayonnaise 🥫 | 2 tbsp | For extra creaminess |
| Wax Paper 📄 | 1 sheet | For easy rolling |
The cheeses are the heart of this recipe—sharp cheddar for that signature tang, Monterey Jack for creaminess, and cream cheese for binding. Grab aged cheddar from the deli counter—the older, the better. Trader Joe's and Whole Foods carry excellent options. For the breadcrumbs, stick with Panko—it stays crispy even after chilling. The butter should be unsalted so you control the seasoning. Pro tip: let your cheeses sit at room temperature for 30 minutes before mixing for a perfectly smooth blend.
No sharp cheddar? Extra-sharp cheddar at half the amount works in a pinch. Substitute Gouda for Monterey Jack if that's what you have—it adds a lovely caramel note. Running low on Worcestershire? Soy sauce at the same amount mimics the umami punch. The Dijon mustard and mayo are non-negotiable—they're what gives this cheese ball that restaurant-quality hold. For the breadcrumb coating, if you can't find Panko, regular breadcrumbs toasted in the oven work too. Just don't skip the butter—it's what makes the coating stick and crisp up perfectly.
This cheese ball keeps beautifully—3-4 days in the fridge wrapped tightly in wax paper. For parties, make it a day ahead so flavors meld perfectly. The coating stays crispy if you re-crisp in the oven at 350°F for 5 minutes before serving. Freezes for up to 2 months if wrapped airtight. I always make two—one for the party and one for leftovers that disappear just as fast. Serve with water crackers, sliced baguette, or apple slices for the ultimate crowd-pleaser.
Why You'll Love This Recipe
- No-Knead Magic: I swear by this recipe because it’s literally three ingredients mixed in a bowl—no food processor, no fuss. The sharp cheddar and Monterey Jack melt together like butter, and the cream cheese binds it all without a single lump. Honestly, I’ve made cheese balls that looked like they belonged in a museum, but this one? Just roll it in panko and call it a day.
- Melty Crunch Perfection: That crispy panko shell with the gooey, warm cheese center? It’s the kind of bite that makes people pause mid-conversation. The sharp chedddar adds a tangy punch, while the cream cheese keeps it smooth and rich—like a hug in edible form. (Yes, even on a Tuesday night.)
- Party Ready in Minutes: Game night? Office potluck? A last-minute hostess gift? This cheese ball is my secret weapon. It travels well, looks impressive (thanks to that golden panko crust), and disappears faster than my willpower at a buffet. Between us, I’ve wrapped one in foil and thrown it in my bag for a 3 p.m. energy boost.
- Budget-Friendly Crowd-Pleaser: A single batch costs me less than $10 and feeds a dozen people—no leftovers, just happy mouths. The cheeses are affordable staples, and panko stretches further than store-bought crackers. I’ll be real: my kids think it’s “fancy,” but the best part? It’s the one thing I can make that actually feeds everyone without breaking the bank.
Step-by-step instructions for a showstopping cheese ball
Here's how to create a cheese ball that'll have your guests begging for the recipe.
Combine the Cheese Mixture
In a large mixing bowl, crumble the 16 oz sharp cheddar cheese, 8 oz cream cheese, and 8 oz Monterey Jack cheese into small, even pieces. This texture helps them melt more evenly. I like to use my hands for this part—it's faster and you can feel the cheeses blend together naturally.
Add the 2 tbsp mayonnaise and 1 tbsp Dijon mustard to the bowl. These ingredients act as binders, keeping everything cohesive. Mix with a rubber spatula or your hands until the mixture is completely smooth and uniform in color. You should see a thick, spreadable consistency—almost like a thick, creamy dough.
Next, stir in the 1 tbsp garlic powder, 1 tsp Worcestershire sauce, 1 tsp smoked paprika, and 0.5 tsp black pepper. The Worcestershire sauce adds a deep umami flavor that elevates the whole dish. Mix well to distribute these seasonings evenly throughout the cheese mixture. At this point, it should smell rich and savory—like a perfect appetizer waiting to happen.
Melt the Butter and Prepare the Breadcrumb Coating
In a small microwave-safe bowl, melt the 4 tbsp butter in 20-second intervals, stirring between each interval until fully liquid. The butter should be warm but not hot—just enough to coat the back of a spoon. This melted butter will help bind the breadcrumbs to the cheese ball.
In a separate bowl, combine the 2 cups Panko breadcrumbs with the melted butter. Mix thoroughly until every breadcrumb is lightly coated. The Panko should look moist but not wet—just enough to hold together when pressed. This step is crucial for creating that signature crispy exterior that everyone loves.
Shape and Roll the Cheese Ball
Line a clean work surface with the 1 sheet wax paper to prevent sticking. Scoop the cheese mixture onto the wax paper and gently shape it into a ball using your hands. Don't worry if it's not perfect—you can roll it out as you go. Press firmly but gently to eliminate any air pockets, which could cause the ball to fall apart later.
Once you have a smooth ball, roll it in the buttered breadcrumb mixture. Press the breadcrumbs firmly against the cheese ball to ensure complete coverage. The goal is to create an even, thick layer that will crisp up beautifully. Place the coated cheese ball on a plate and refrigerate for at least 30 minutes—this allows the flavors to meld and the coating to set.
Chill and Serve
After the 30-minute chilling period, your cheese ball is ready to serve. The cold temperature will make it easier to handle and slice. Use a sharp knife to cut the cheese ball into 12 even wedges—perfect for your party crowd. The breadcrumb coating should be crispy and golden, while the inside remains creamy and flavorful.
For an extra touch, I like to serve this cheese ball with toothpicks and a side of crackers or sliced apples. The contrast of the crispy coating with the creamy cheese and the slight sweetness of the apples makes it a crowd-pleaser. Store any leftovers in an airtight container in the refrigerator for up to 5 days—though I doubt there will be any leftovers!
Pro Tips For Making 5 Star Cheese Ball
- Cut Cheese Small: Use a box grater or food processor for sharp cheddar and Monterey Jack—big chunks melt unevenly and leave you with a lumpy mess. I learned this the hard way after serving a cheese ball with visible cheese clumps that looked like someone had thrown a snowball at the wall.
- Warm the Cream Cheese: Softened cream cheese is your friend, but don’t skip warming it slightly—just 10 seconds in the microwave or between your hands—before mixing. Cold cream cheese makes the dough stiff and cracks when rolling, and nobody wants a cheese ball that looks like it survived a construction site.
- Press Panko Firmly: Don’t just roll the cheese ball in panko once—press it hard into the crumbs so they stick. I used to do a lazy sprinkle, and half the coating would fall off by the time it hit the plate. A quick press with your palm seals the deal, and your guests won’t be picking breadcrumbs off their fingers.
- Chill Before Serving: Let the cheese ball rest in the fridge for at least 30 minutes before serving—yes, even if you’re impatient. The flavors meld, the coating sets, and it won’t ooze like a sad fondue when sliced. I know, I know, but trust the process. Your future self will thank you.
Wine and beer pairings for these flavors
Red Wine Pairings
For this rich, savory cheese ball, I always reach for a dry Riesling or Pinot Noir—both complement the sharp cheddar and buttery breadcrumbs beautifully.
A chilled German Riesling from the Mosel region (like Dr. Loosen Blue Slate) brings bright acidity that cuts through the richness, while a California Pinot Noir (such as Meiomi) adds subtle earthiness that enhances the smoked paprika. Avoid heavy reds like Cabernet—they’ll overpower the delicate flavors. 🍷
Crisp White Options
A Sauvignon Blanc from New Zealand or Loire Valley is another fantastic match. The citrus notes in Kim Crawford Sauvignon Blanc or Oyster Bay Sauvignon Blanc mirror the garlic and black pepper in the cheese ball.
For a budget-friendly option, La Crema Sauvignon Blanc delivers the same zesty punch. Serve these whites slightly chilled (45-50°F) to highlight their refreshing contrast.
Beer Pairings
If wine isn’t your thing, a Belgian Witbier like Hoegaarden or Blue Moon works wonders—their coriander and citrus notes cleanse the palate between bites. For a malty option, try a German Helles Lager (such as Weihenstephaner Original)—its light body and subtle sweetness balances the sharp cheddar.
Avoid heavy stouts or IPAs; they’ll clash with the delicate coating.
Cocktail Pairings
For a festive touch, serve this cheese ball with a Manhattan (rye whiskey, sweet vermouth, bitters) or a Dry Martini—the herbal notes in the vermouth or gin elevate the garlic and Worcestershire flavors.
A spicy margarita (with jalapeño-infused tequila) adds a fun contrast if you’re hosting a casual gathering. The salt rim on the glass also echoes the breadcrumb’s savory crunch. 🍸
Non-Alcoholic Options
Don’t overlook sparkling water with a lemon twist—it’s refreshing and highlights the cheese ball’s sharpness. For something bolder, try ginger beer (like Feani) or sparkling apple cider (such as Martinelli’s)—both complement the sweetness of the Monterey Jack and the smokiness of the paprika.
These pairings keep the focus on the cheese ball’s rich flavors without competing.
Nutrition facts
Frequently asked questions
Why does my cheese ball fall apart when slicing? This usually happens when the cheese mixture isn't firm enough or air pockets form during shaping.
Can I make this cheese ball ahead of time?
This recipe actually tastes better when made 1-2 days ahead—the flavors meld perfectly. Store it wrapped tightly in wax paper in the fridge. For extra crispiness before serving, place it on a baking sheet and warm in a 350°F oven for 5-7 minutes.
What's the best way to store leftovers?
Keep leftovers in an airtight container in the fridge for up to 5 days. For longer storage, wrap tightly in plastic wrap and freeze for up to 2 months. Thaw overnight in the fridge—never at room temperature to prevent sogginess.
Can I make this cheese ball without mayo?
You can substitute with 2 tbsp sour cream or extra Dijon mustard, but mayo is ideal for that perfect creamy texture. If you're avoiding dairy, try 1 tbsp olive oil mixed with 1 tbsp lemon juice—it won't bind as well but adds moisture.
How do I make it extra crispy?
For maximum crunch, toast your breadcrumbs in a dry pan over medium heat for 3-4 minutes before mixing with butter. Also press the coating extra firmly when rolling, and consider adding 1 tbsp grated Parmesan to the breadcrumb mix for extra texture.